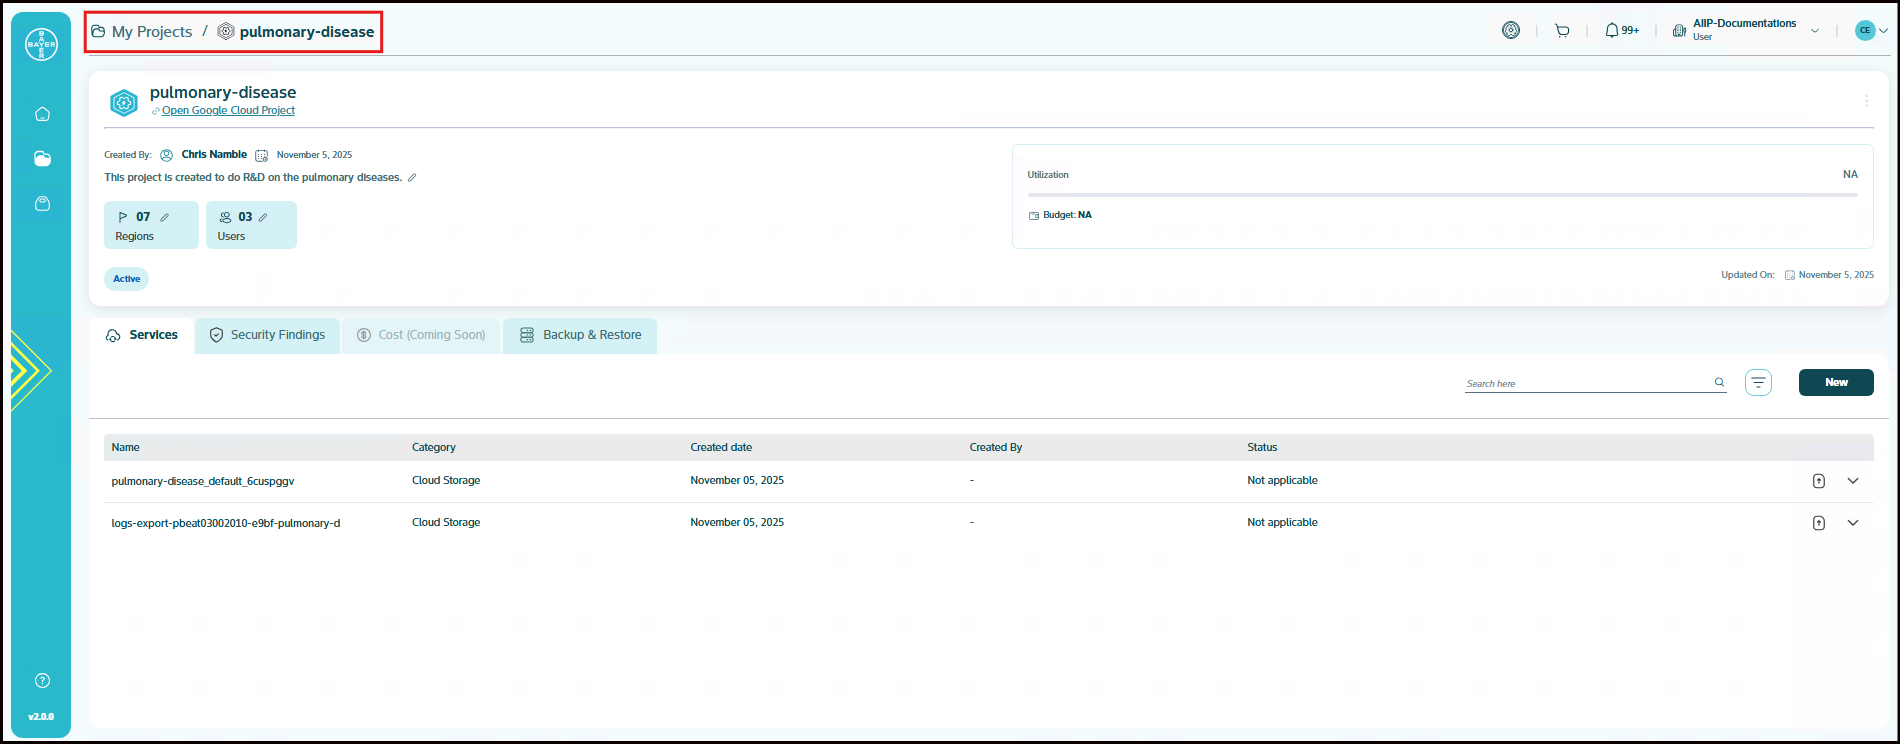
Viewing Your Projects
View Projects
From the time the project is requested and sent for admin approval, the project will be displayed on the My projects page with a tag as Pending request.
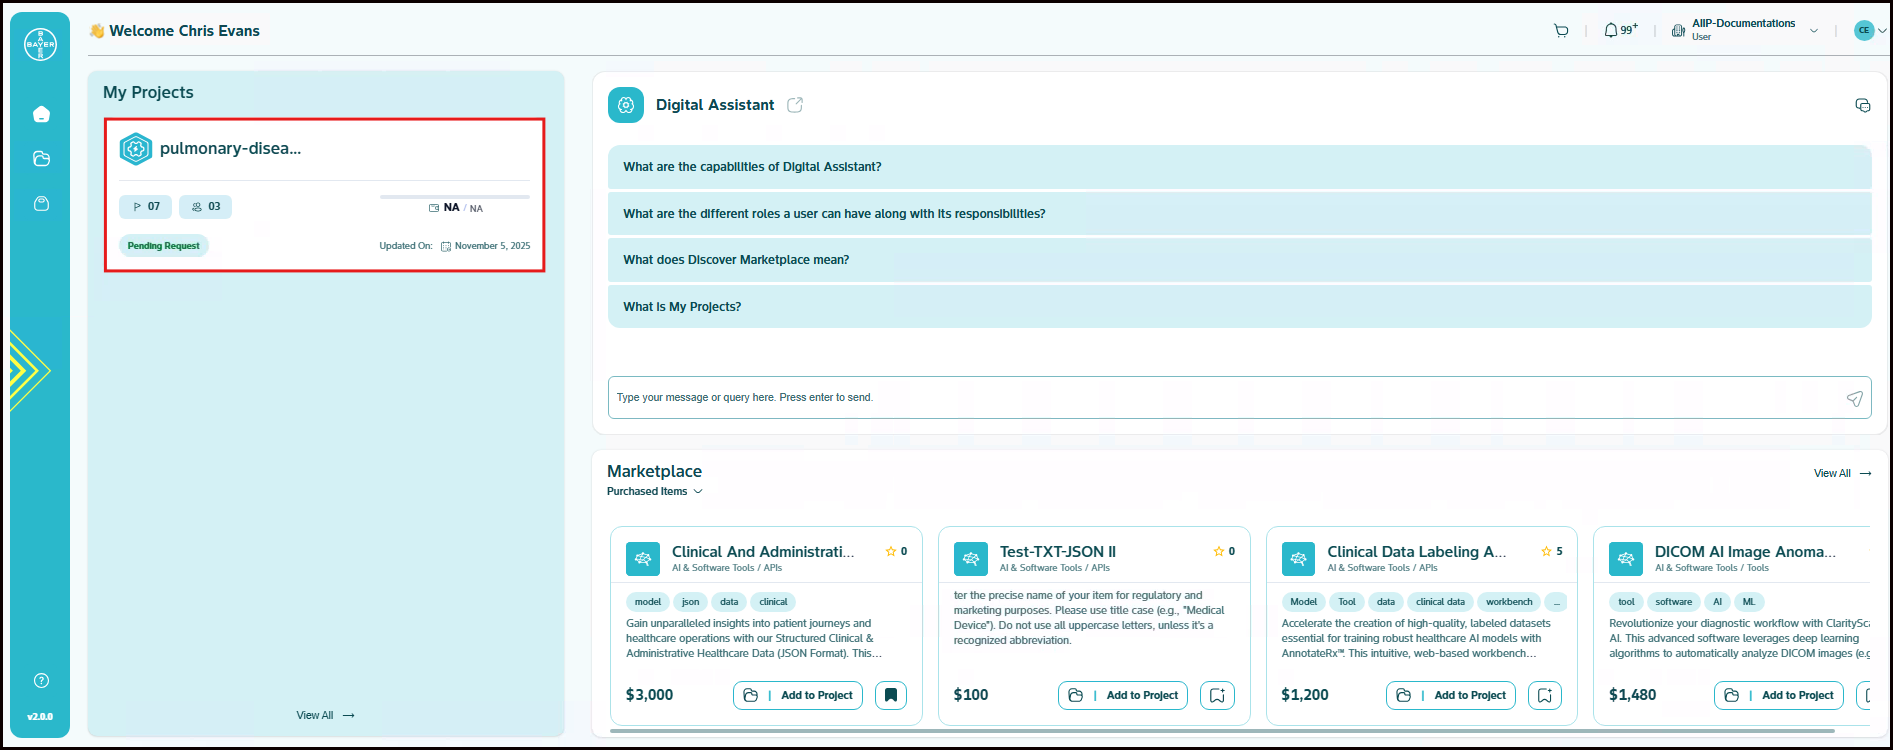
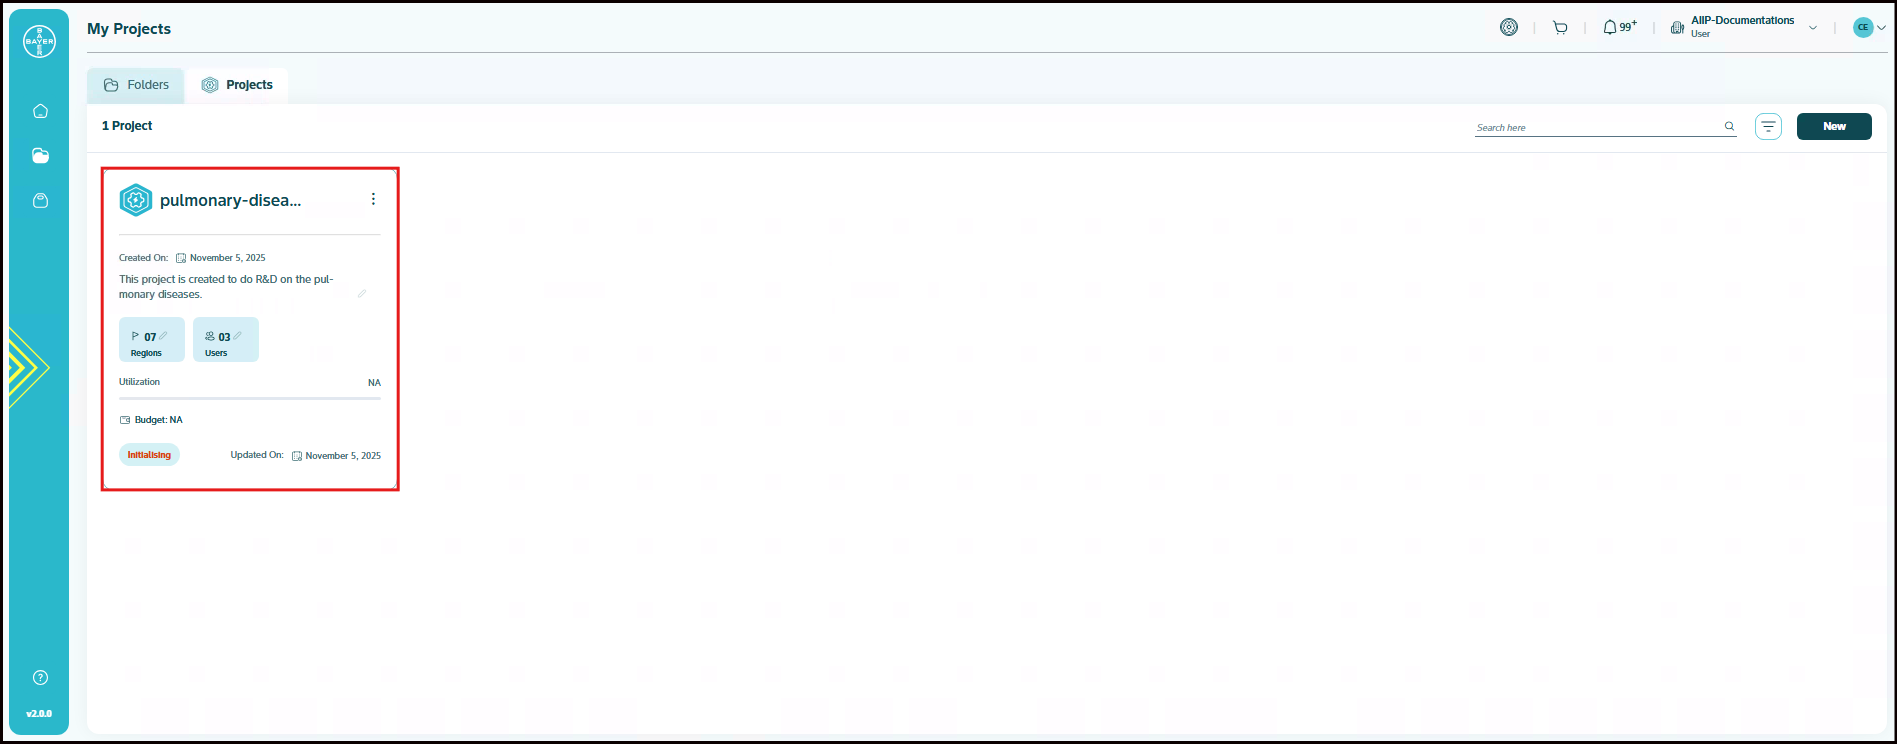
The user can click on the project and can see the details of the project that has been requested.
Note
While the project is in the Requested state, all modifications are disabled and the project remains read-only.
Here, below details are displayed:
- Project Details: The project details like project name, description etc are available on the project details page.
- Users: Displays the list of users associated with the project.
- Region: Shows the geographical GCP regions associated with the project.
- Budget: Provides budget-related insights and allocations for the project.
- Backup and Archive: This section will offer backup and archival functionalities to ensure data retention and recovery.
- Cost: Will include detailed cost tracking, usage insights, and optimization recommendations.
- Security Posture: Will introduce security-related features to enhance project compliance and protection.
Once the project is approved by the admin, it enters the provisioning state, indicating that the project is in the process of being created. During this time, it will be labeled with an "Initialising" tag. The provisioning typically takes 25–30 minutes, and the project will remain in the Initialising state until the setup is complete.
Once the project is successfully created, it will be displayed with a tag "Active".
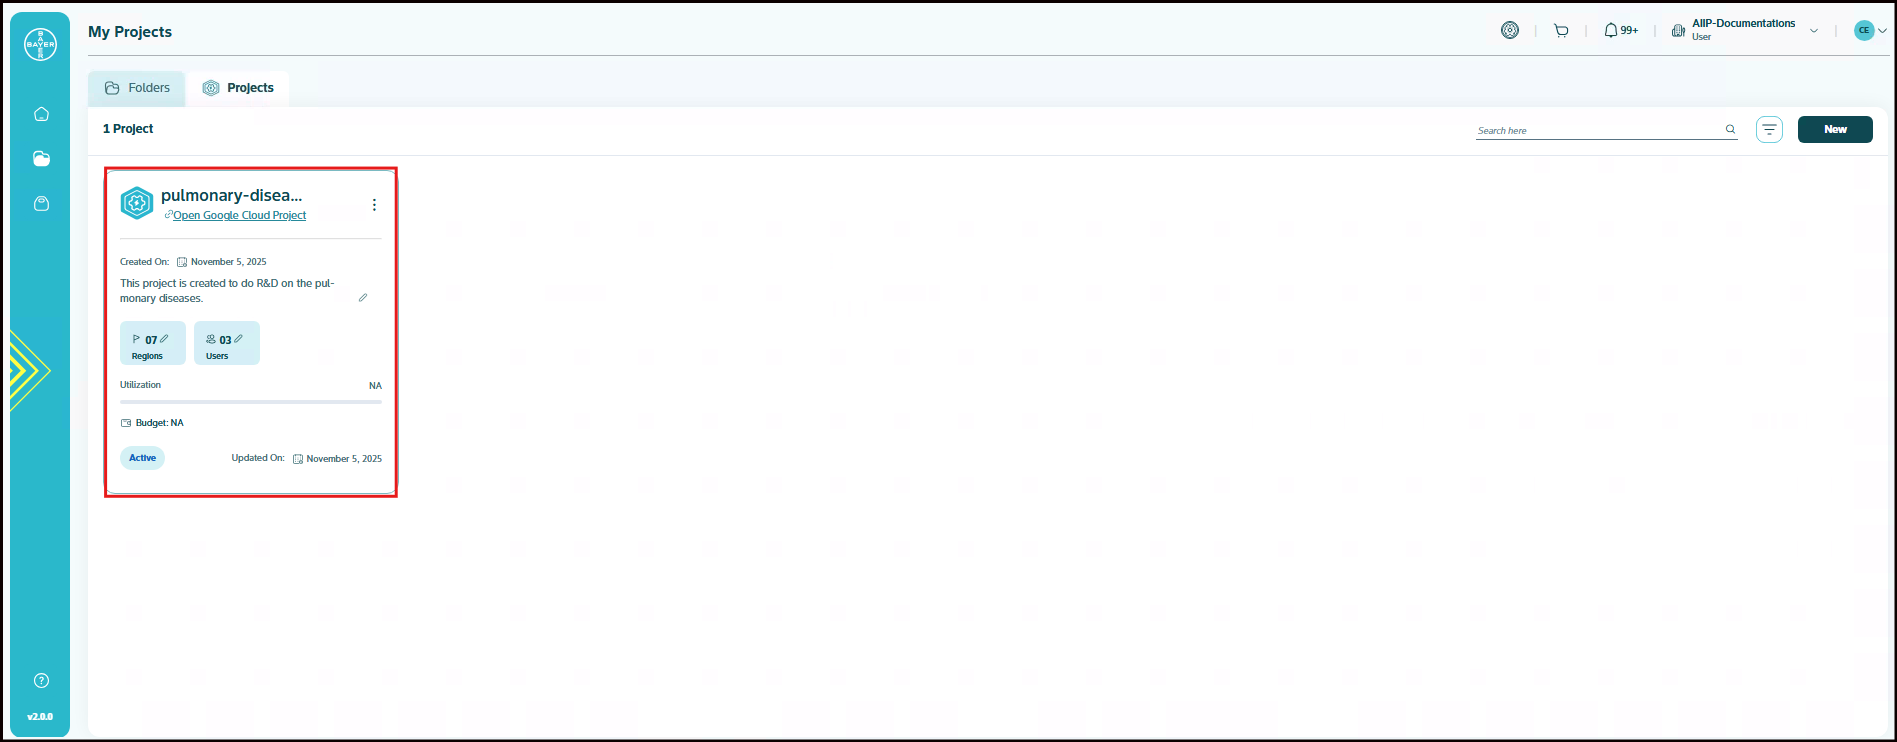
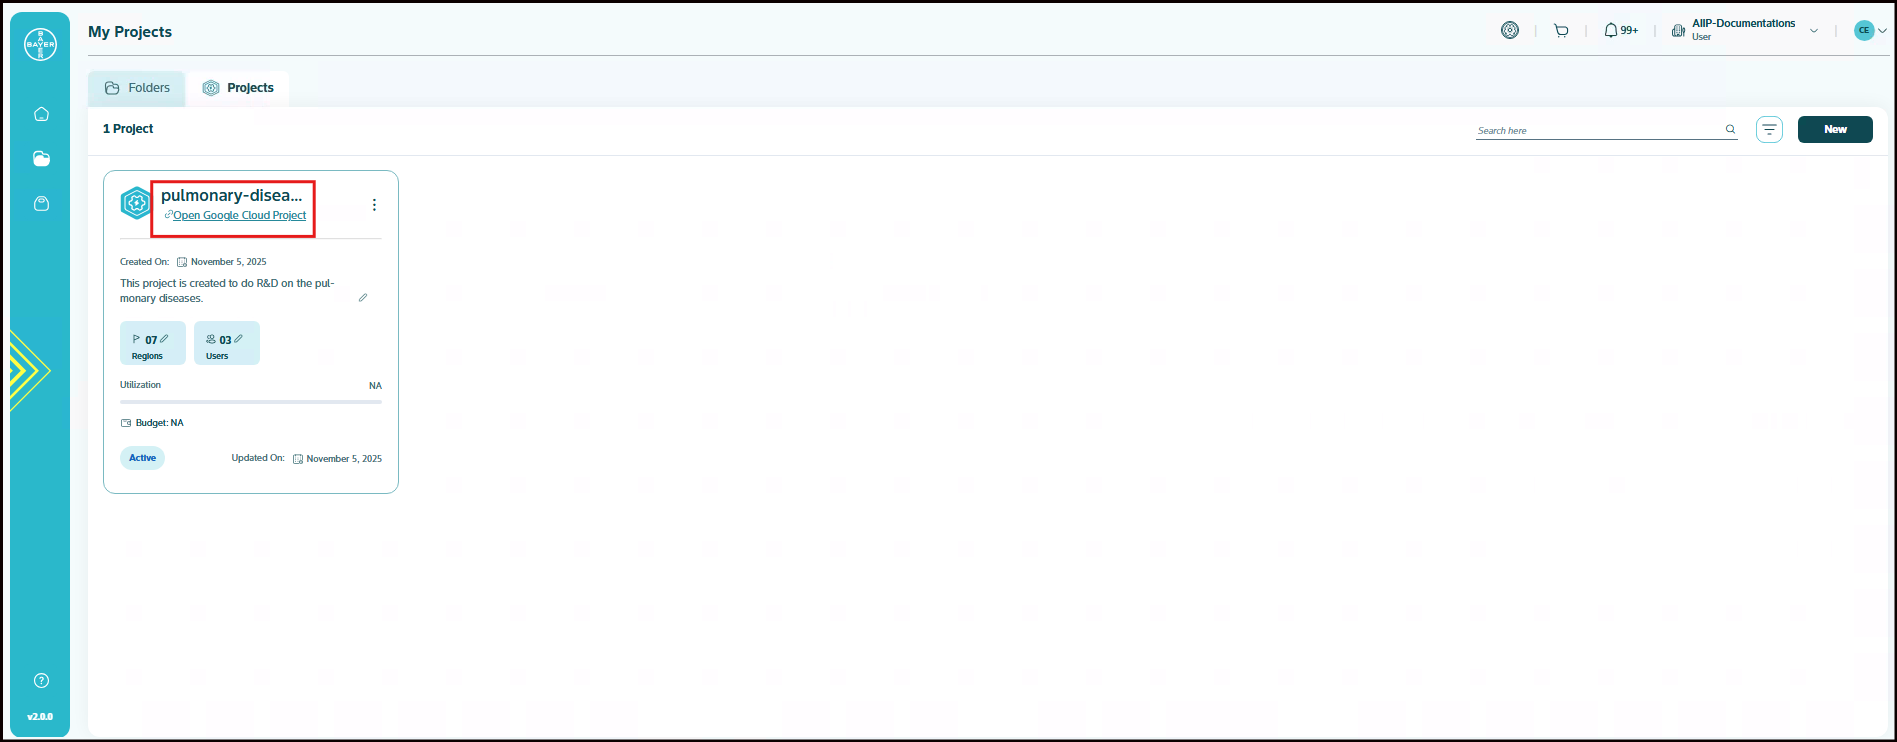
In case you want to open this project on the GCP console, navigate to GCP via the "Open GCP Project" link below the project name.
Navigating Using Page Path Links
Use the path link at the top of the page to quickly navigate between different levels of your project hierarchy. Simply click on any link(e.g., My Projects/Folder Name/Project Name) to jump to that specific section.
Let us now talk about the different ways of accessing your GCP projects that are provisioned through the AI Innovation Platform, where one of them is the hyperlink present on the project name that will redirect you to the GCP console page of that project.
Access GCP Project Using Google Cloud SDK
Pre-requisites
- Install Google Cloud SDK: If the SDK is not installed, download and install it from here.
- Verify GCloud SDK Installation: Open Terminal (Mac/Linux) or Command Prompt (Windows).
-
Verify the Gcloud SDK version. Minimum Version: 485.0.0 or later:

If the version is older, update it using:
Steps to access the GCP project
-
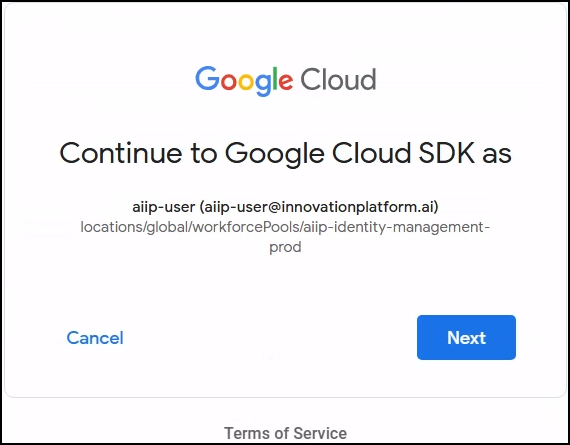
Create the login.json as mentioned below
{
  "universe_domain": "googleapis.com",
  "type": "external_account_authorized_user_login_config",
  "audience": "//iam.googleapis.com/locations/global/workforcePools/aiip-identity-management-prod/providers/aiip-provider-prod",
  "auth_url": "https://auth.cloud.google/authorize",
  "token_url": "https://sts.googleapis.com/v1/oauthtoken",
  "token_info_url": "https://sts.googleapis.com/v1/introspect"
}
Note: This configuration file is required for logging into SDK using your identity provider. The user session will be valid for around "8 hrs" by default
-
Run the following command
gcloud auth login --no-launch-browser --login-config=login.json
Open the sigin link prompted and login with user access. Ensure you open the link in same browser where UI interface is authenticated.
-
Open the above authorization link in the device Browser. Login via Google Provider.
The above link will open the Federated login and give an authorization token which the user needs to enter here.
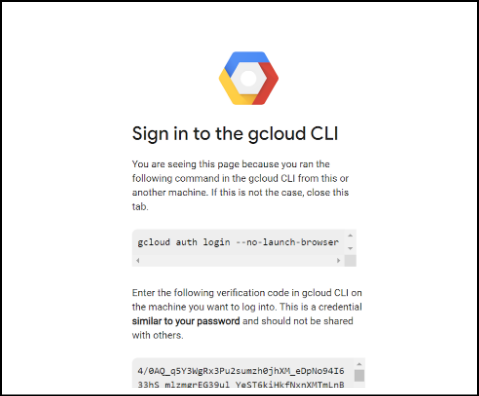
-
Paste the token and verify the credentials. The account will be in the below naming convention:
principal://iam.googleapis.com/locations/global/workforcePools/\<WorkforcePool
Name\> /subject/\<User Email\>
Run below command to verify the active user.

-
Configure Gcloud SDK. Run the below commands to setup your cloud SDK
-
SSH into compute VM. Run the below SSH command to SSH into the instance:

Note
1. For JupyterHub service, username is calculated by replacing all special character by "_".
E.g: If email is “firstname.lastname@domain.com” then the username is "firstname_lastname_domain_com"
2. For compute instances, username is calculated using email.split['@'][0].
E.g: If email is “firstname.lastname@domain.com” then the username is "firstname.lastname"
3. Username in ssh command follows all rules defined by GCP.
Data Security Guidelines:
1. "Do not store your data outside of the project resources created." This includes sharing them online, on personal devices, or through any other means.
2. By using this platform, you agree to be responsible for the security of your data and to comply with these guidelines.
If you have any questions or concerns about data security, please contact our support team.
1. Connect via VS code
Below steps can be followed:
-
Ensure VS code IDE is installed on your device to proceed with this setup.
-
SSH into the instance using gcloud command for allowing the GCP APIs to auto generate the SSH Keys which will be used as Identity file to connect from VS code.

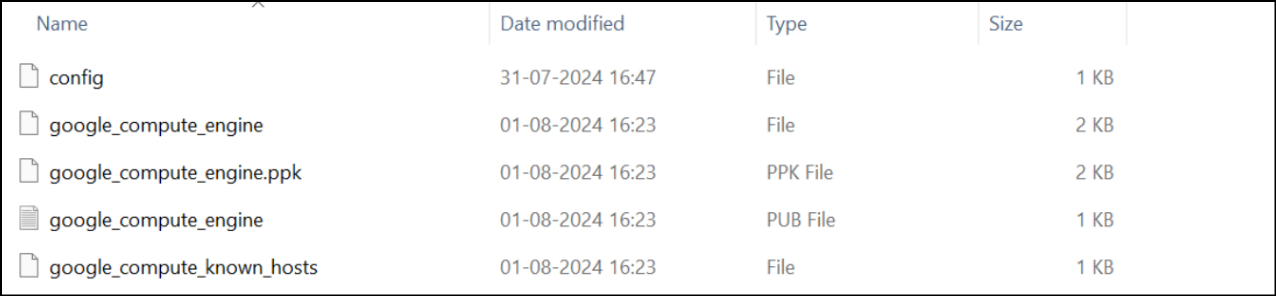
Below are the files auto-generated by the above command in \~/.ssh/config/
-
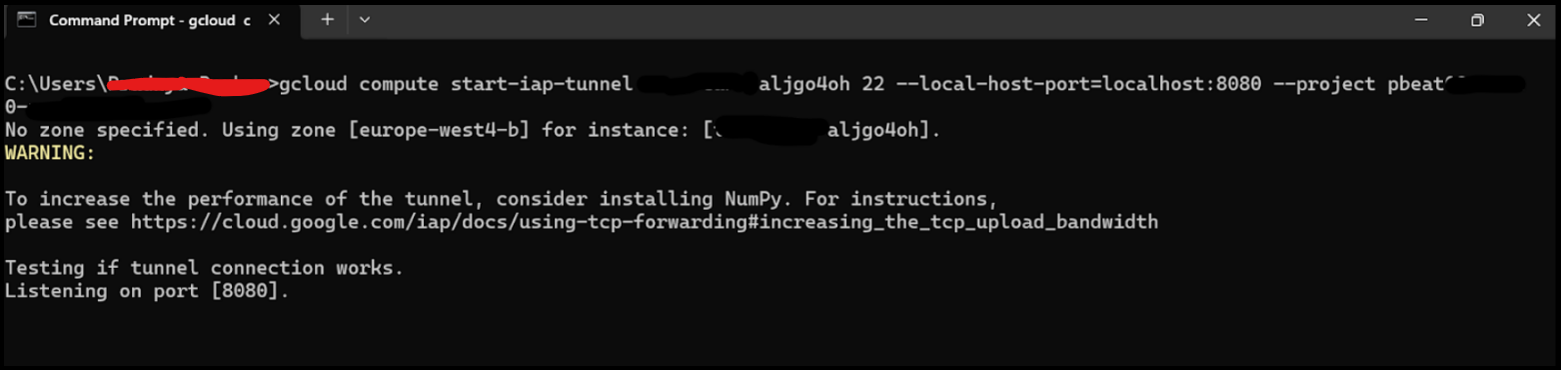
Start IAP tunnel for the instance to be connected to VS code IDE.
-
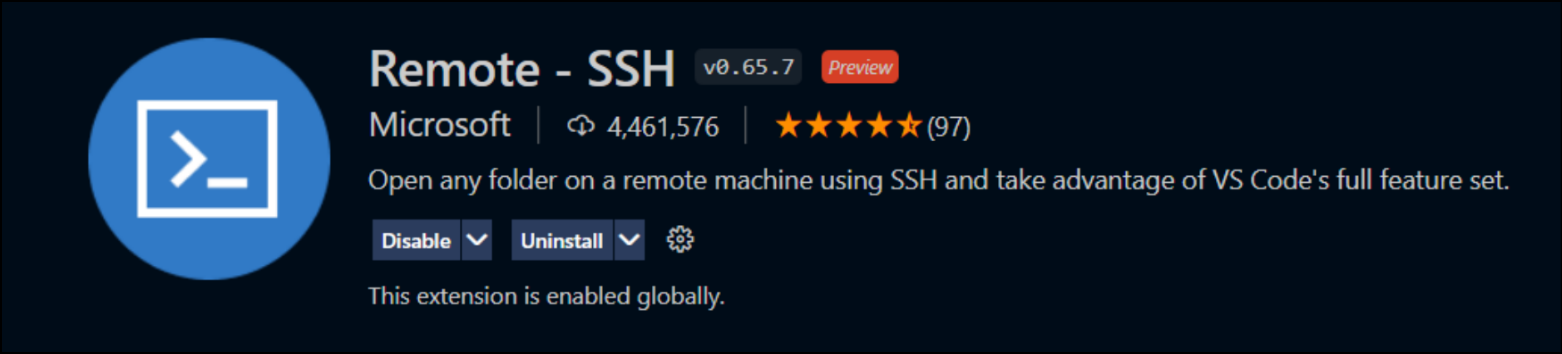
Install Remote SSH VS code plugin
-
Update the SSH configurations in \~/.ssh/config file and add the below.
Host localhost
  HostName localhost
  Port 8080
  User <ADD_USER_NAME_HERE>
  IdentityFile ~/.ssh/google_compute_engine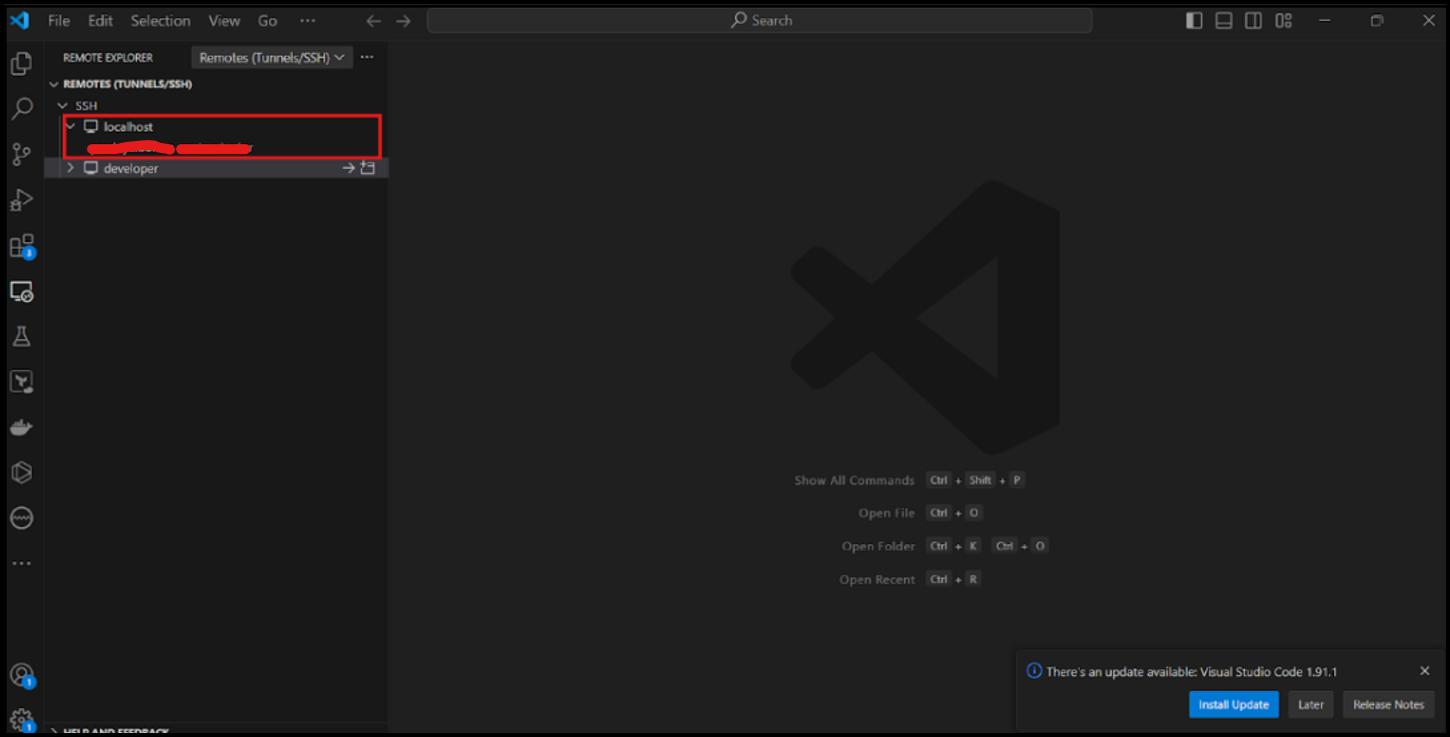
Data Security Guidelines:
1. "Do not store your data outside of the project resources created." This includes sharing them online, on personal devices, or through any other means.
2. By using this platform, you agree to be responsible for the security of your data and to comply with these guidelines.
If you have any questions or concerns about data security, please contact our support team.
2. Browser Based SSH
GCP offers browser based SSH functionality. Click here for more details.
3. Use Cloud Workstations
Cloud workstations are used as an alternative to cloud shell. It provides a browser based IDE for the developers.
The Cloud workstation consists of 3 stages:
- Clusters: Create Cluster
- Configuration: Create Configuration
- Workstations: Create Workstations
This service is available in the service catalogue of our platform. Click here for more details.
4. Desktop Access
Setup Local IAP Tunnel
To access the GCP projects through remote desktop, this section can be referred to. With this, you will understand how to connect to Windows instances on GCP cloud. Since you are working with the secure environment, the instances would not be associated with external/public IPs, hence you need to open a secure tunnel using IAP proxy offered by GCP to securely access the instances.
Below steps can be followed:
-
Start IAP Tunnel
a. Remote Desktop Connection (Windows Users)
-
Login using user credentials from the Remote Desktop
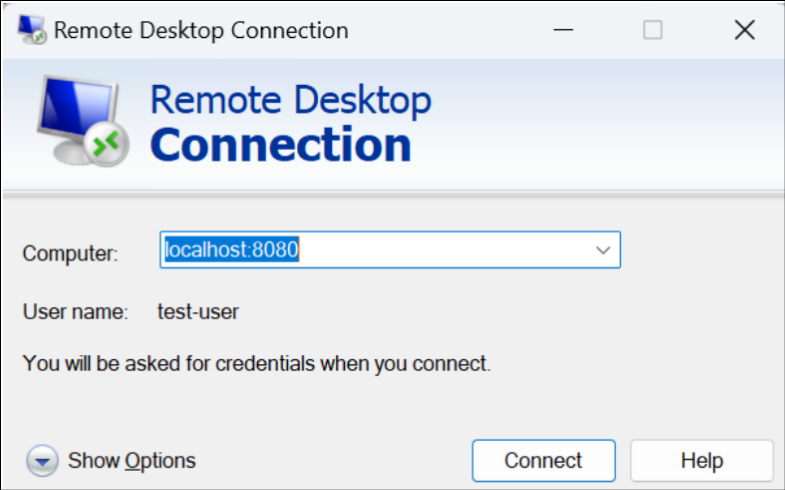
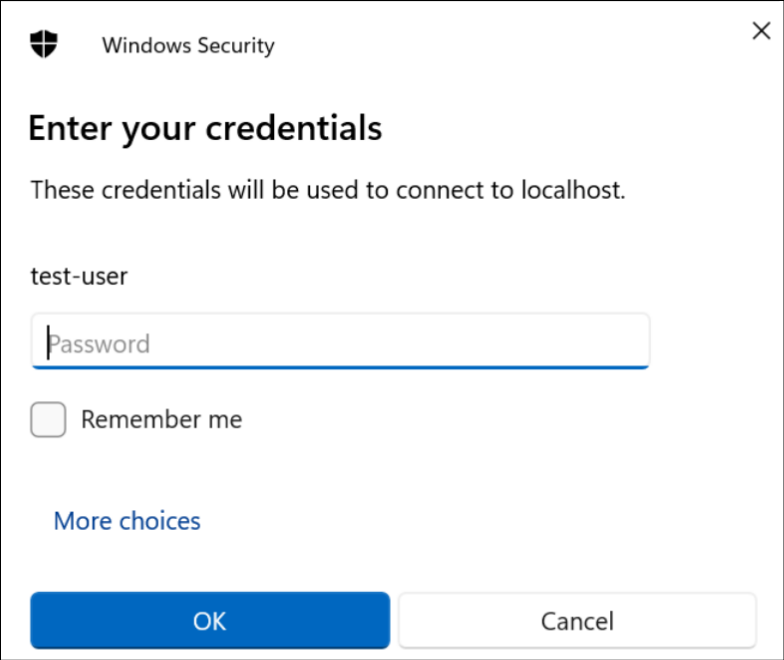
The Windows Desktop will open post successful login.
b. IAP Desktop (Windows Users)
IAP desktop is a remote desktop and SSH client that lets you connect to your Google Cloud VM instances from anywhere. You need to make sure to download version 2.41 or later versions for using workforce Identity providers from here and then follow the following steps
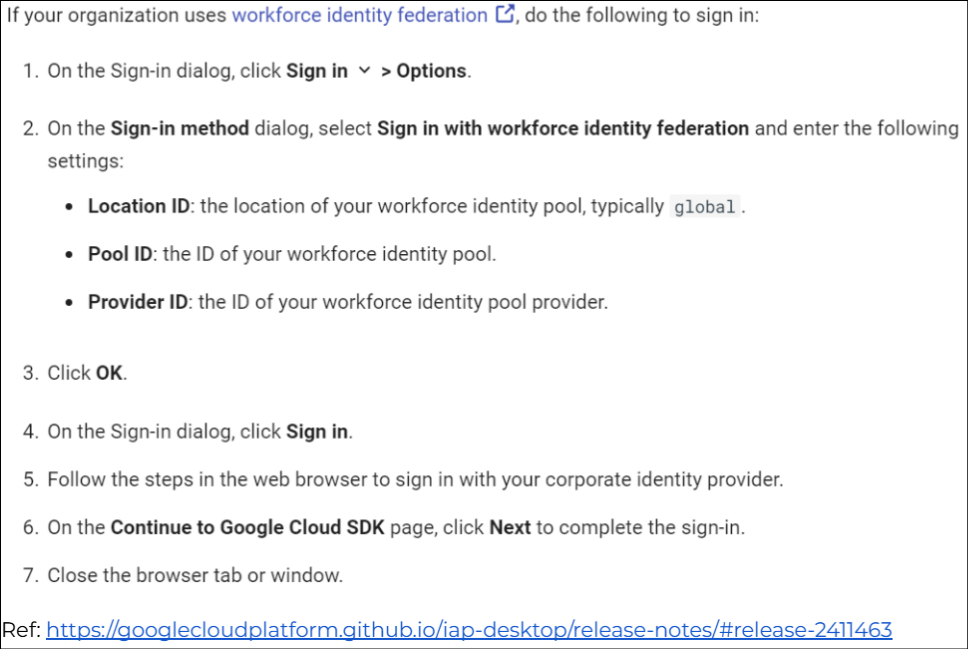
Ref: IAP Release Documentation
Data Security Guidelines:
1. "Do not store your data outside of the project resources created." This includes sharing them online, on personal devices, or through any other means.
2. By using this platform, you agree to be responsible for the security of your data and to comply with these guidelines.
If you have any questions or concerns about data security, please contact our support team.
c. Windows App (Mac Users)
-
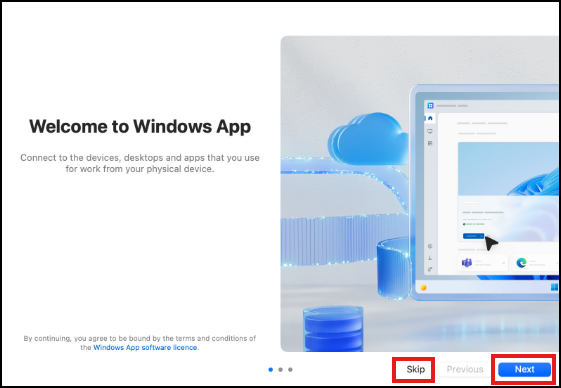
Install Windows App on Mac
- Download and install Windows App from the Mac App Store. When the Windows App is installed, open it.
-
Connect to the Windows VM
- If it's your first time using Windows App, navigate through the tour to learn more about Windows App, then select Done, or select Skip.
- Windows App opens on the Devices tab. Select the plus (+) icon, then select Add PC.
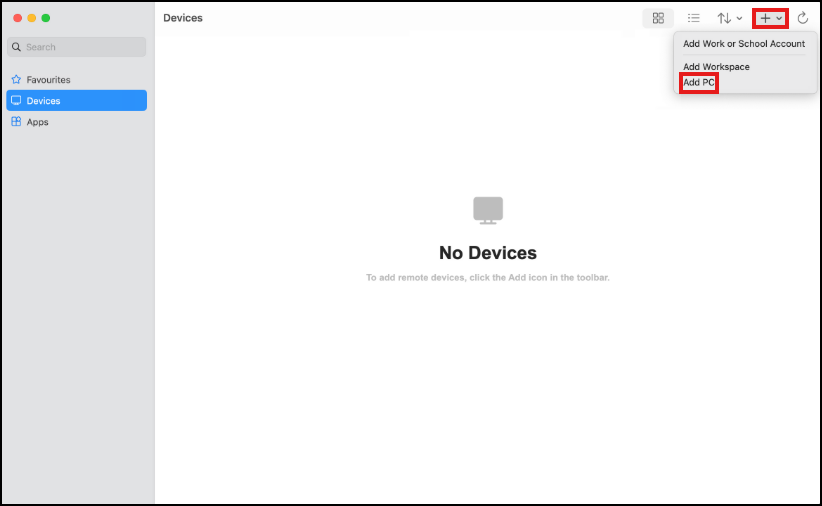
- In the dialog box that appears, for PC Name, enter the hostname as localhost.
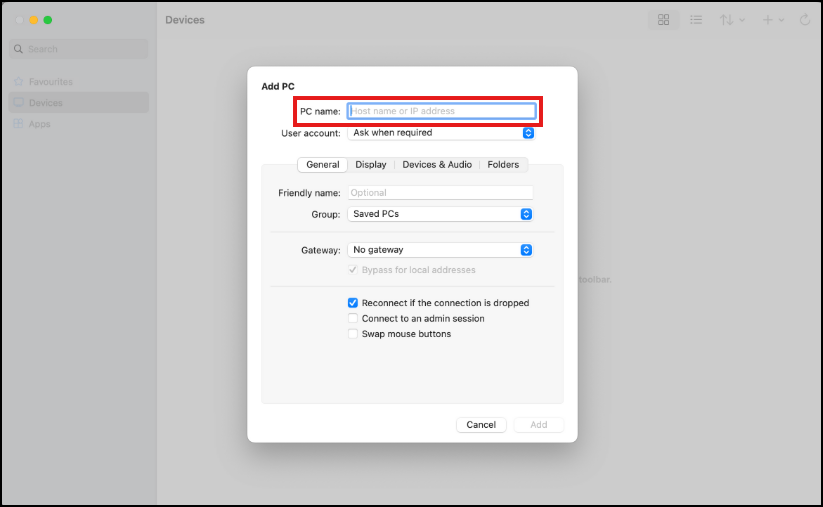
- Navigate to the User account and select "Add User Account".
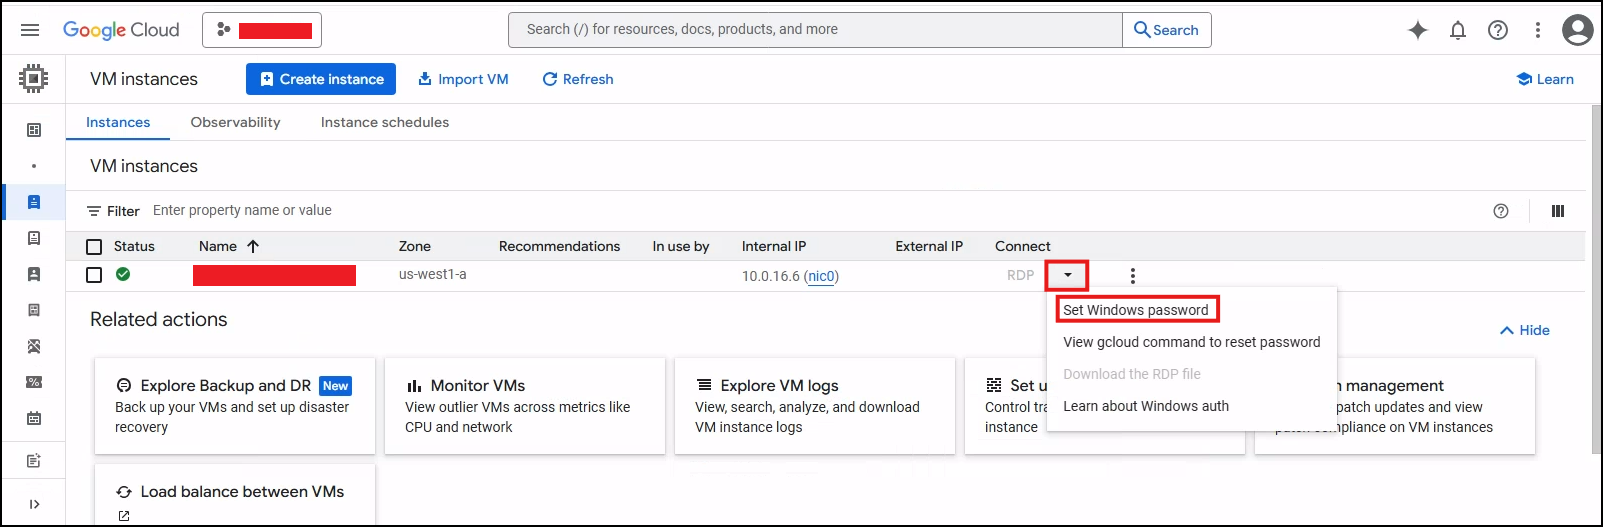
a. Go to My projects, choose your project, and click on the "GCP Link".

b. In the search bar, type "VM Instance" to locate the Slicer VM.

c. Click the dropdown icon under "Connect" and select Set Windows Password.
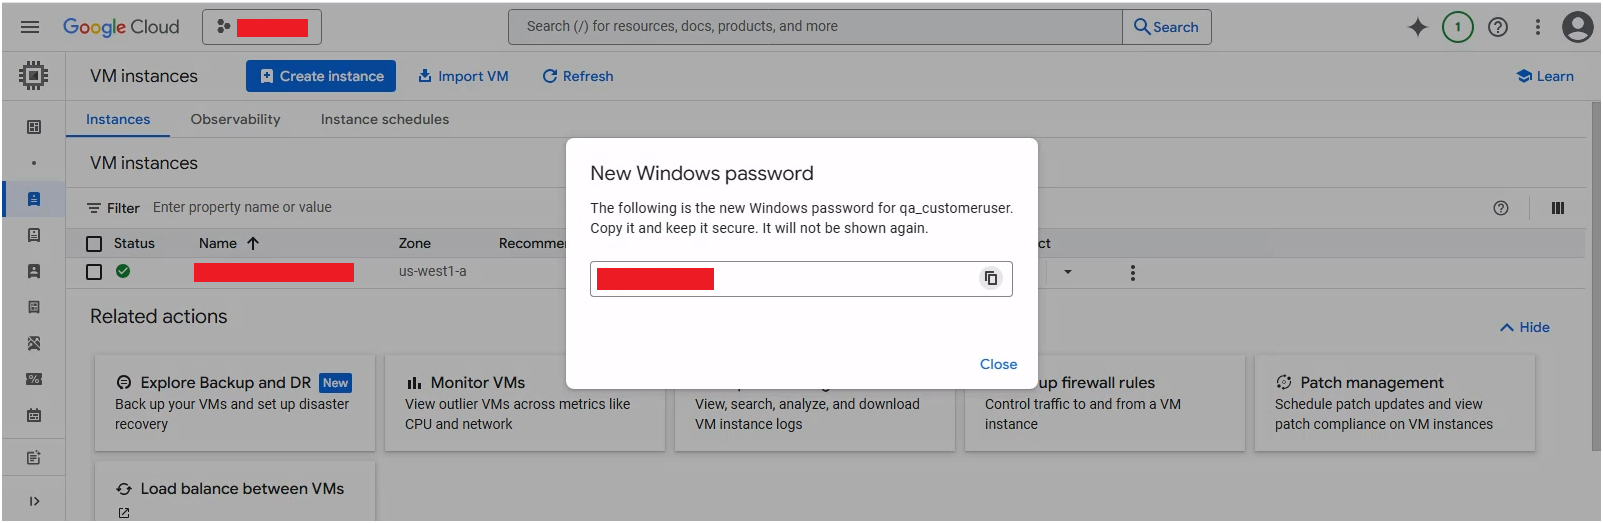
d. Enter or update the Username, then click "Set".
e. A Windows password will be generated - copy and store it securely.
- Click "Add"
- Your remote PC is added to the Devices tab.
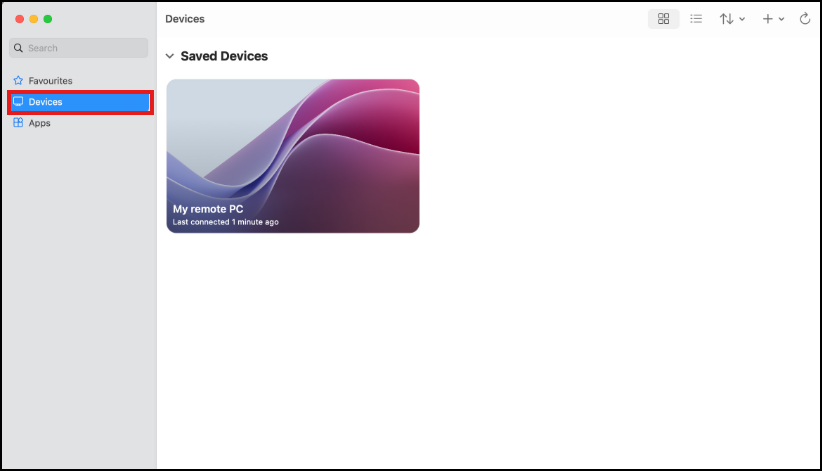
- On the Devices tab, double-click the remote PC to connect.
- If it's your first time using Windows App, navigate through the tour to learn more about Windows App, then select Done, or select Skip.
-
Accept Certificate Warning & Login
-
If you see a certificate warning, click "Continue".
-
You should now have access to your Windows VM.
-
5. Common Errors
Refresh token has expired:
In this scenario, the user tokens have expired and users are required to login to cloud SDK again. As per security best practices, the tokens generated for the users are expired in a defined time interval.

Public key denied while connecting to VS code:
In case the user experiences public key denied from VS Code IDE but is able to SSH into the instance using the Gcloud command, you need to remove old keys from .ssh folder generated and perform a fresh SSH into the instance to generate new keys and try connecting again.