Service Provisioning Guide
The Service Catalogue on our AI Innovation Platform streamlines the setup of Google Cloud Platform resources, enabling you to easily add services to your projects/workspaces directly from the platform.
Why Use the Service Catalogue?
-
Simplified Provisioning: Easily add complex GCP services with just a few clicks.
-
Automated Best Practices: The Service Catalogue automates authentication, service setup, and integrates cloud best practices (e.g., security tags, internal IPs). For Example: Provisioning a shared JupyterLab GPU instance, which typically involves multiple manual steps in the GCP console:
- Host the Jupyter service
- Attach it behind a load balancer
- Secure it using an authentication method Our Service Catalogue handles all this hassle-free.
-
Flexibility & Control: While the Service Catalogue provides an initial secure setup, you retain full flexibility to update/change instance settings (e.g., scale GPU resources, adjust machine types, modify storage, update network configurations) directly from the Google Cloud Platform console.
-
Non-Compulsory: It's a recommended add-on for basic setup with security and cloud best practices, but you can still add services directly from the Google Cloud Platform console if preferred.
-
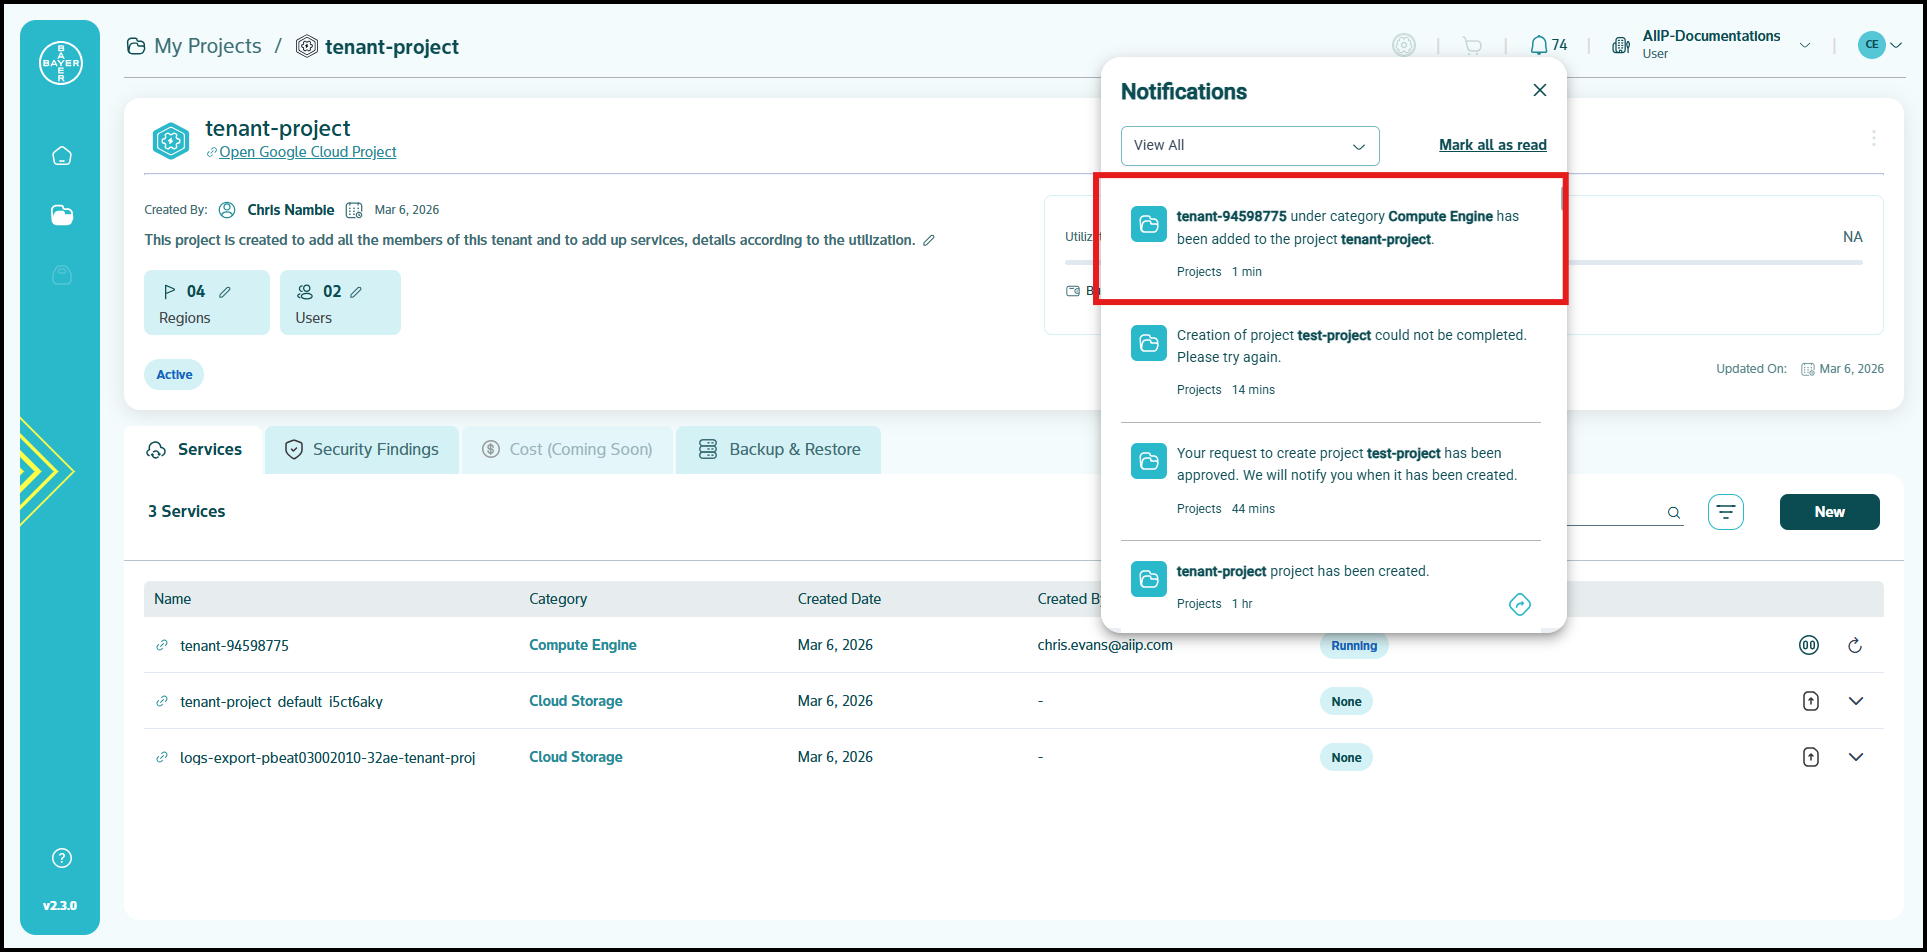
Instant Updates: Services are added directly, and you will receive notifications on the status of your service addition requests.
The Service Catalogue is your gateway to provisioning essential services for your healthcare AI development projects. It organizes available services into intuitive categories, enabling you to easily select and provision services tailored to your specific requirements.
Provisioning Services
The provision to spin up new resources is provided on the AI Innovation Platform itself, let us talk about how this can be done.
Below are the steps to be followed to add services:
-
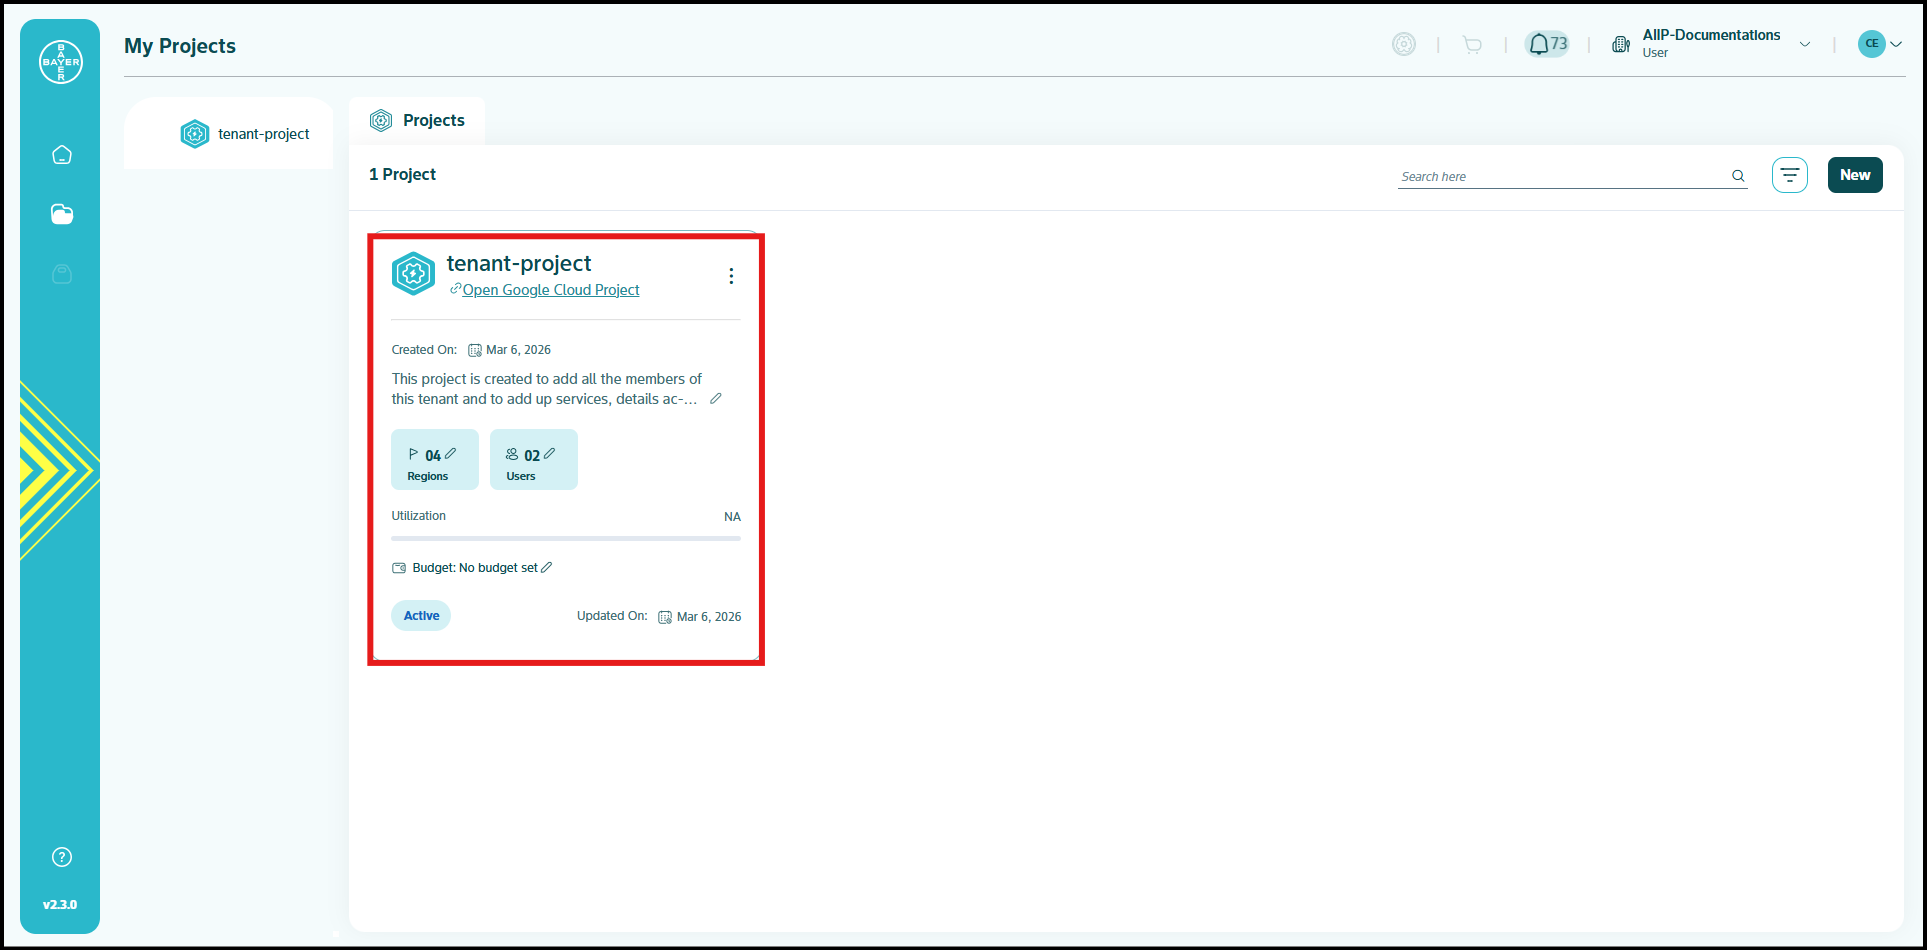
Go to My Projects and click on the project for which the services need to be added.
-
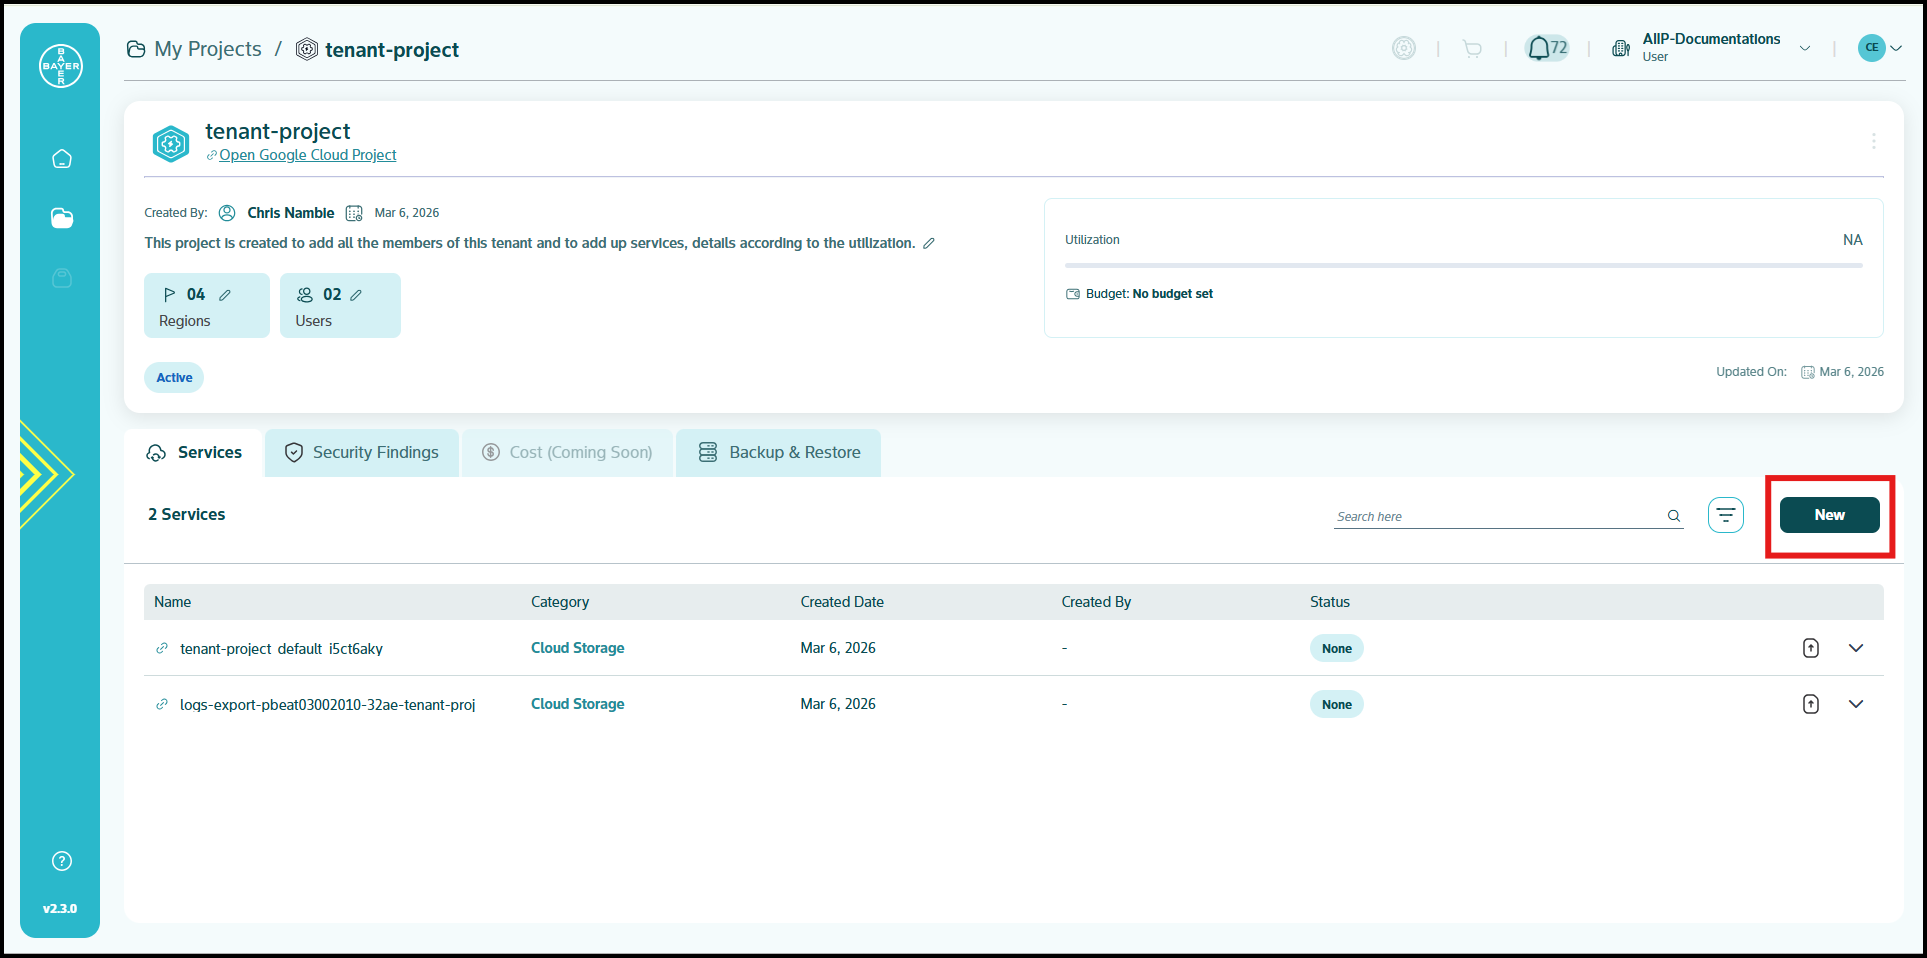
In the project details page, click on "New" under Services tab, to provision the services.
-
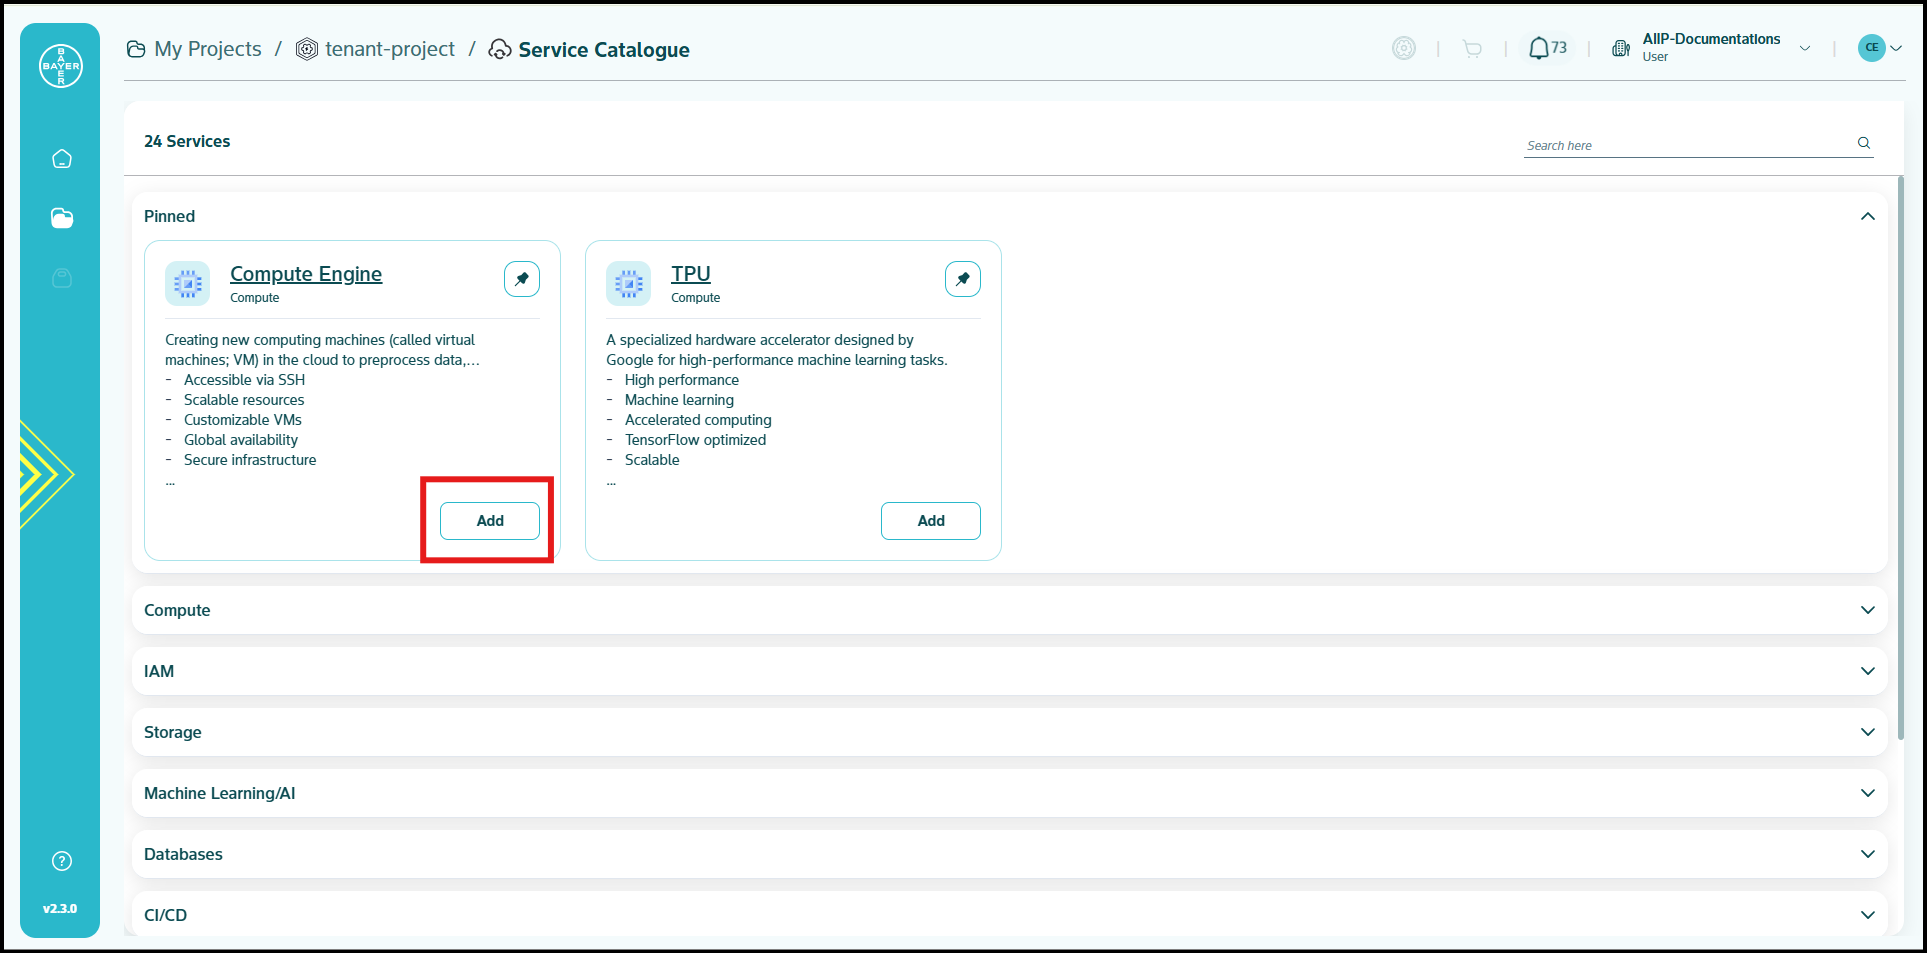
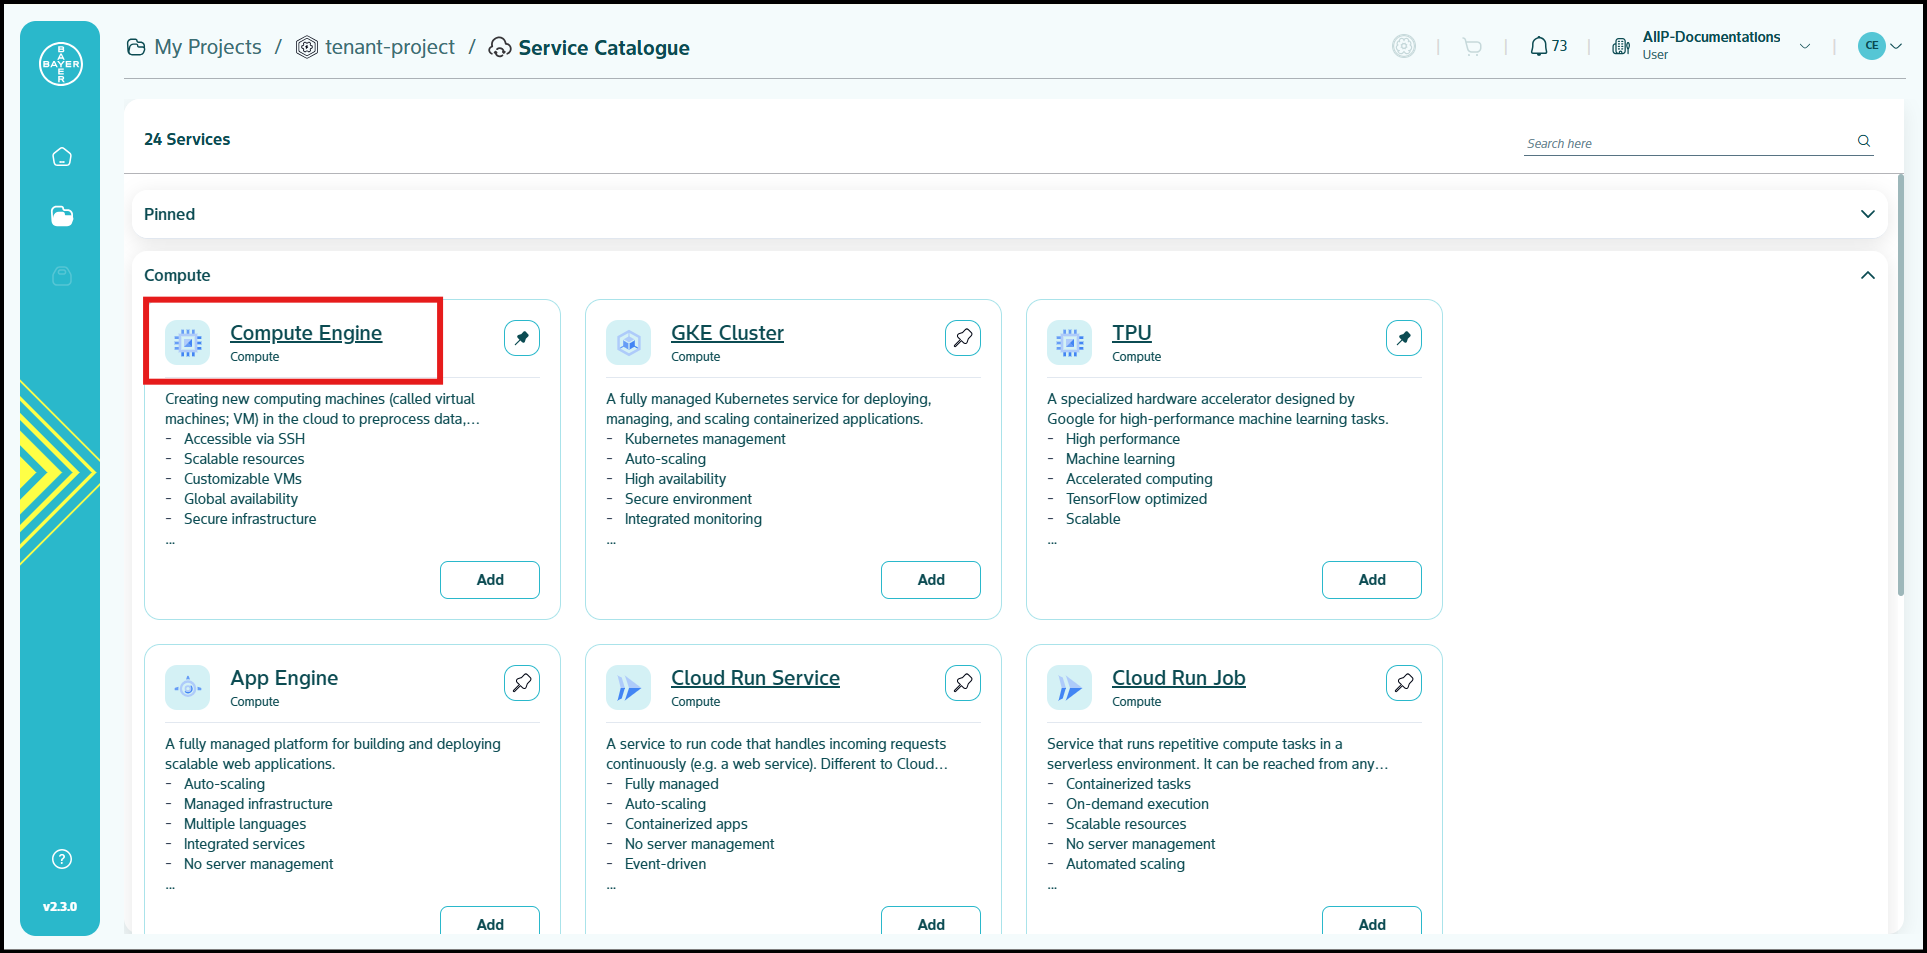
Select the service and click on "Add" to choose the configurations. Scroll through and choose from our wide range of service categories and pick the service that best suits your needs.
-
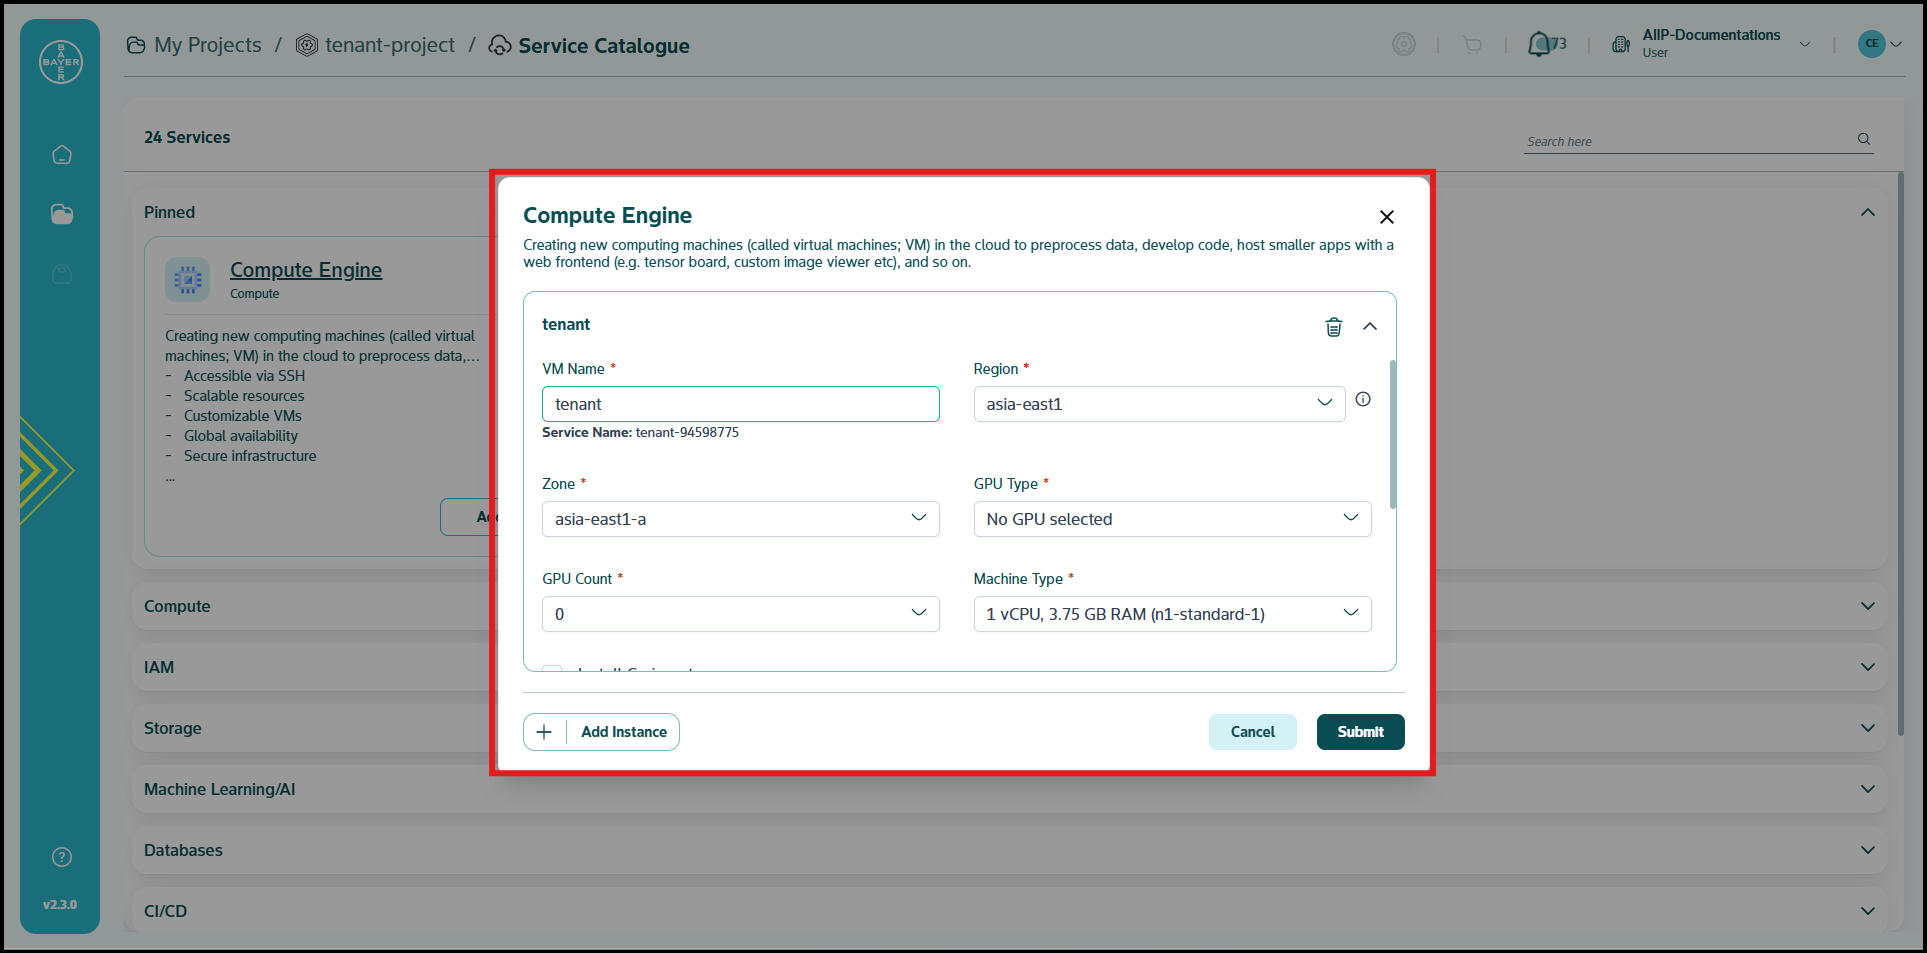
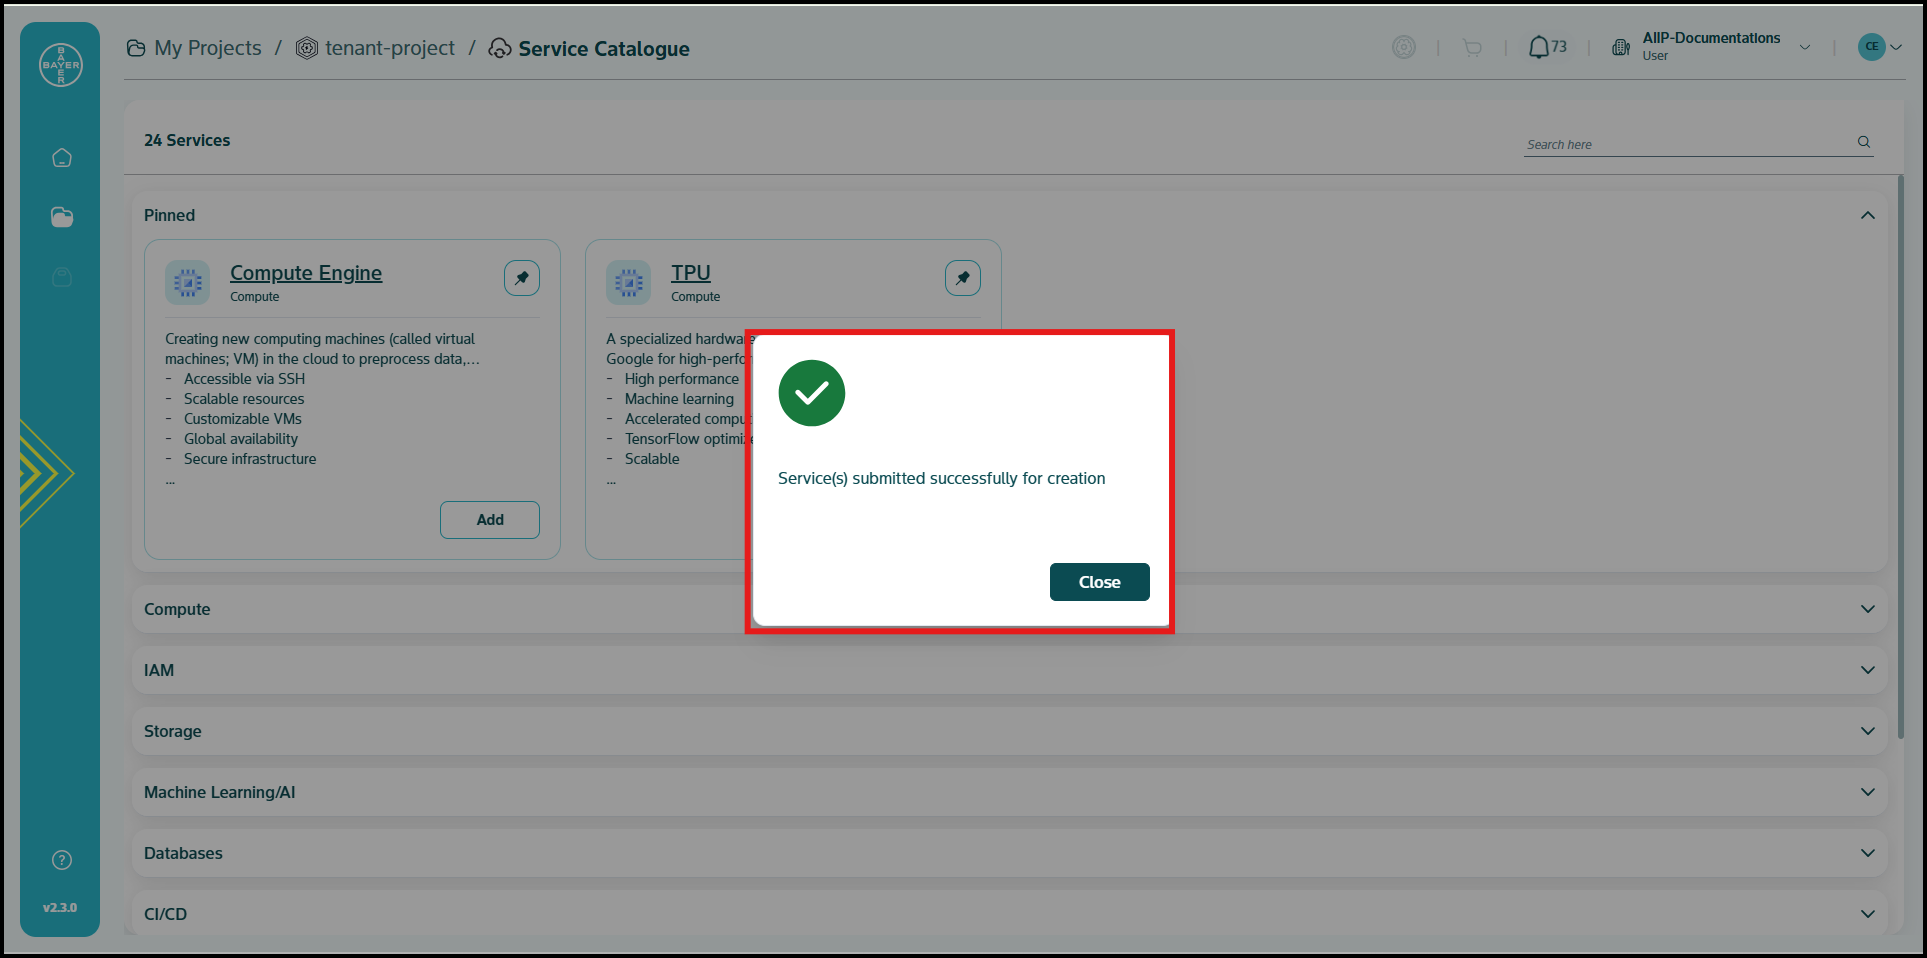
Choose the configuration details and click on "Submit".
-
You will be notified once the service is added to your project. This may take a few minutes.
-
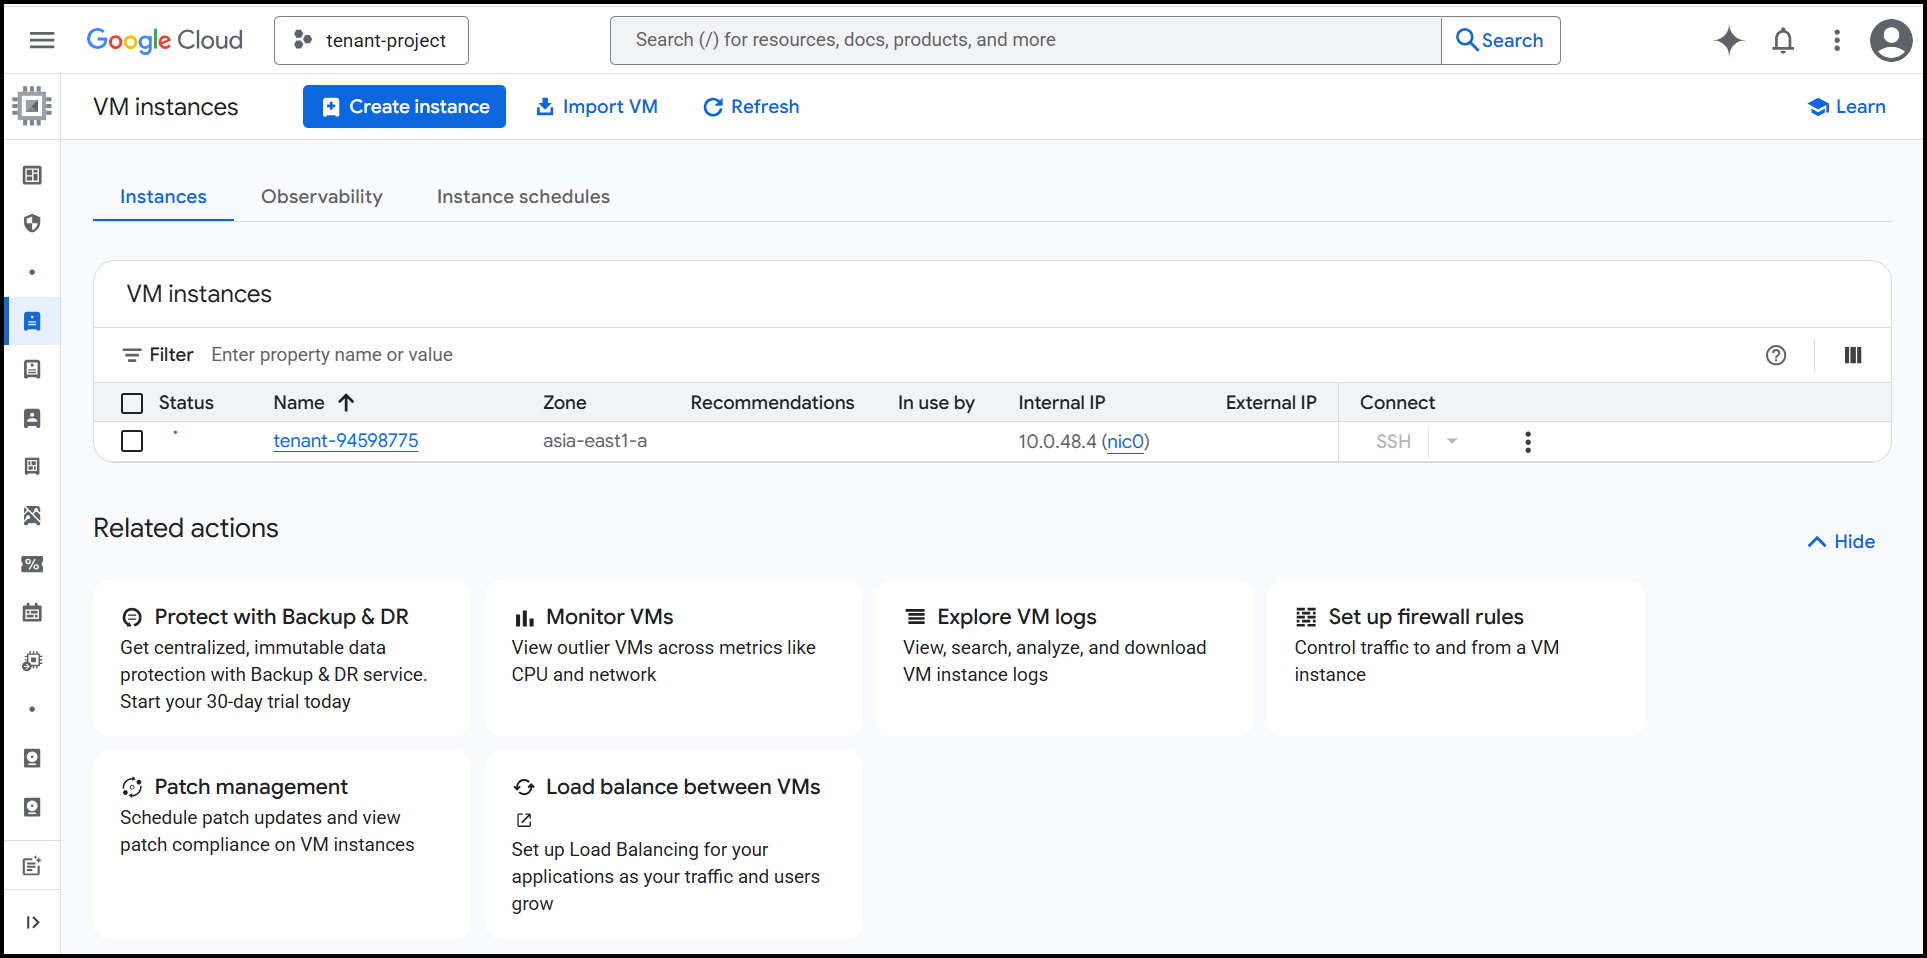
Once provisioned, a link of the service will be available on the service name itself as a hyperlink. You can click on this and navigate to the Google Cloud Platform console to see this service.
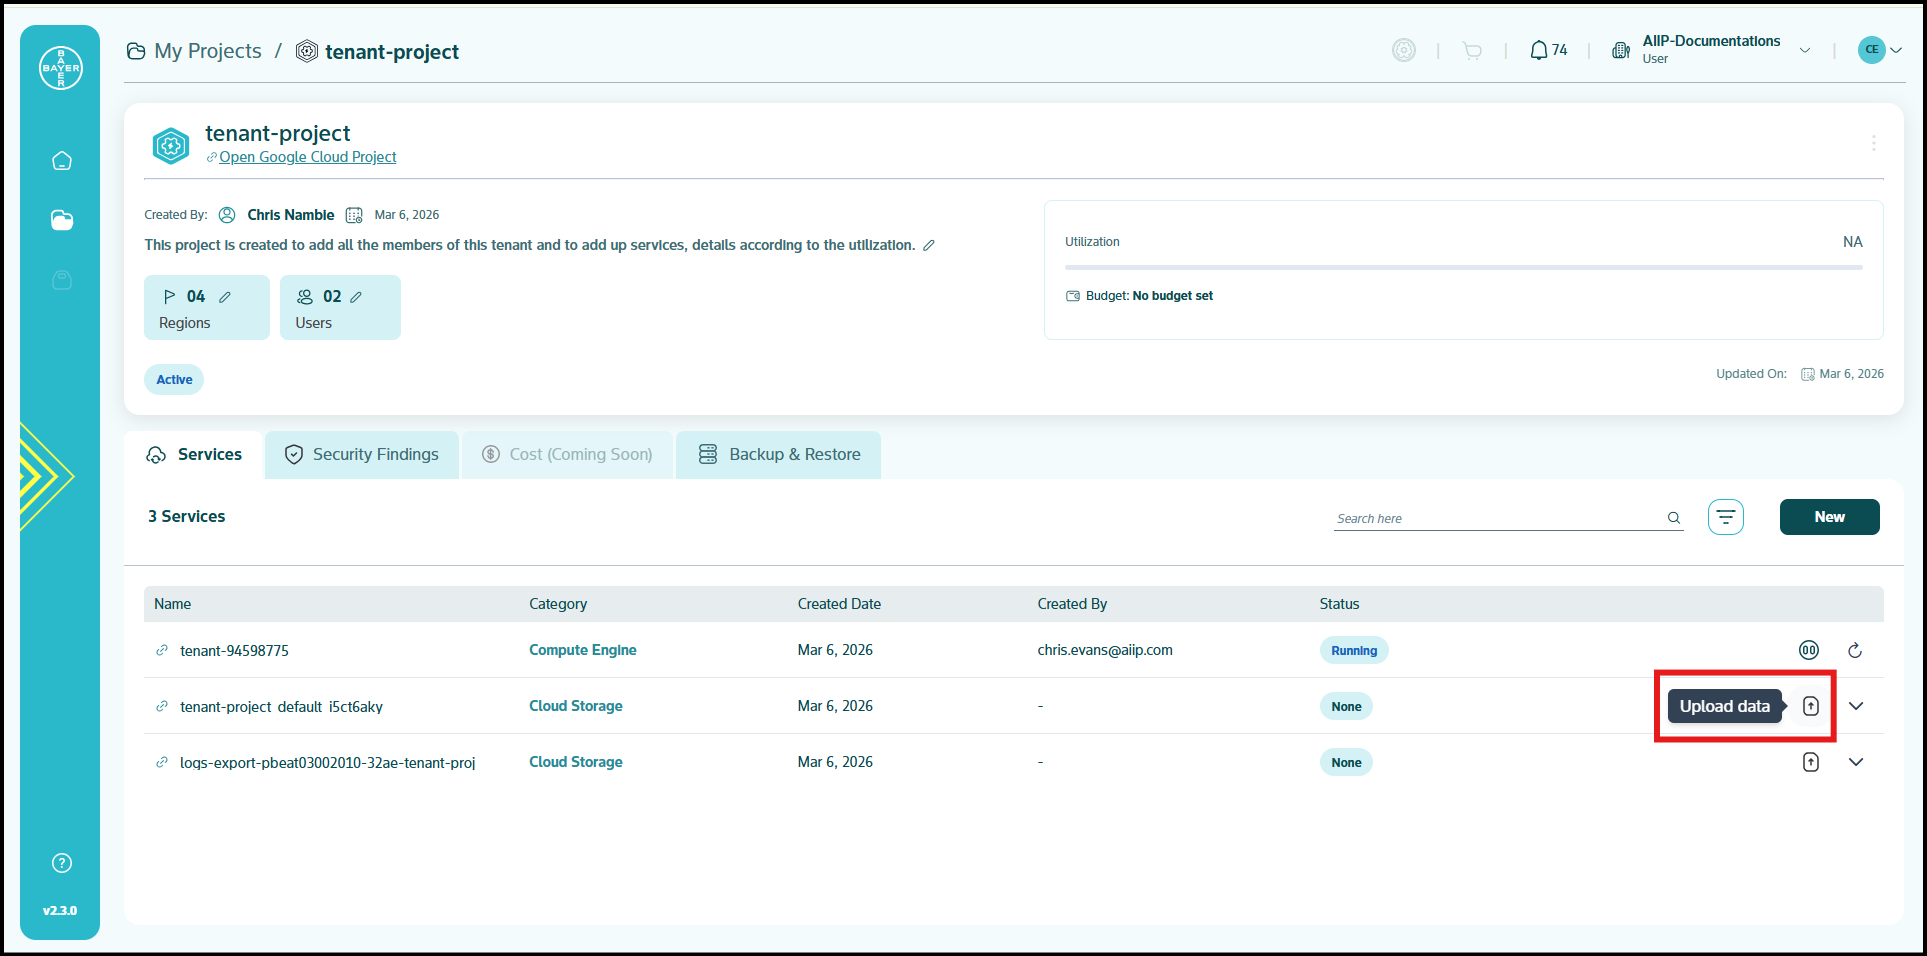
Uploading Data to Bucket
This guide explains how you can upload data to your bucket directly from the Services page.
-
In the project details page, click on upload icon next to the desired service under Services tab, to upload the data.
-
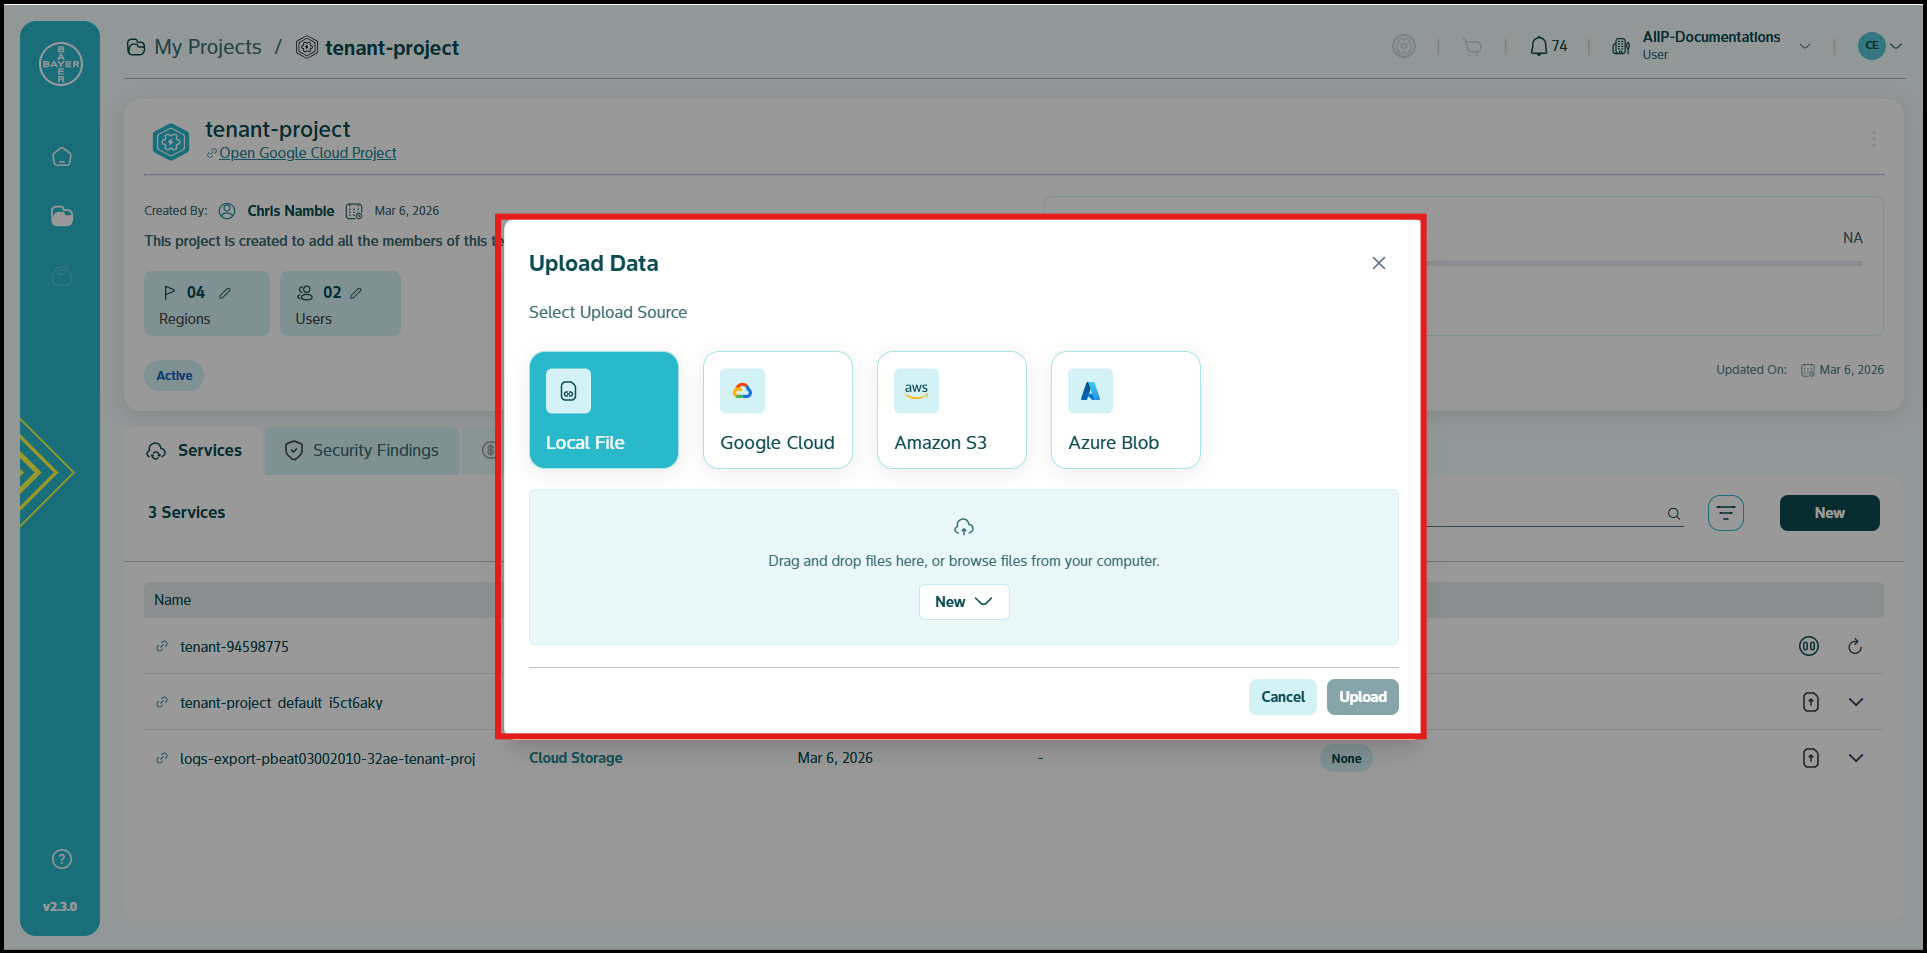
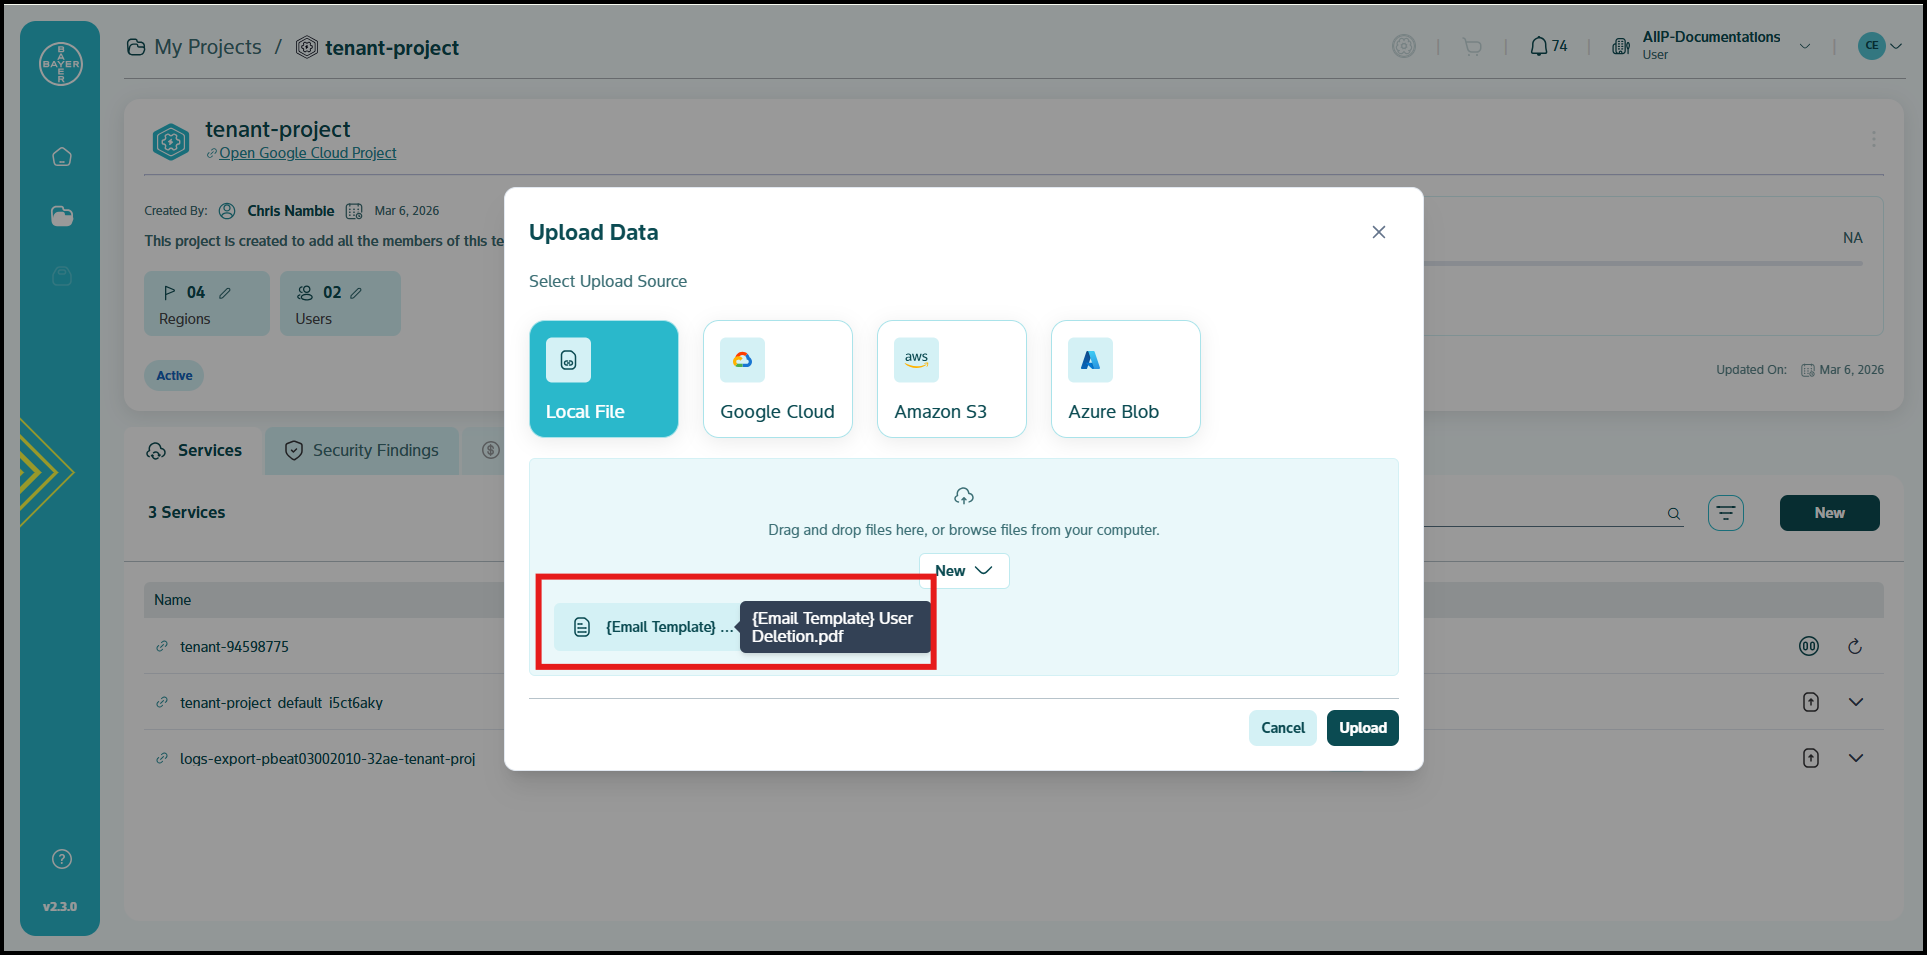
The "Upload Data" pop-up presents several options for your data source. You can choose the option that best suits your needs:
- Local File (Selected by default): You can upload files directly from your computer.
- Google Cloud: You can connect to your Google Cloud storage by entering the Bucket URL.
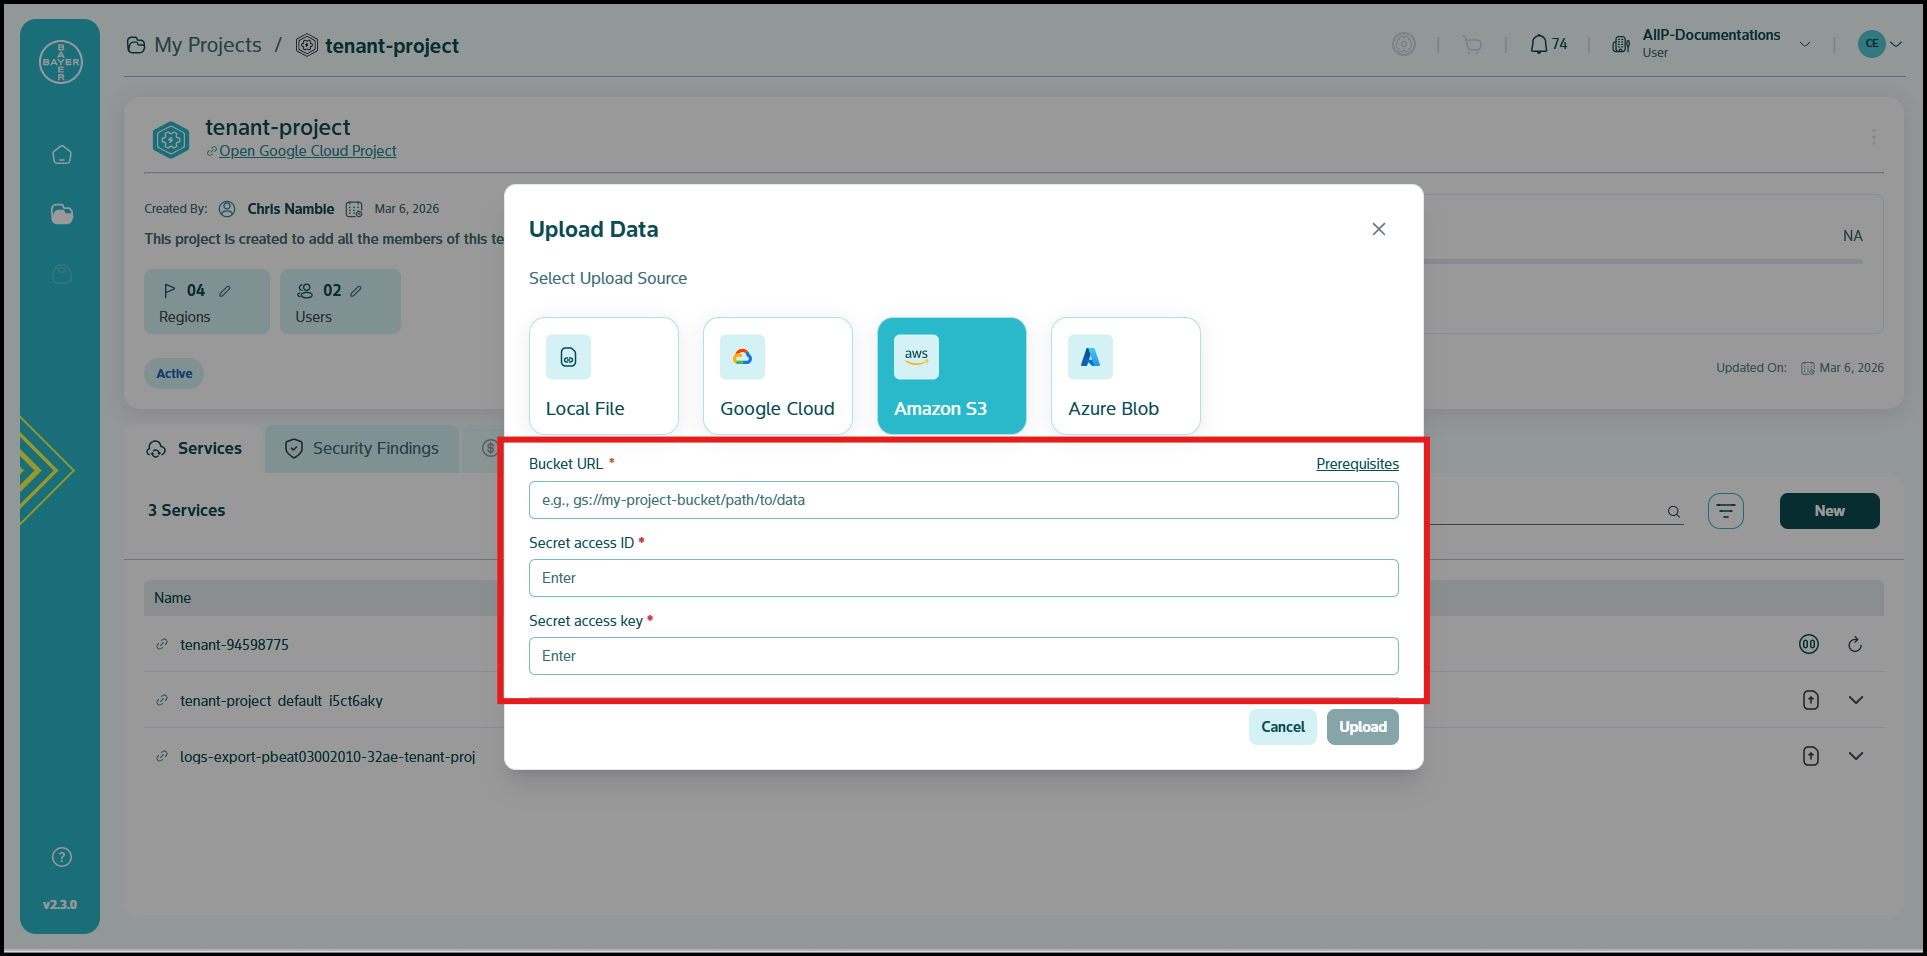
- Amazon S3: You can connect to your Amazon S3 buckets by entering the Bucket URL, Secret access ID, and Secret access key.
- Azure Blob: You can connect to your Azure Blob storage by entering the Bucket URL, Storage account name, and Shared access signature.
-
Upload Your Data:
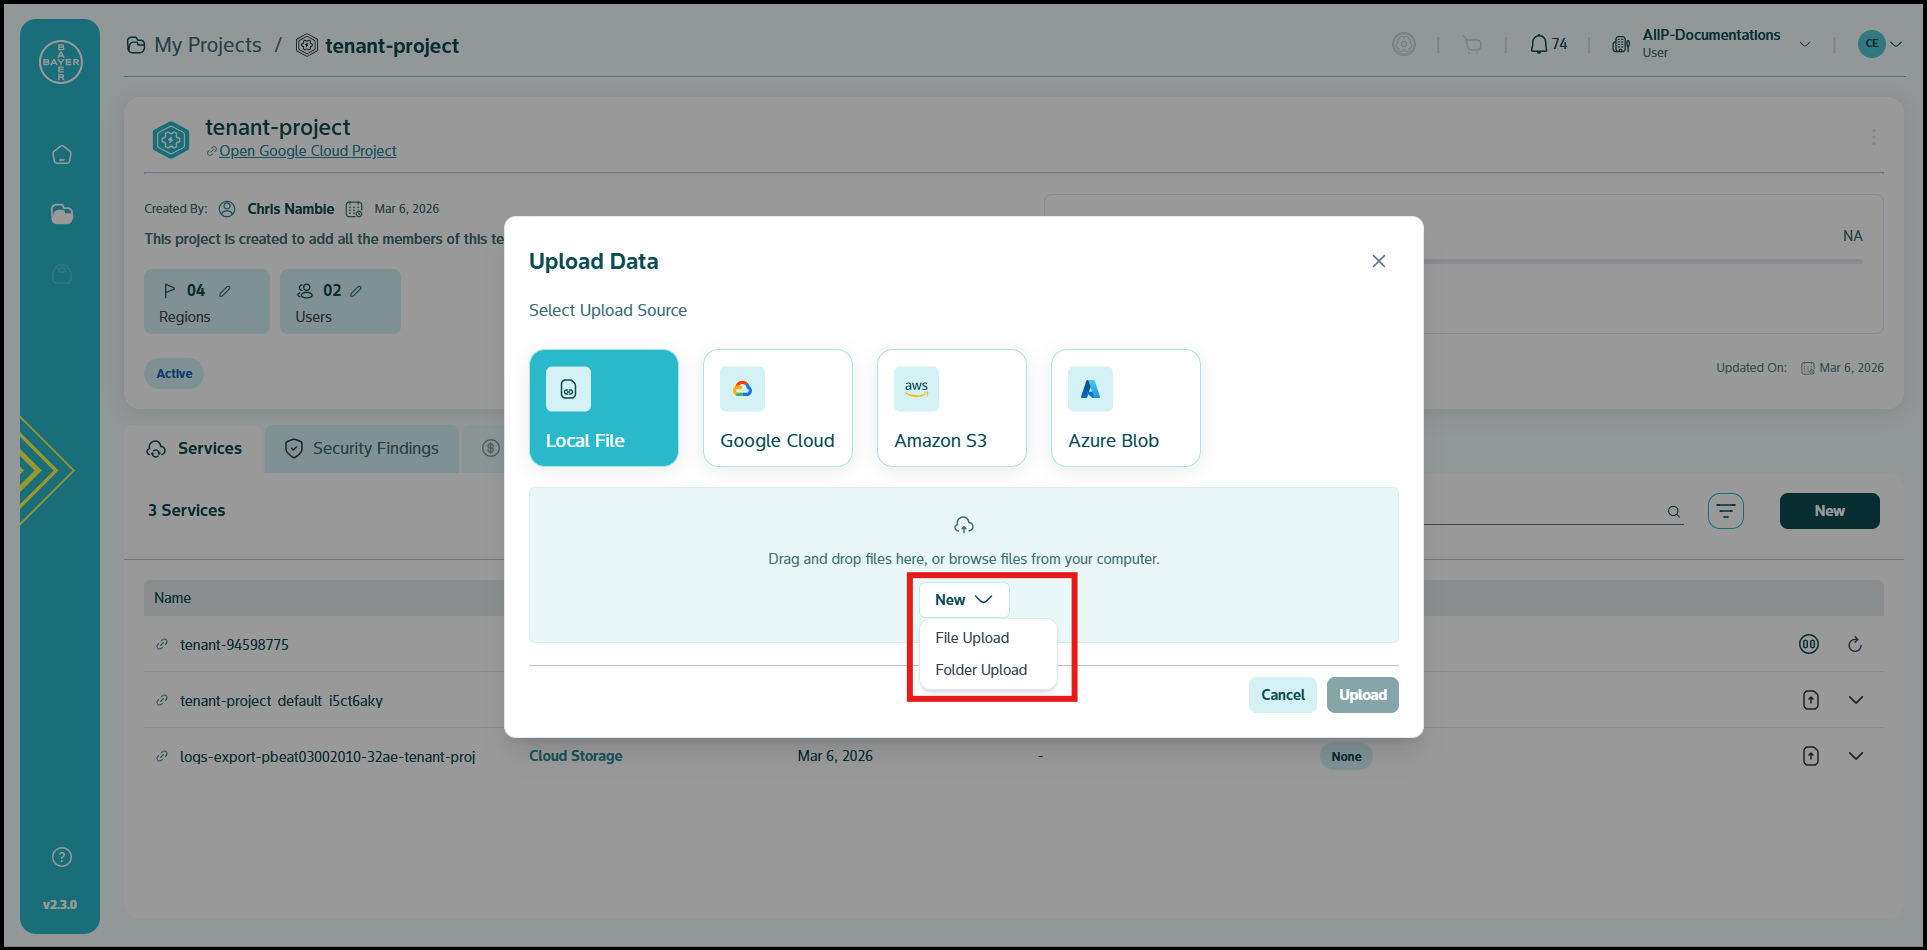
- For Local File Uploads: You can drag and drop your files directly into the designated area within the pop-up window or click on "browse files from your computer" to open a file explorer and select the files you wish to upload.
- For Cloud Storage Uploads (Google Cloud, Amazon S3, Azure Blob): After you select one of these options, you will be prompted to authenticate and select the specific bucket or container you wish to upload to. Follow the on-screen instructions for authentication and selection.
-
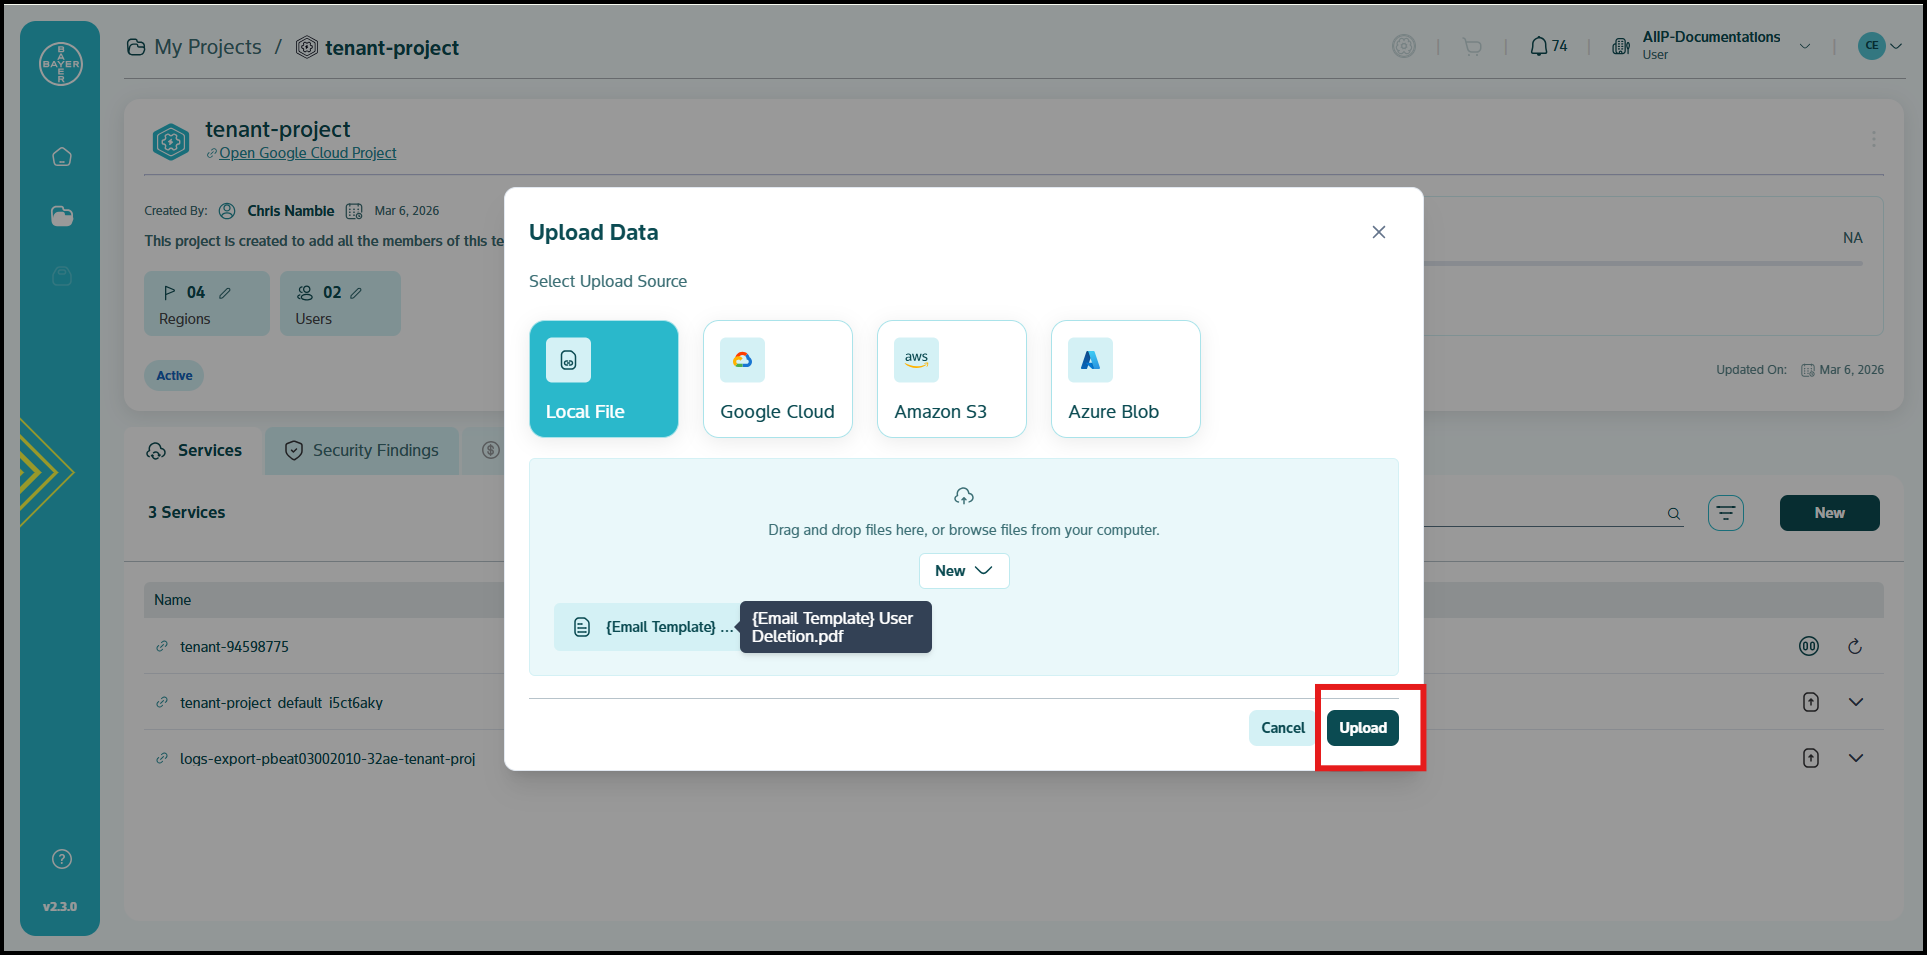
Once you have selected your files or connected to your cloud storage, you can review the details of your upload.
-
Click the "Upload" button to begin the data transfer.
Note
- For large files or numerous files, the upload process may take some time depending on your internet connection and the size of the data.
- You must ensure that the files you upload do not contain any passwords or other sensitive data.
Maximize Your Efficiency
Efficiently manage and organize your services to enhance productivity and streamline your workflow. The platform offers powerful features to customize your service view.
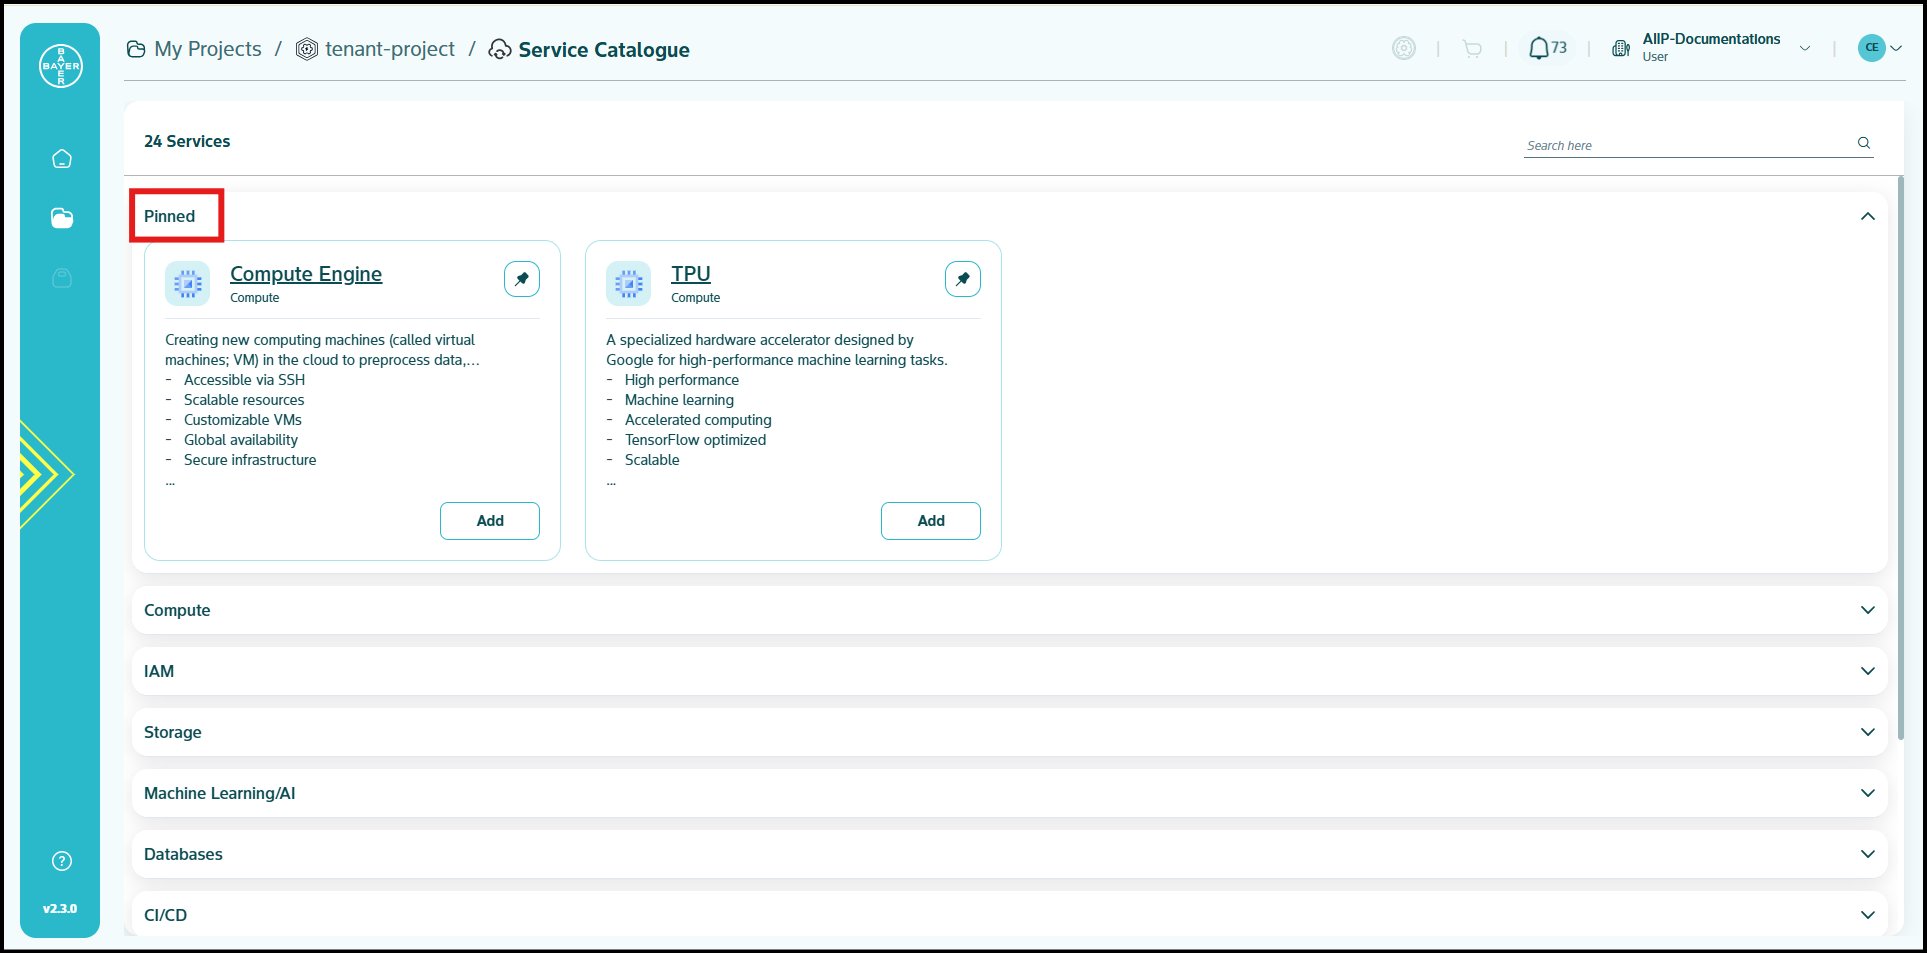
Pinning Services
- Benefit: Gain immediate access to your most frequently used services, eliminating the need for repetitive searching or scrolling. This significantly streamlines your workflow.
- How it Works: Locate the pin icon on the top-right corner of any service tile. Clicking this icon will pin the service, placing it under a dedicated "Pinned" section at the top of the Service Catalogue page.
- Flexibility: Pinned services remain consistently at the top. To unpin a service, simply click the pin icon again.
This feature is ideal for users who regularly interact with a specific set of services, ensuring your essential tools are always within reach.
Filtering Services
- Rapidly narrow down the list of available services, allowing you to quickly locate specific items without sifting through the entire catalogue. This saves time and improves efficiency, especially with a large number of services.
- The Service Catalogue offers robust filtering capabilities.
- Refine the displayed services based on various criteria, whether you're exploring new options or managing existing ones.
These features are designed to empower you in managing your healthcare AI development projects effectively. Click here to learn more about the available service categories and groups.