Licensing and User Management
Licensing and User Management
The License and User Management section provides comprehensive tools for controlling access to platform features and managing your team members. This guide will help you understand the different license options available and how to effectively administer users within your tenant.
Licensing Essentials
Licenses define how your team can access and use platform services. Each option provides a different level of functionality to match your tenants needs.
Free Sign-Up:
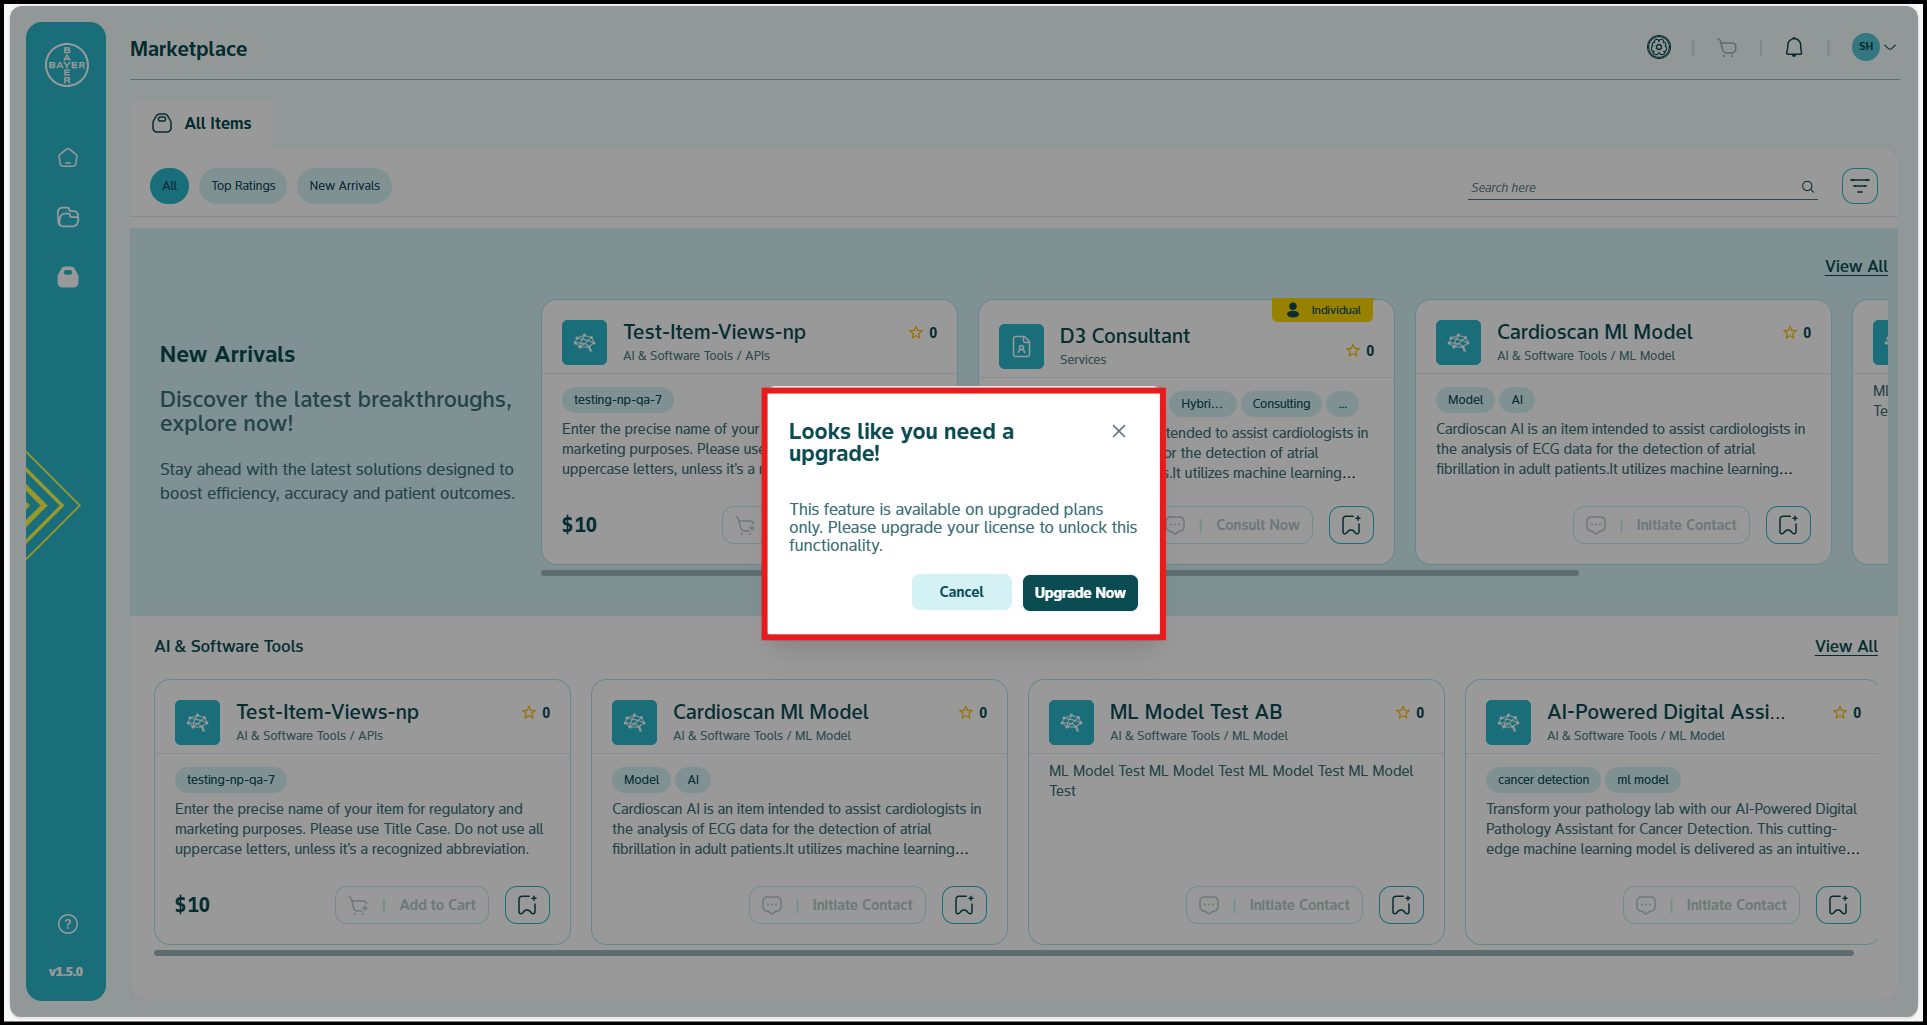
On signing up, you are registered as a free sign-up/free tier user and in case you take any action that involves costs, you are prompted with the paywall to purchase licenses i.e.
- In case you try to purchase an item from the Marketplace, you hit a paywall.
- In case you try to use full capabilities of the Digital Assistant, you hit a paywall.
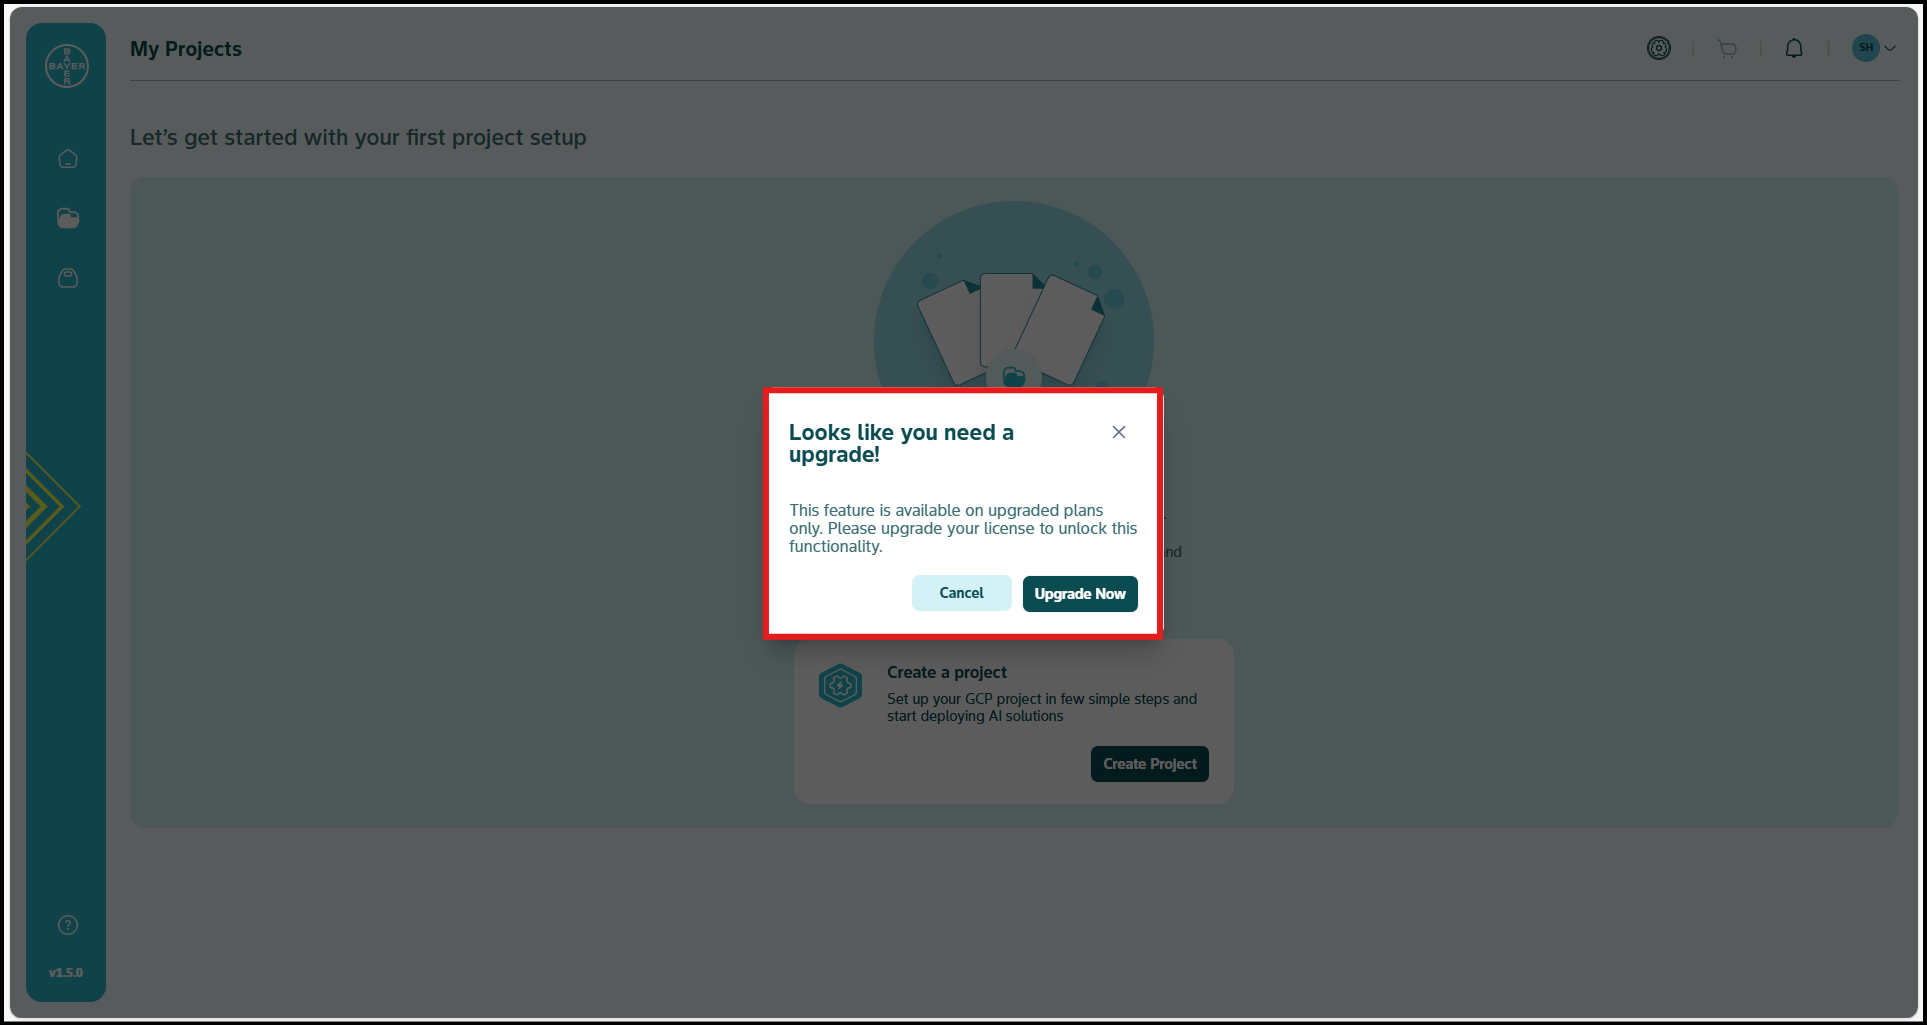
- In case you try to create a project, you hit a paywall.
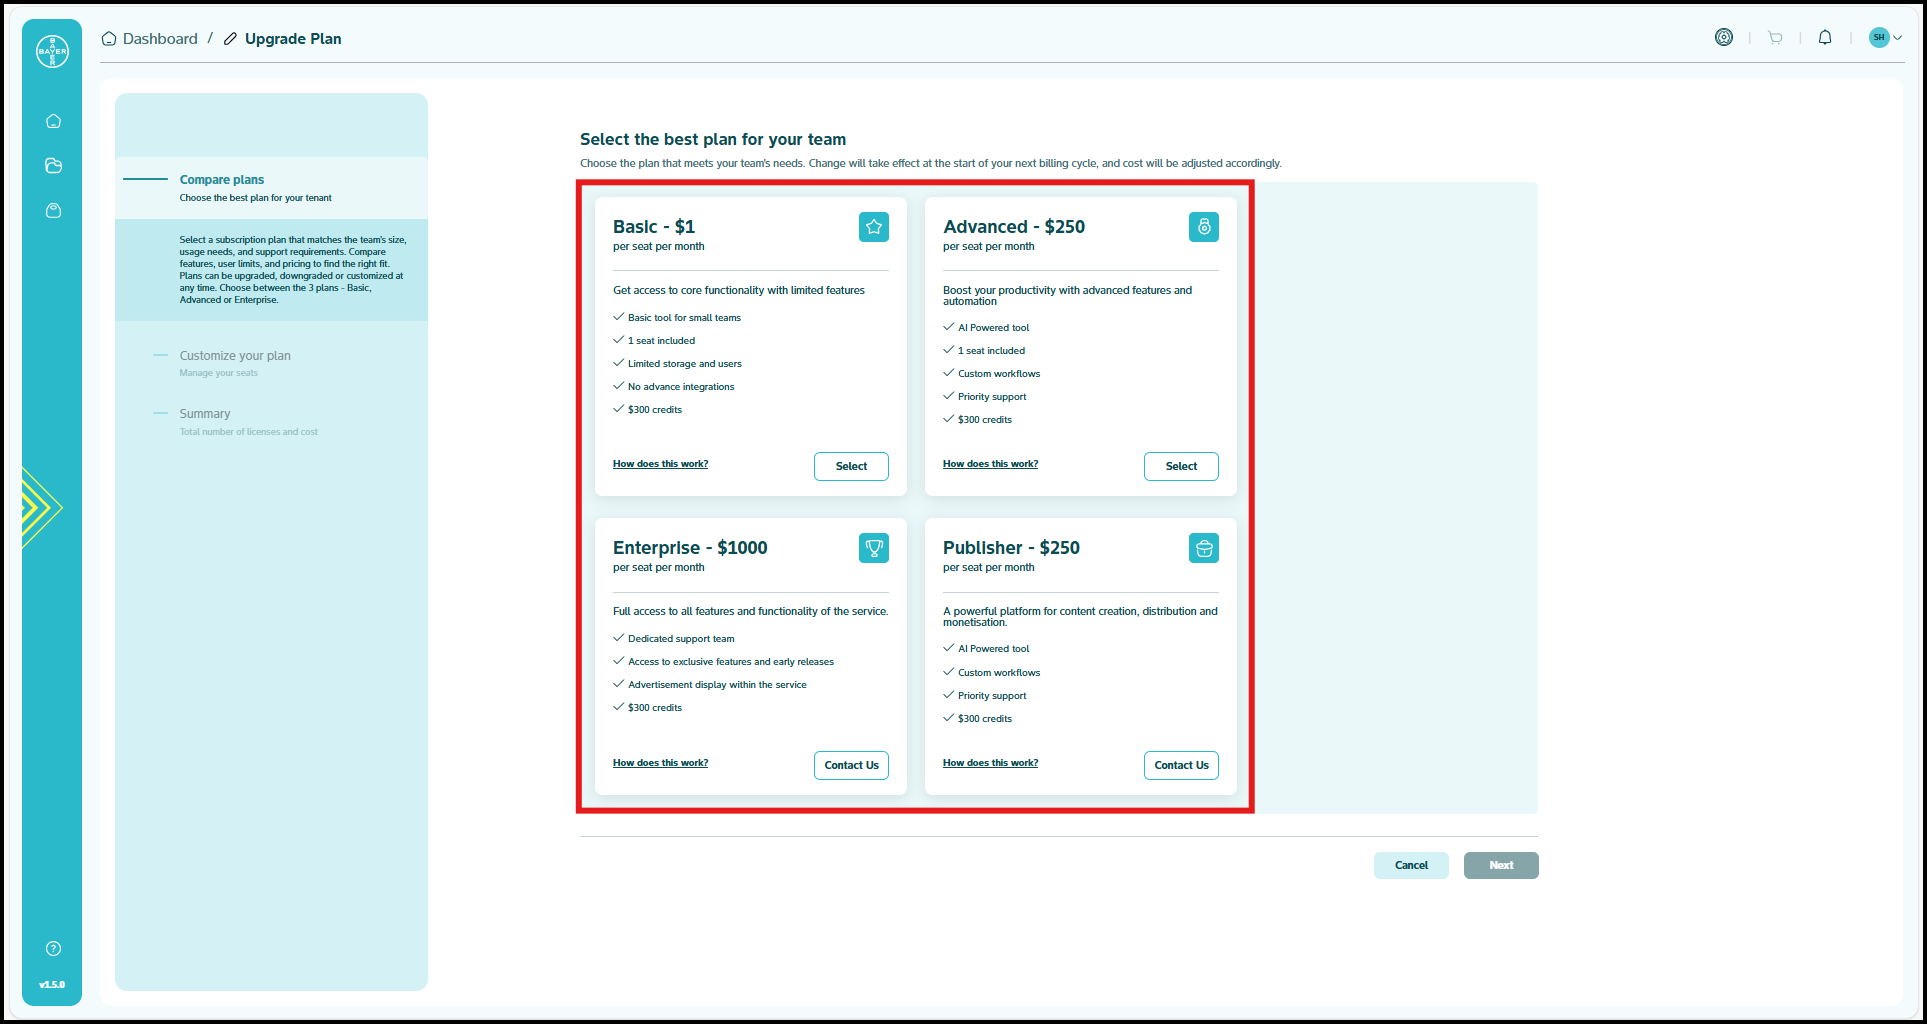
Available License Tiers:
- Basic - $0 per seat per month: Ideal for small teams, includes 1 seat, limited storage and users.
- Advanced - $250 per seat per month: Includes AI Powered tools, 1 seat, and custom workflows.
- Enterprise - Customized pricing: Offers dedicated support and tailored solutions.
- Publisher - Customized pricing: Designed for users who wish to publish and monetize their own AI Powered tools.
Note
For Enterprise and Publisher licenses,System Admins will handle user onboarding to ensure a smooth setup process.
Getting Started with Licenses
When first joining the platform, individual users automatically receives a free sign up license. As your needs evolve, you can easily upgrade to access additional features.
License Management Process
Follow these steps to manage your tenant's licenses:
-
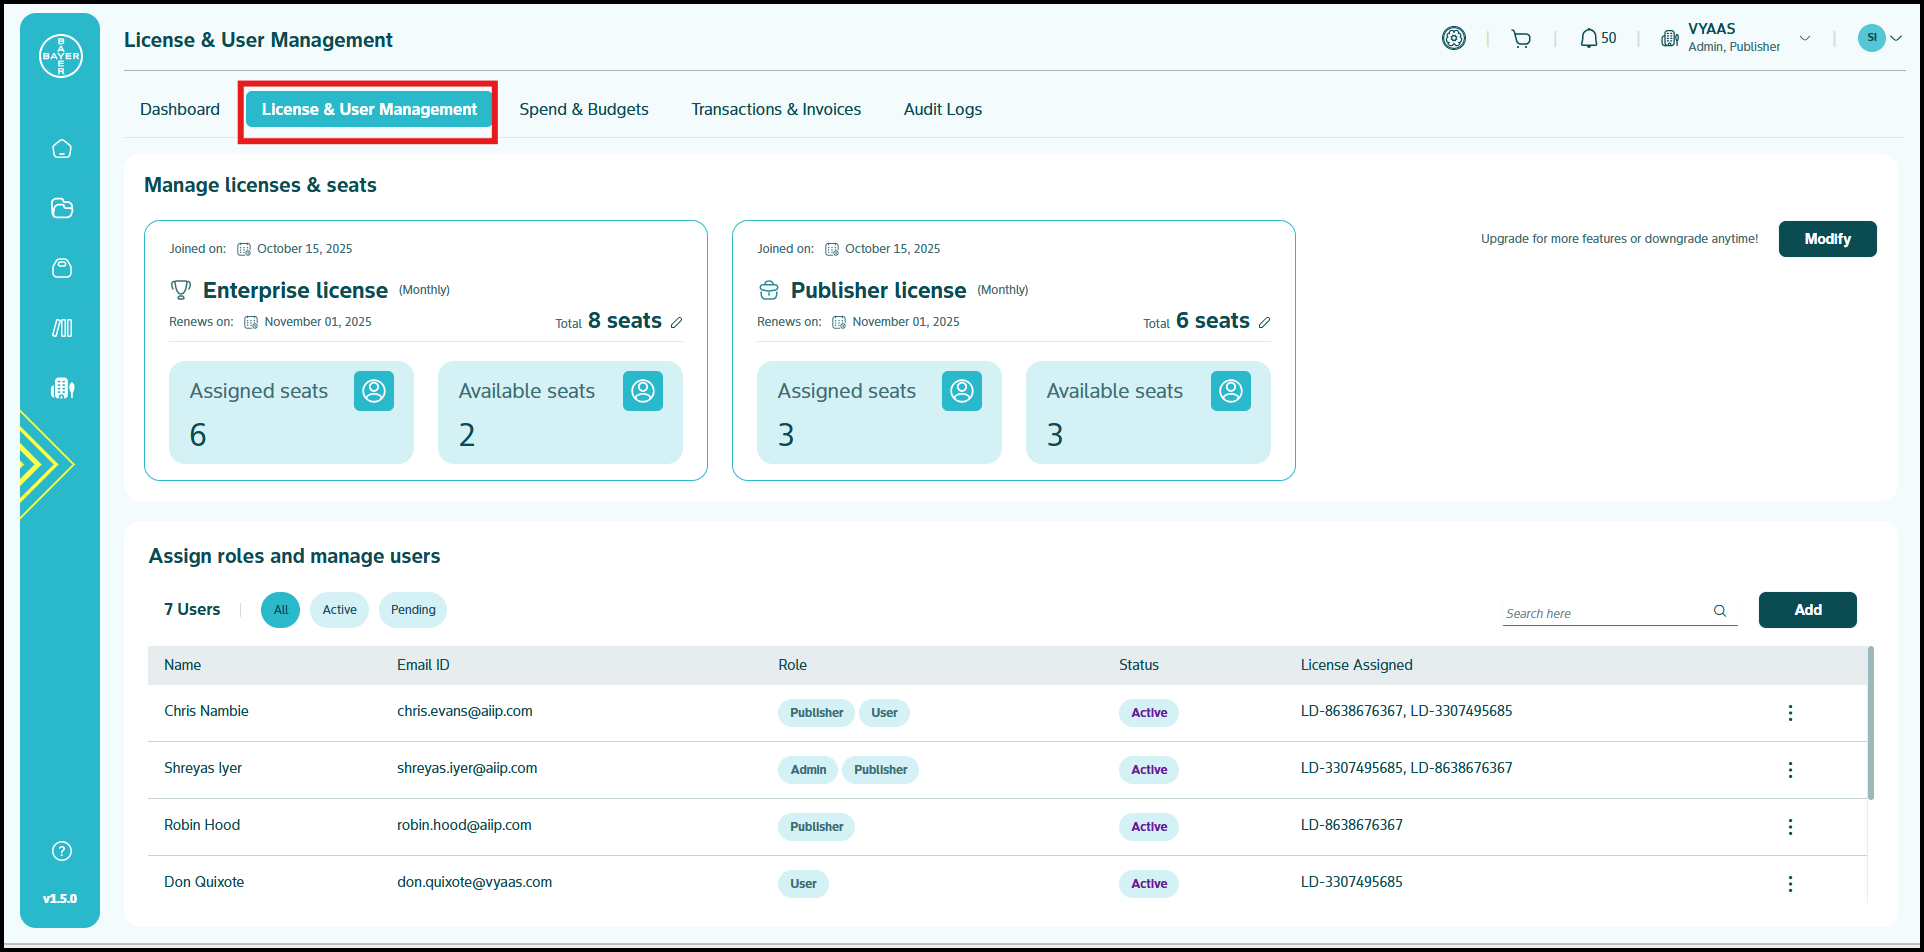
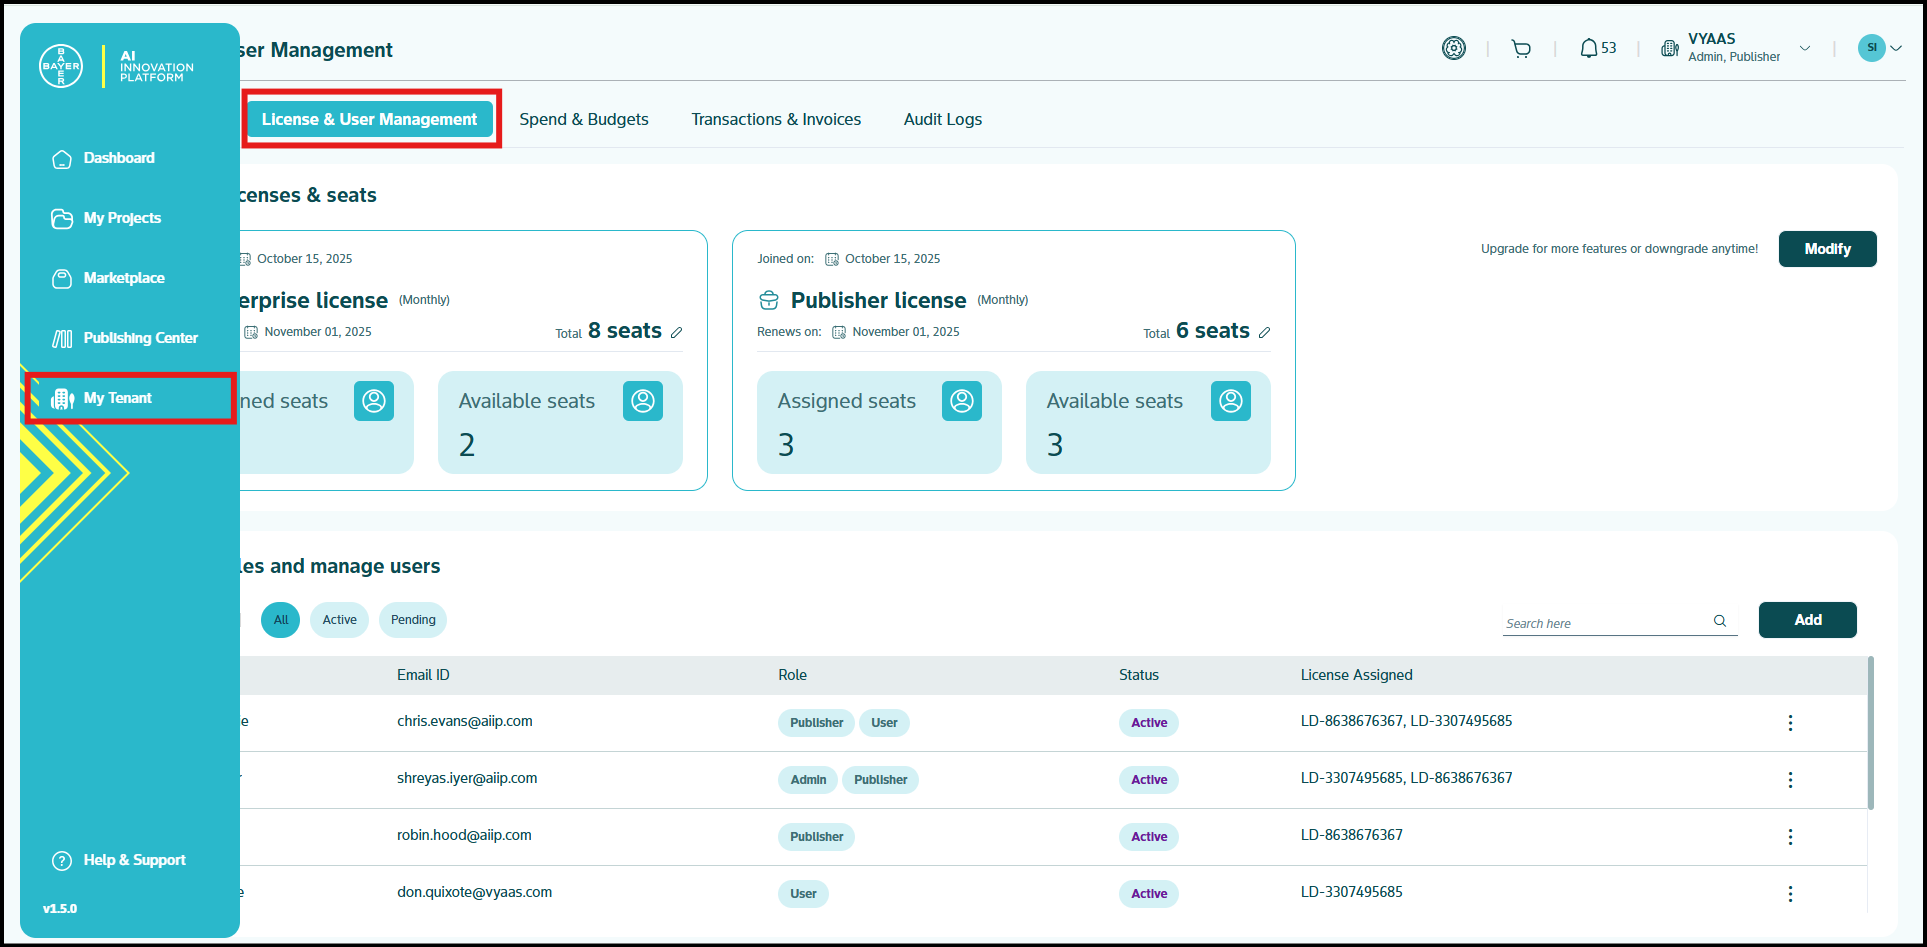
Access the License Management Interface
-
Navigate to "My Tenant" from your Dashboard
-
Select the "License & User Management" tab
-
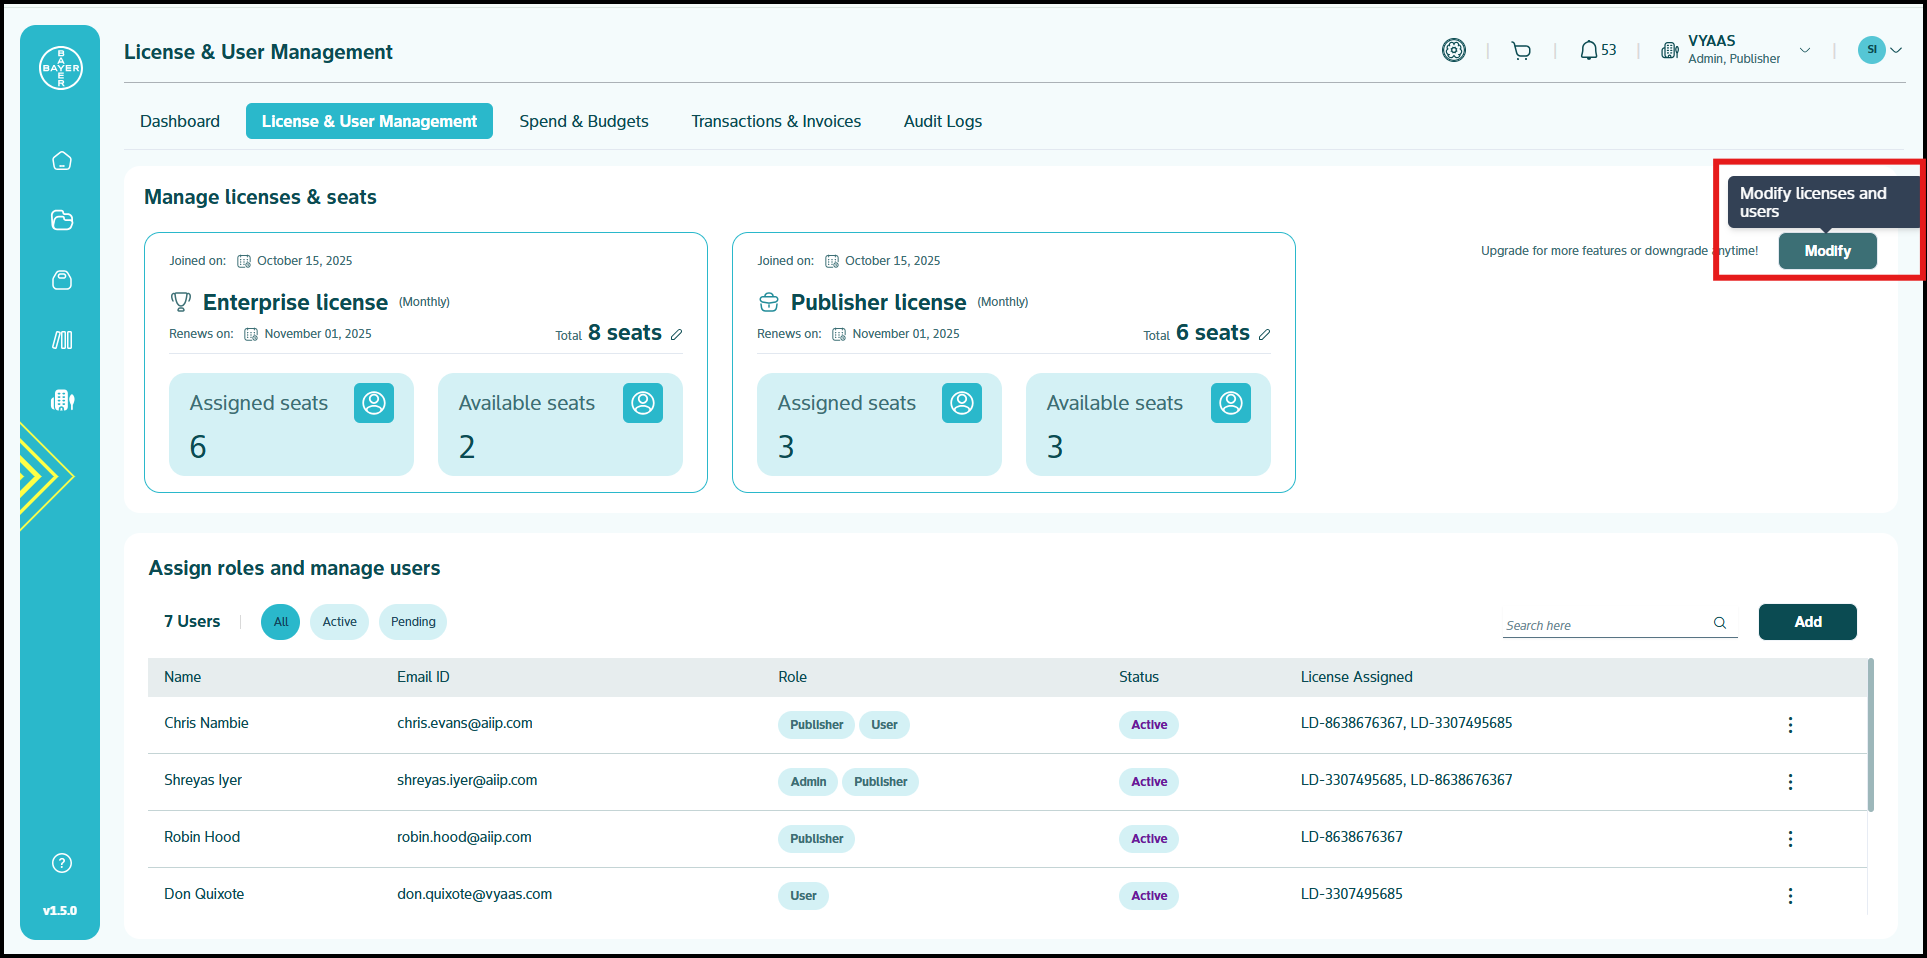
Click "Modify" to adjust your subscription
-
-
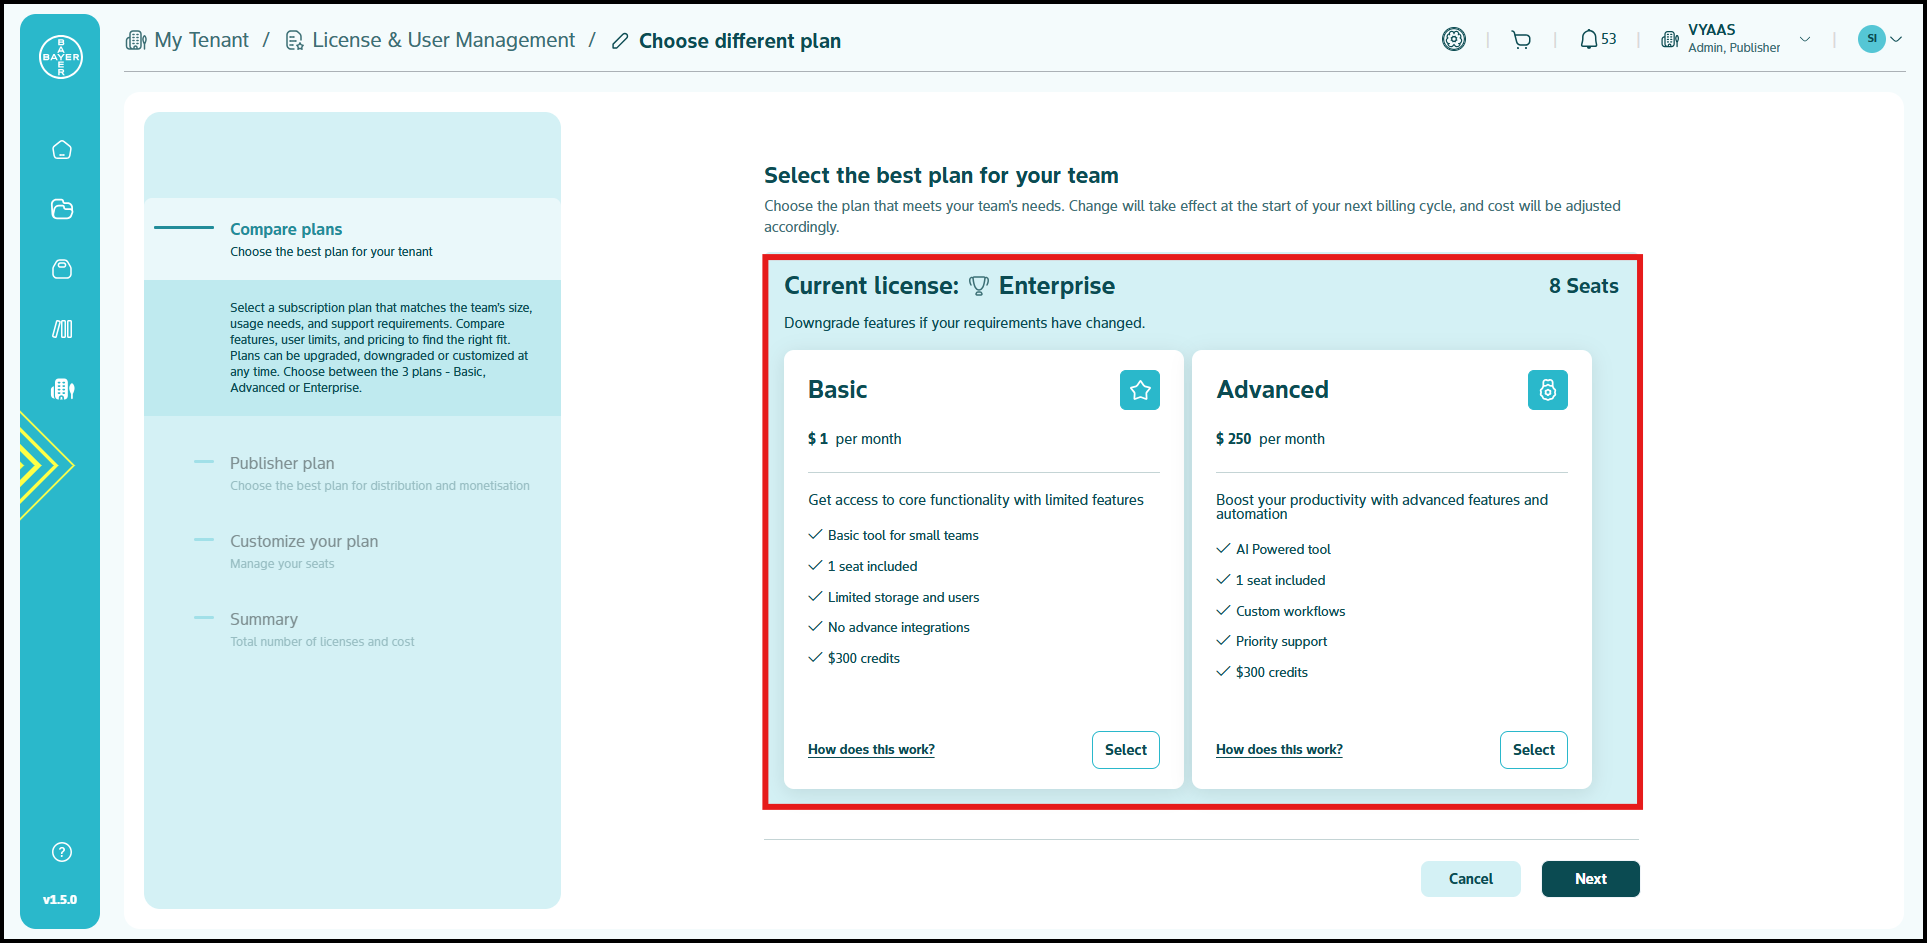
Select the Appropriate Plan
- Review the side-by-side comparison of Basic, Advanced, and Enterprise tiers
- Identify which features best match your team's requirements
- Choose to upgrade or downgrade based on your current needs
-
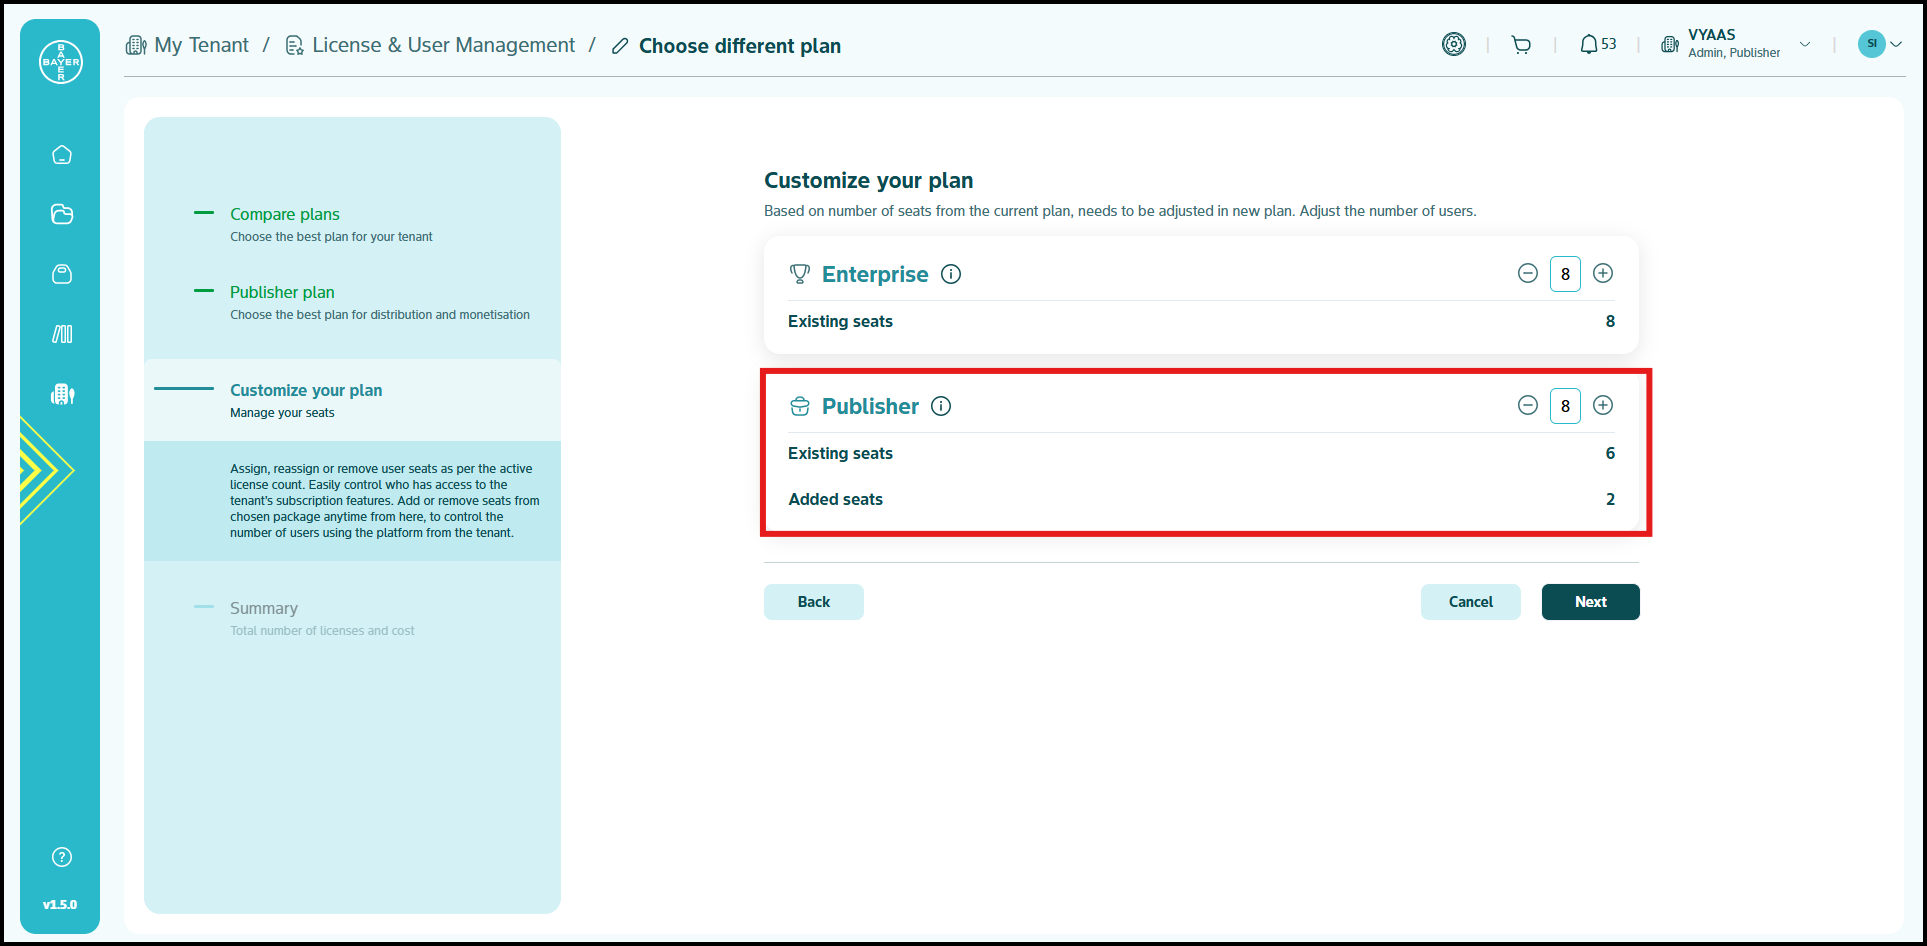
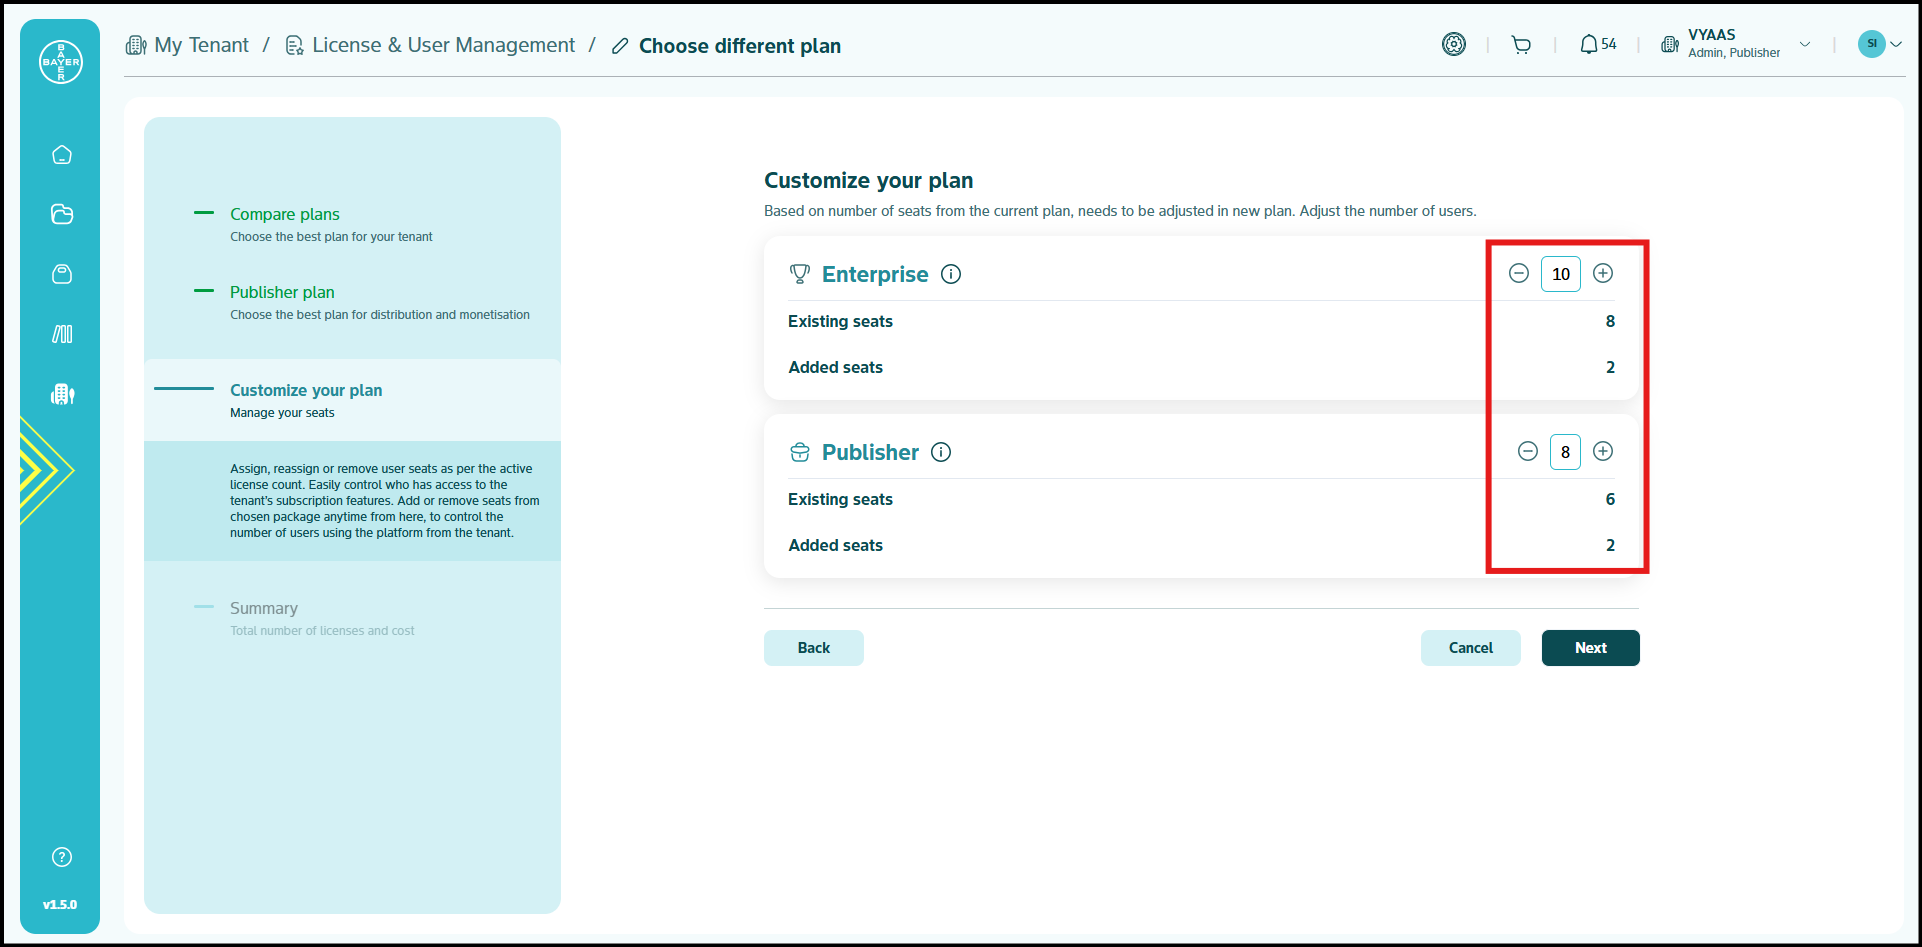
Customize Your License Allocation
- Adjust the number of seats for your selected base license
- Set the quantity of Publisher add-ons needed
- Tailor the subscription to match your exact team size
- Each user requires their own specific seat to be allocated i.e. choose the number of base license and publisher seats as per the team members you want to onboard to your tenant
-
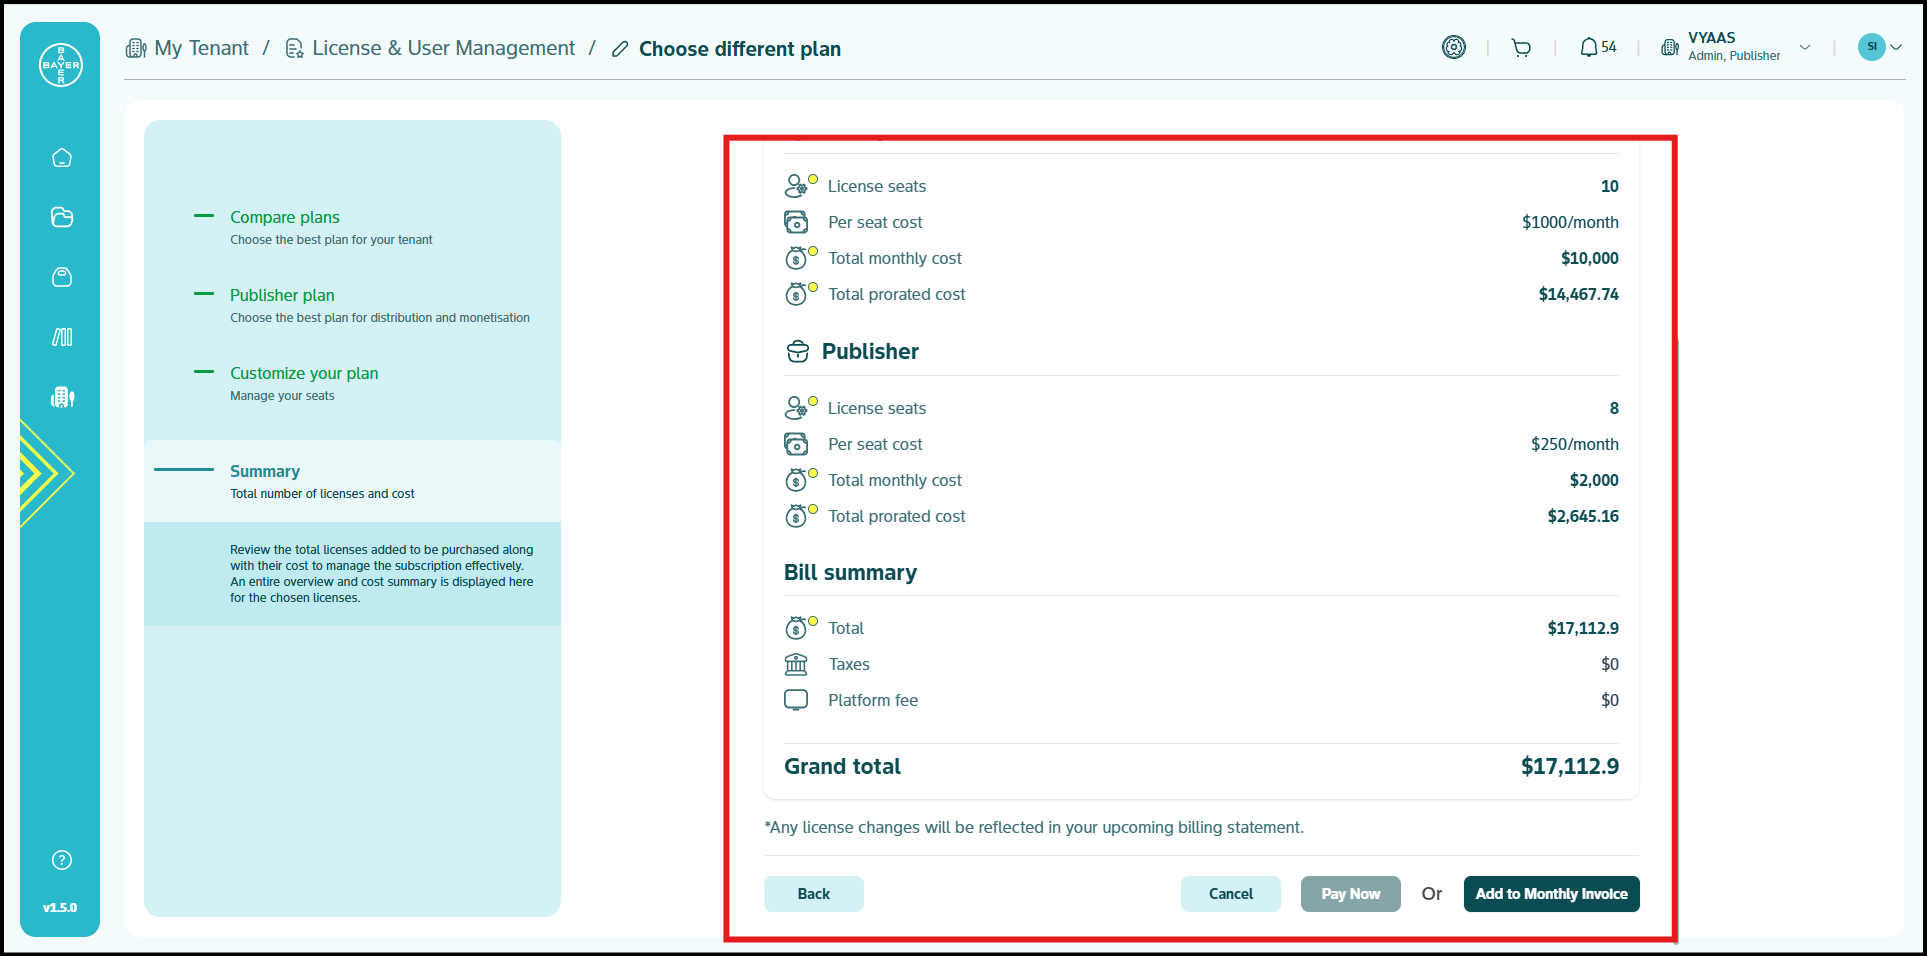
Review and Confirm Changes (Coming Soon)
- Examine the complete summary before finalizing
- Verify total licenses, associated costs, and effective dates
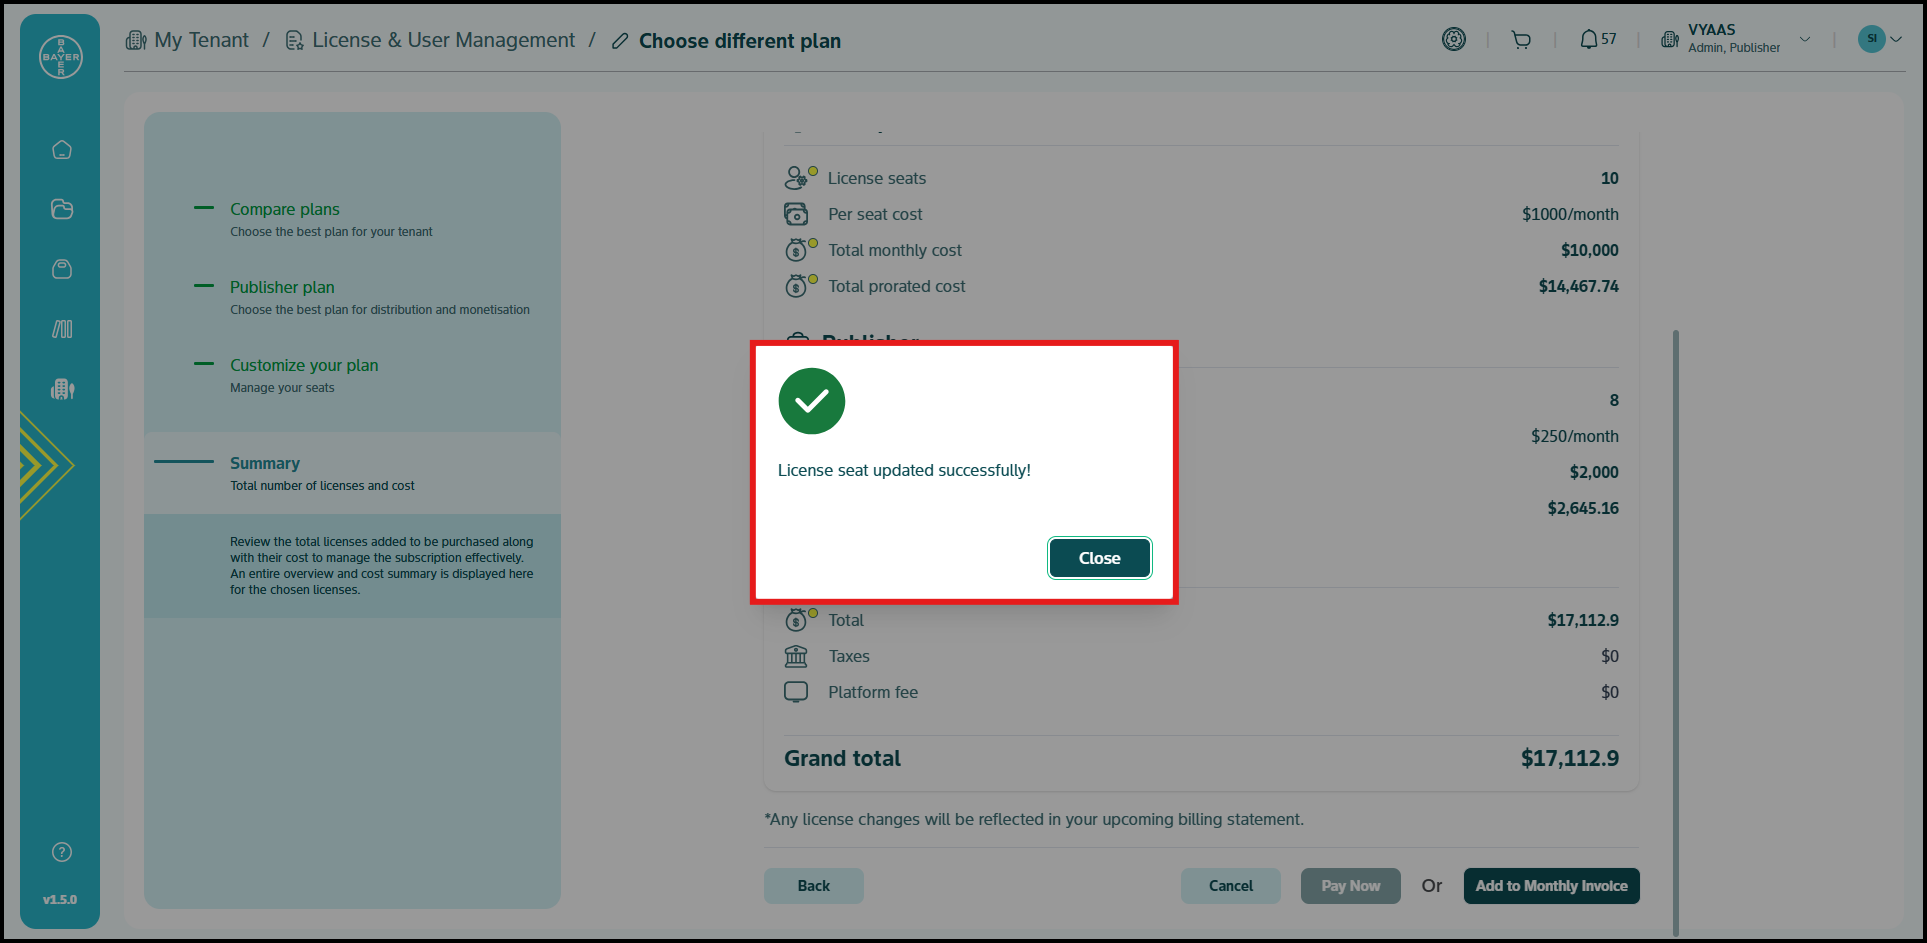
- Submit your changes when everything looks correct
-
For License Subscription and payment.Click here for more details.
-
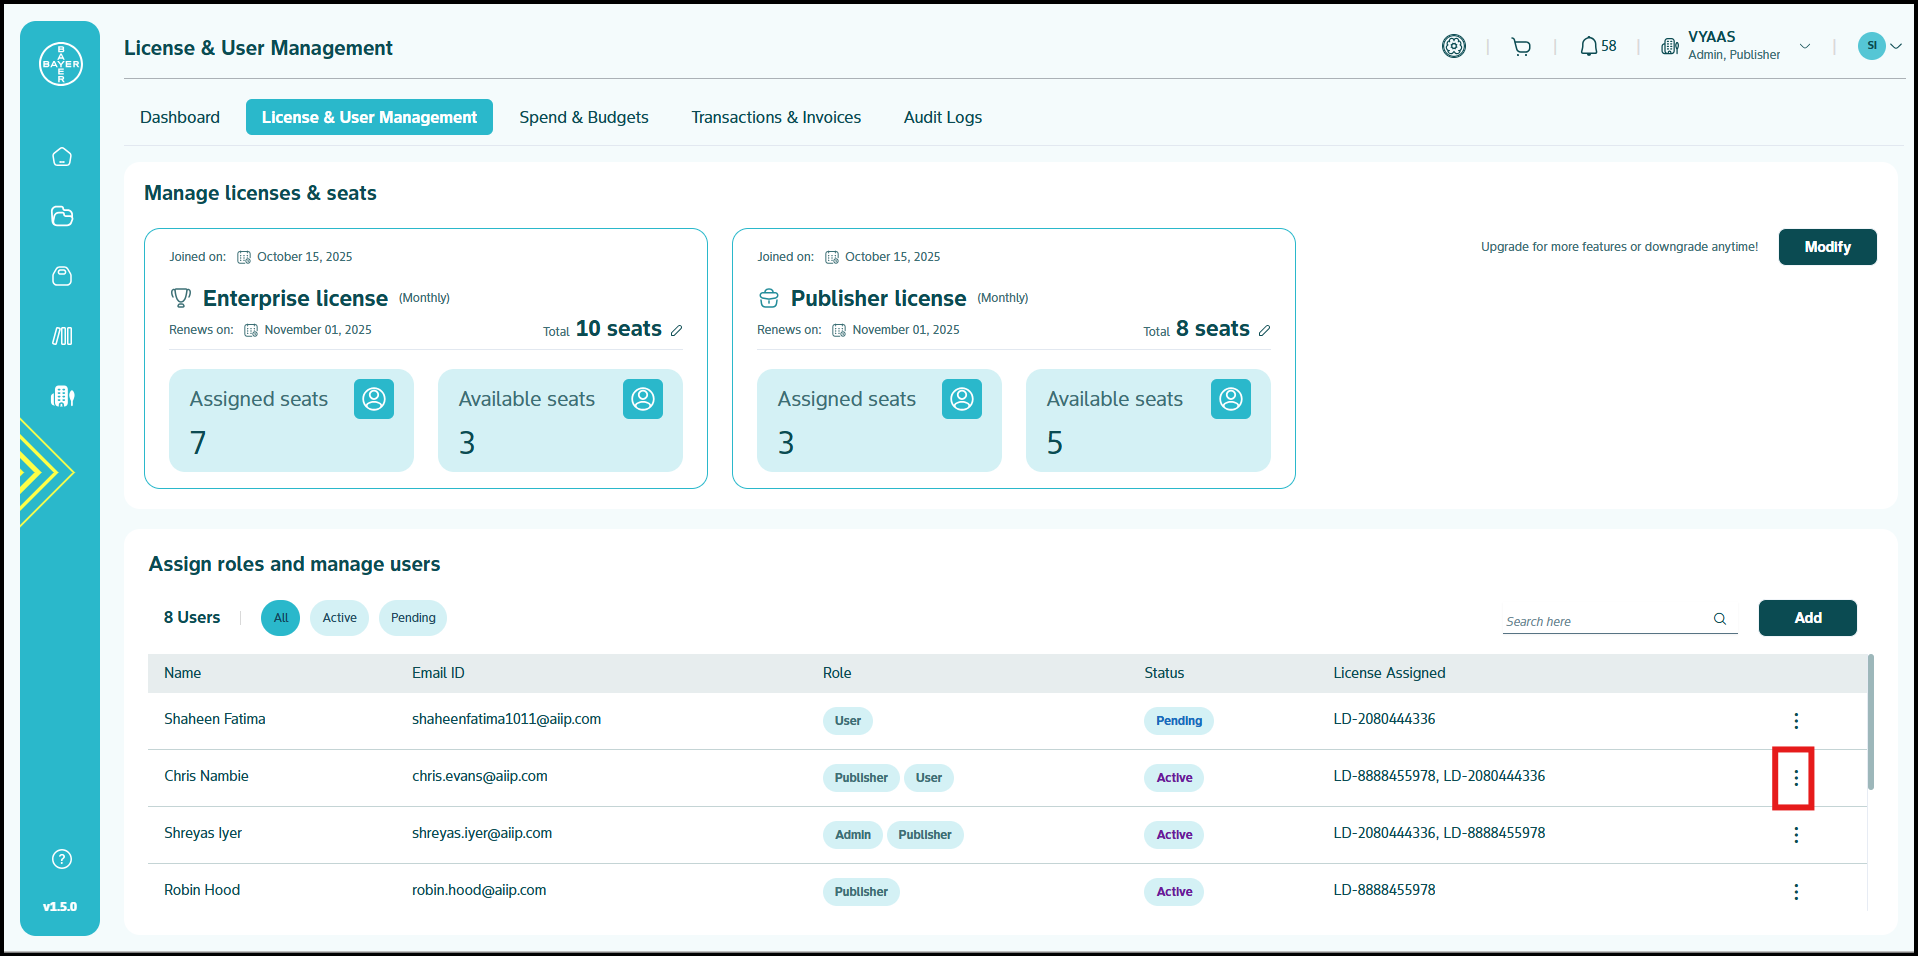
Seats Addition or Removal
- Once a license has been purchased, you can also choose to add or remove seats as per your team requirements. This can be done same as the above mentioned steps or you can directly click the edit icon next to the total seats count and edit your license seats.
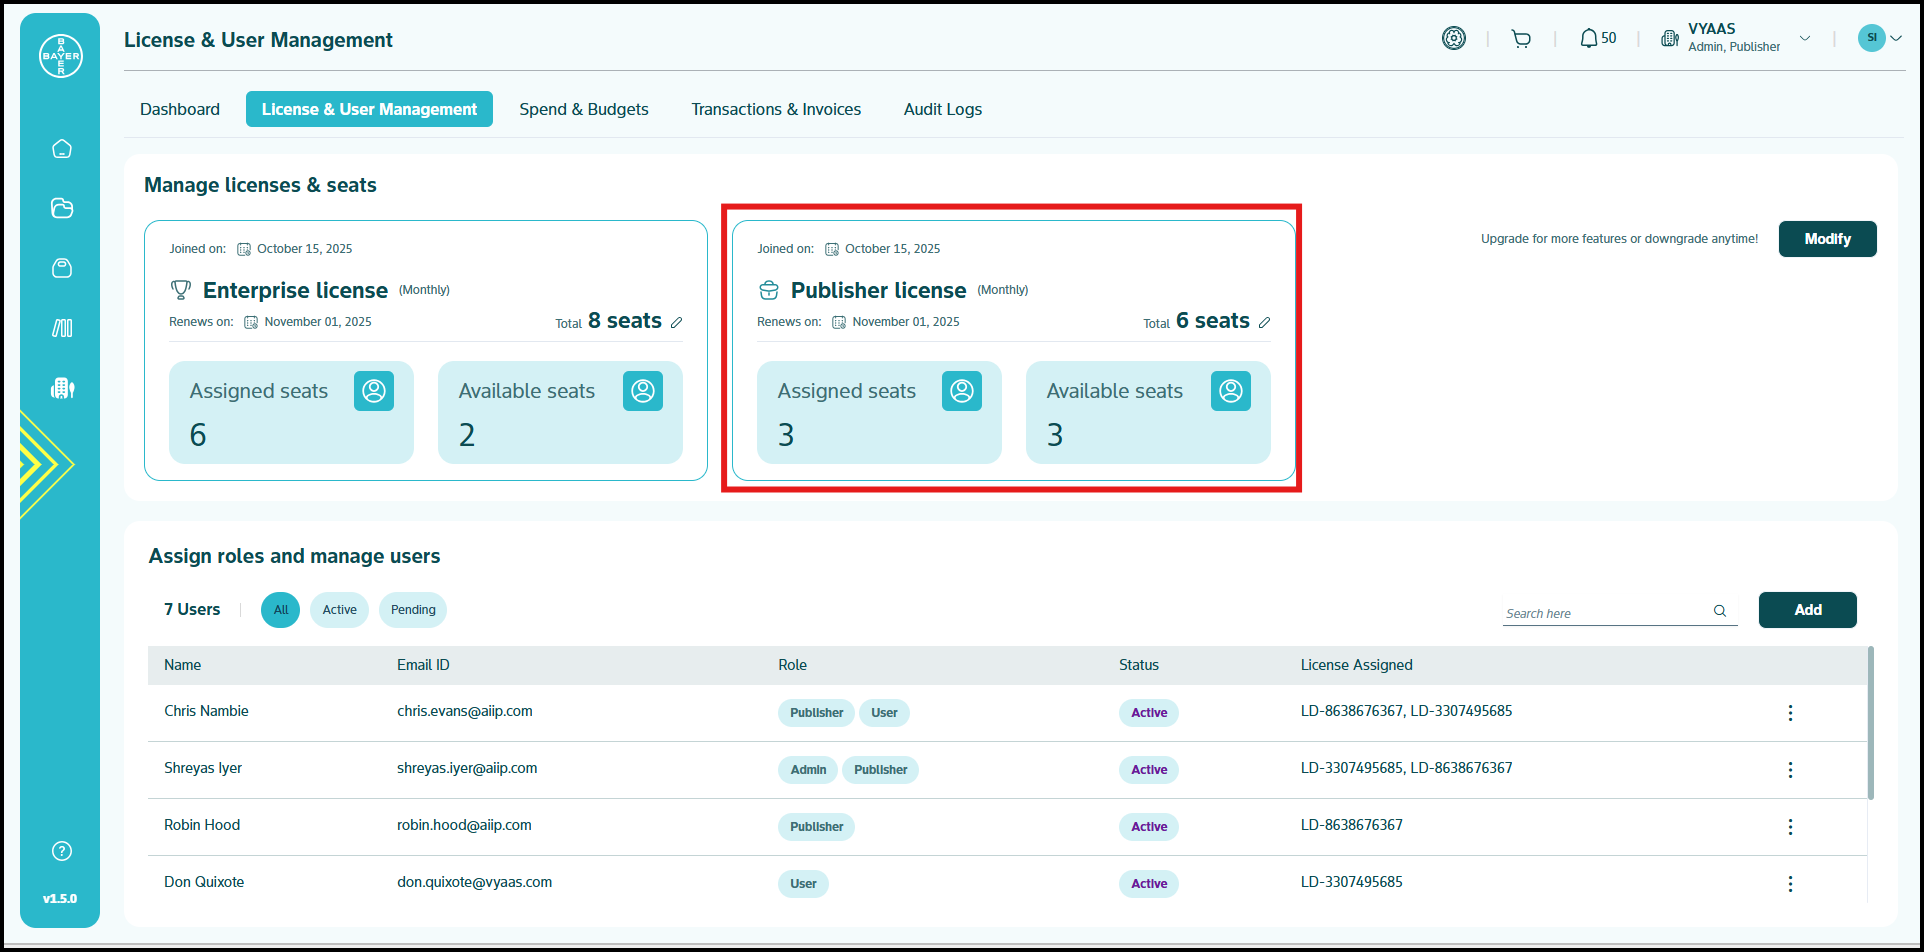
Publisher Capabilities
To publish your listings on the Marketplace:
- Add the Publisher role to users who need to publish content on the Marketplace
- Determine how many Publisher add-ons/seats your team requires
Follow these steps to configure publisher capabilities:
- Locate the Publisher license plan section under 'Manage Licenses and Seats' column.
- Click on "Add a Publisher License to your plan"
- The license configuration request has been forwarded to the team. An update will be provided shortly.
Important Considerations
- License Upgrades: Changes become active the following day
- License Downgrades: Changes take effect at the beginning of the next month
- User Access: Team members receive permissions based on their assigned license type
- Licenses are auto-renewed at the end of the month. In the upcoming releases, users will be able to control their license renewal and stop them as needed (Coming Soon).
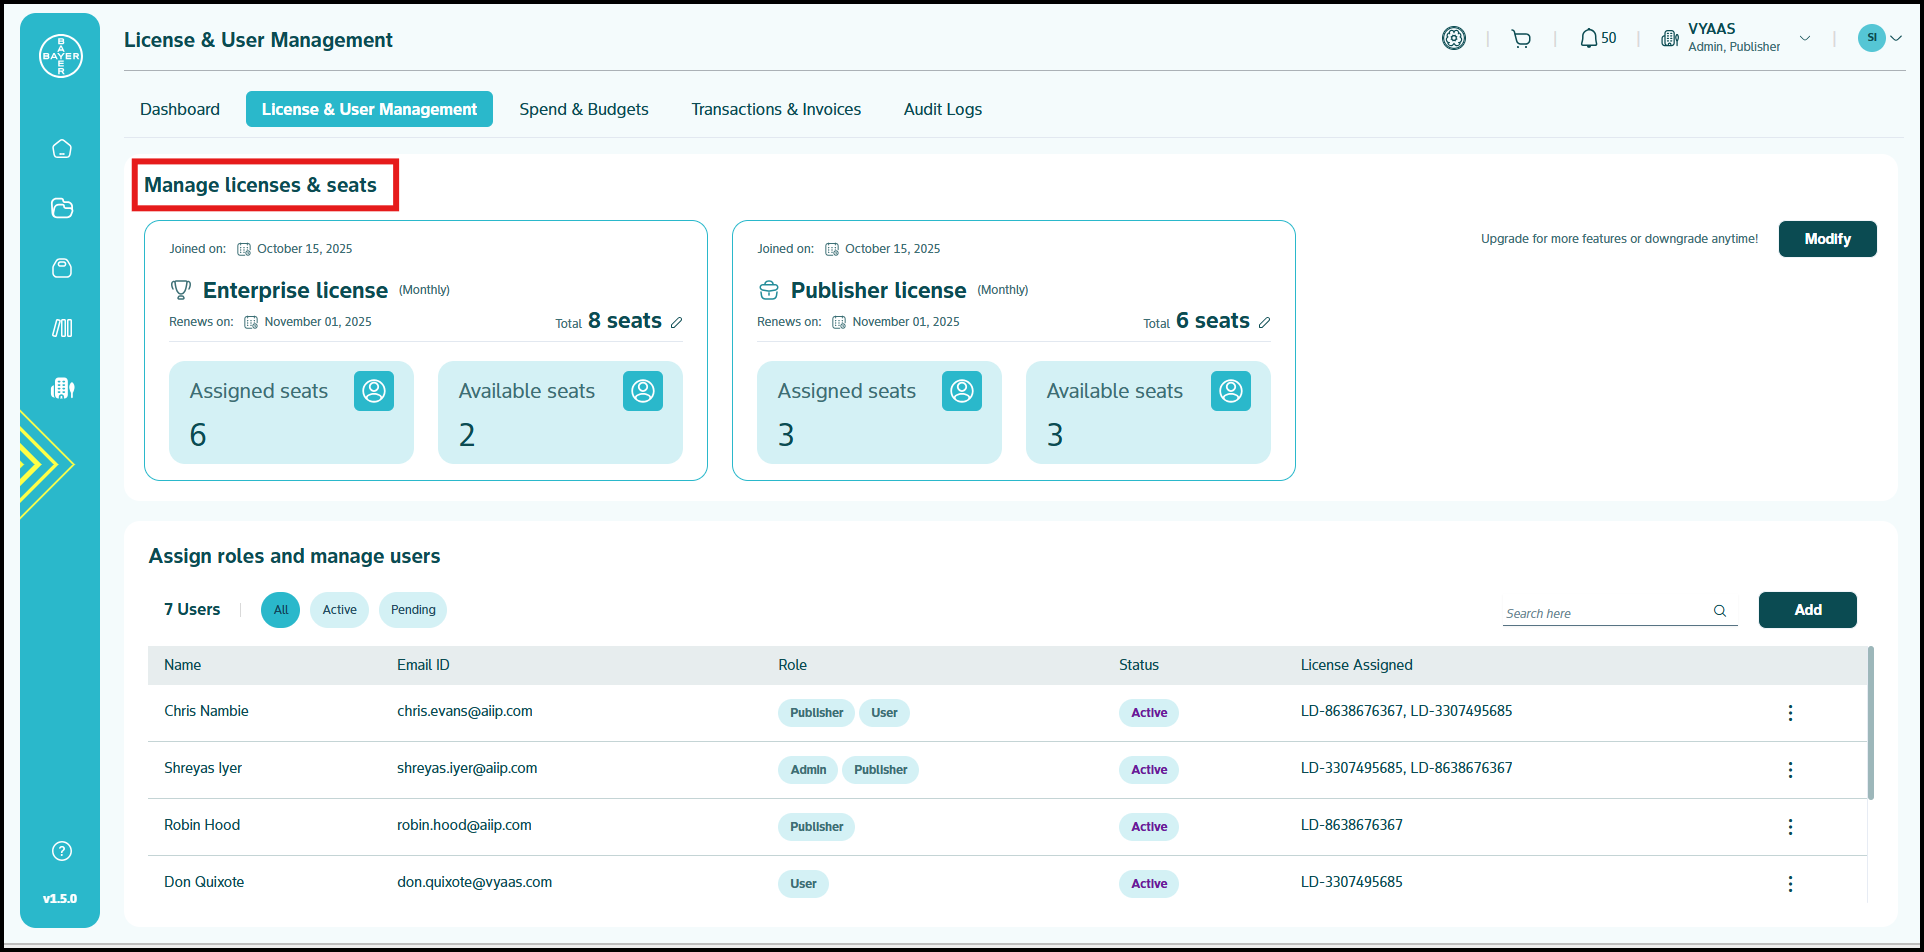
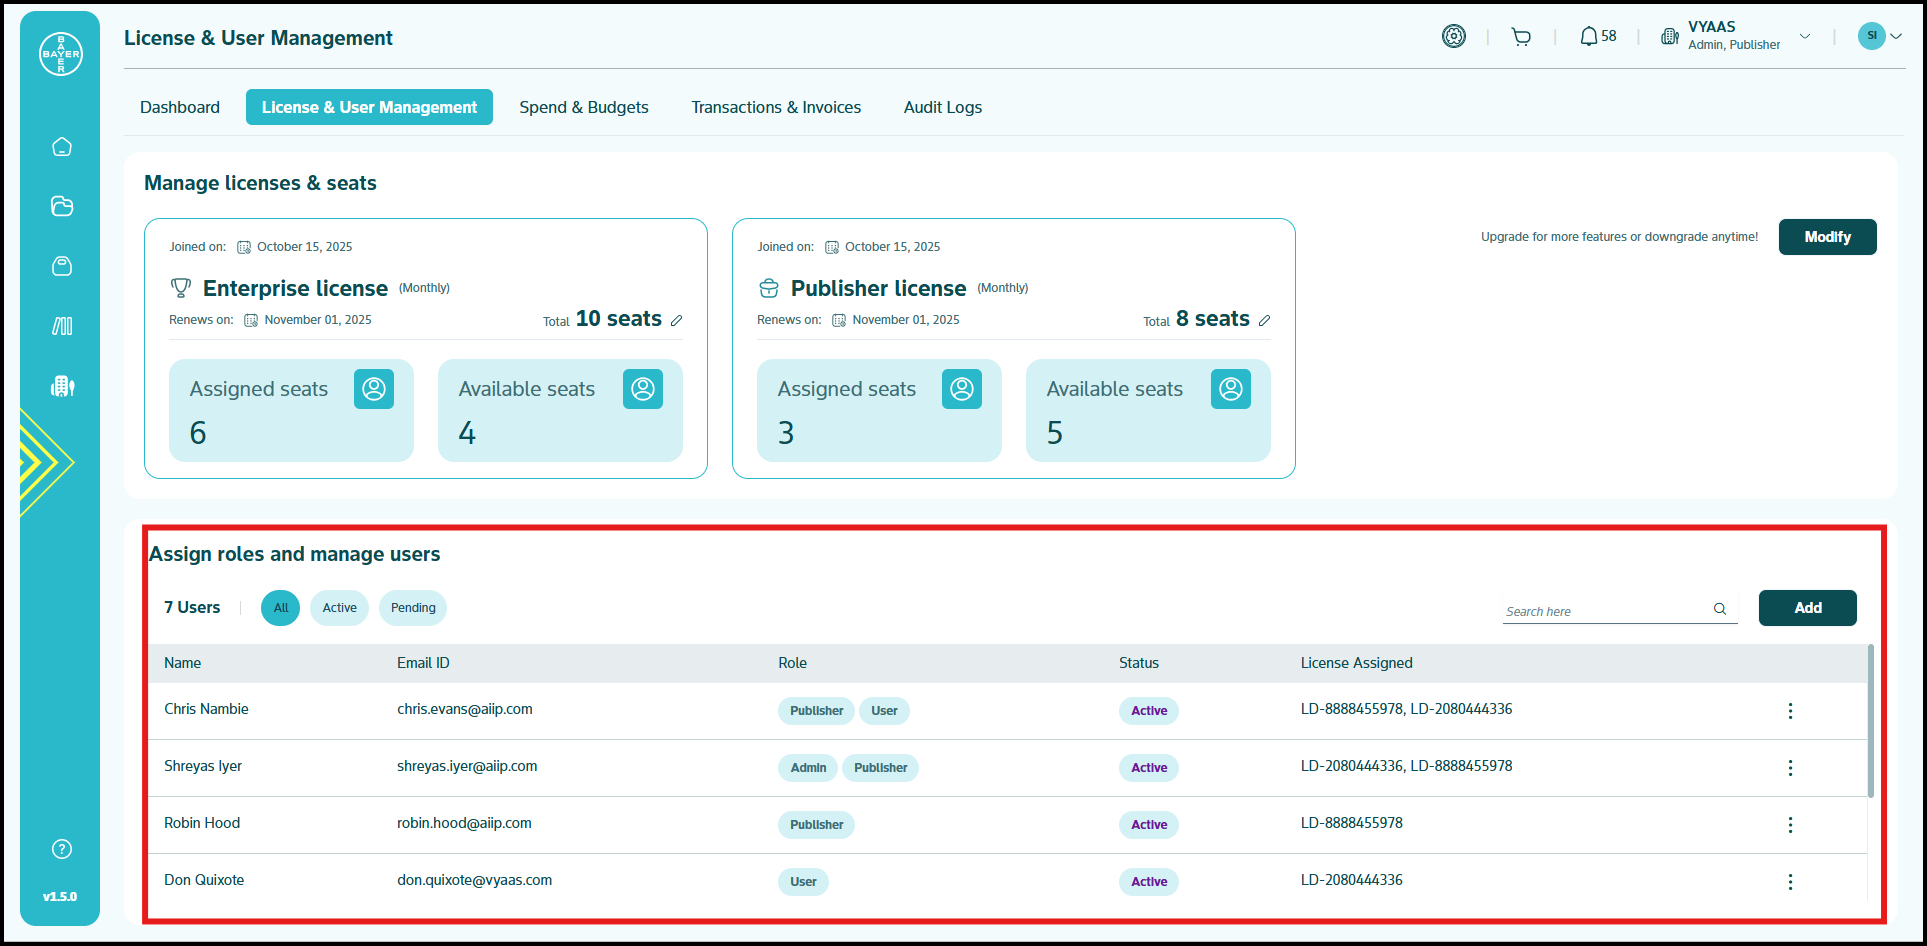
User Management
The intuitive dashboard provides a clear overview of your tenant's users allocated against their individual license seats.
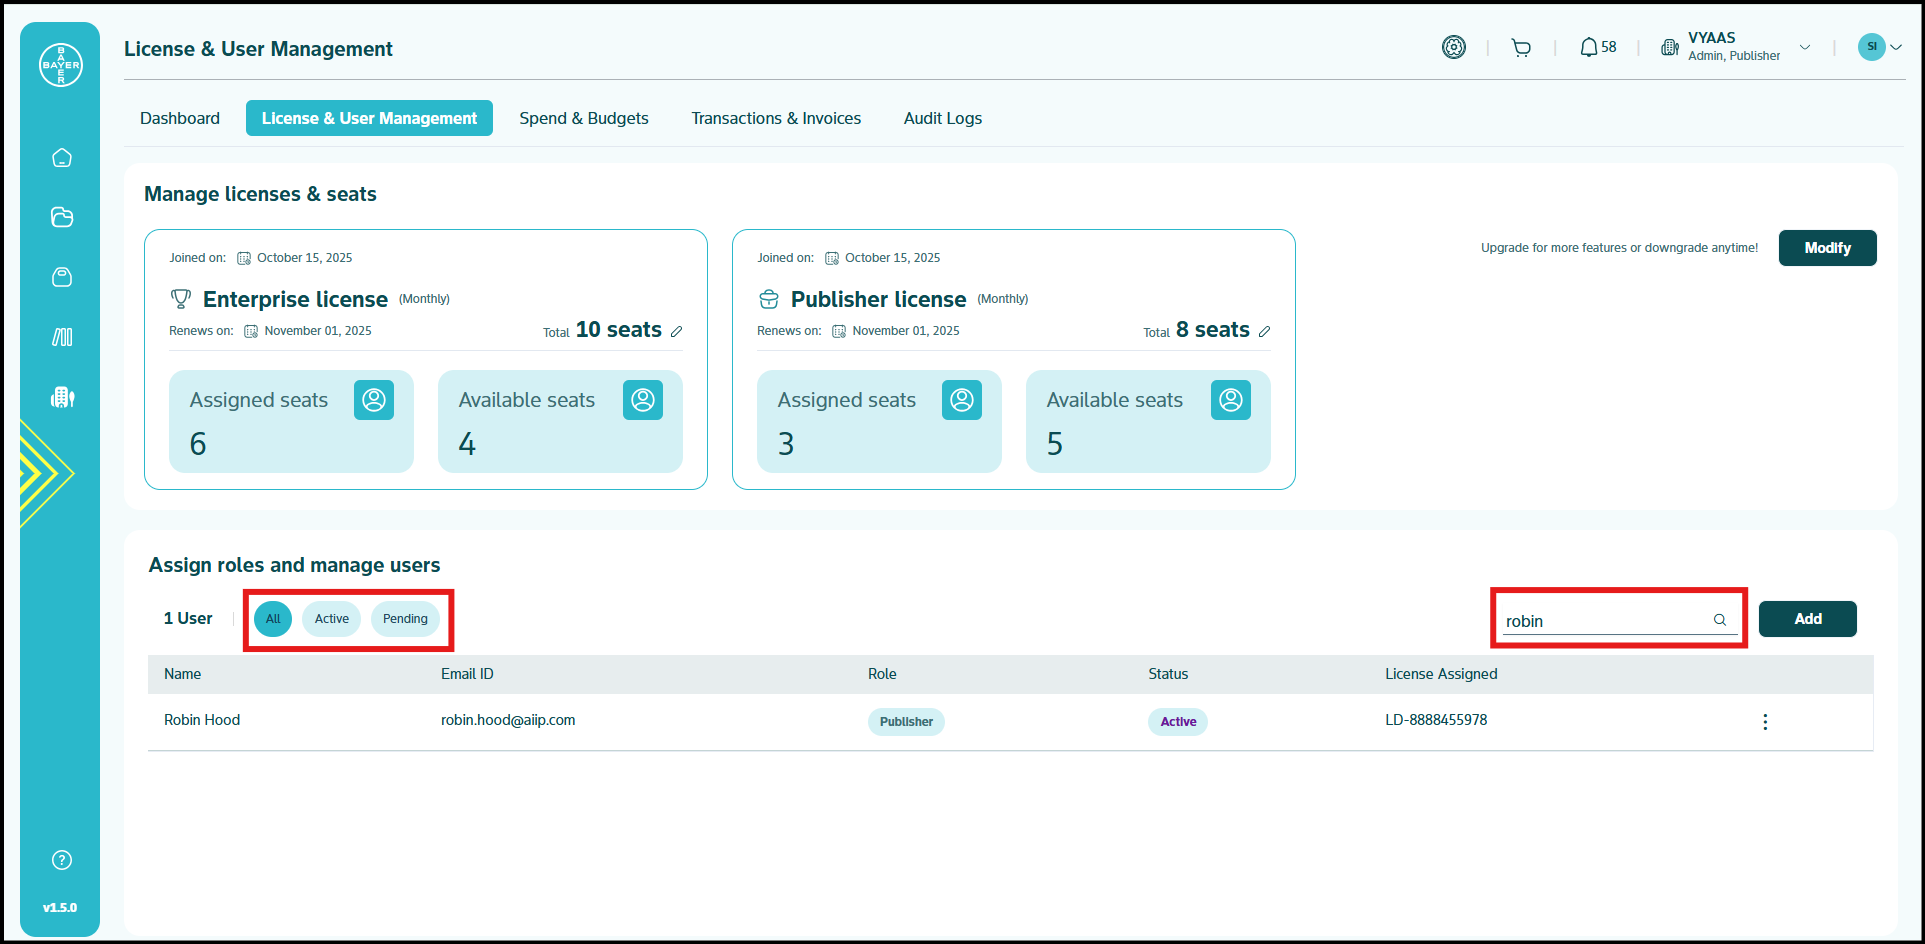
Finding and Filtering Users
Locate specific team members with powerful filtering tools:
- Toggle between user status views (All/Active/Pending)
- Use real-time search to find users by name or email
- View comprehensive user information in an organized table
- Monitor each user's current status
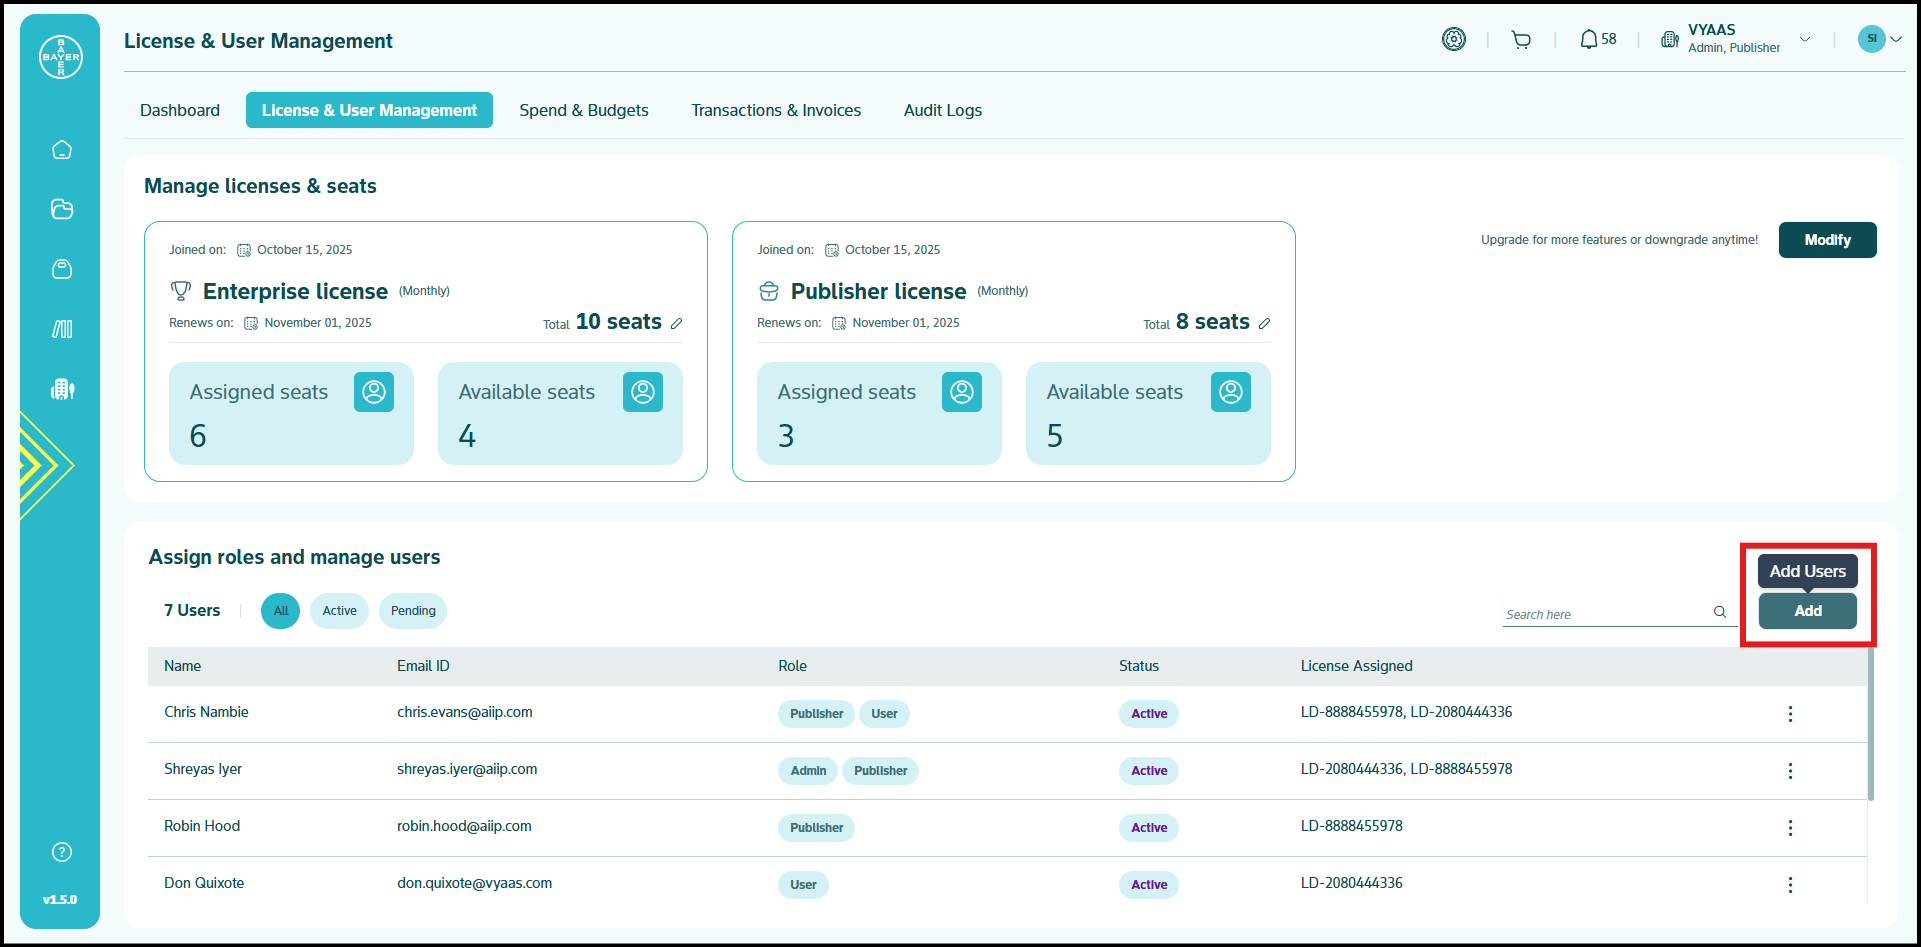
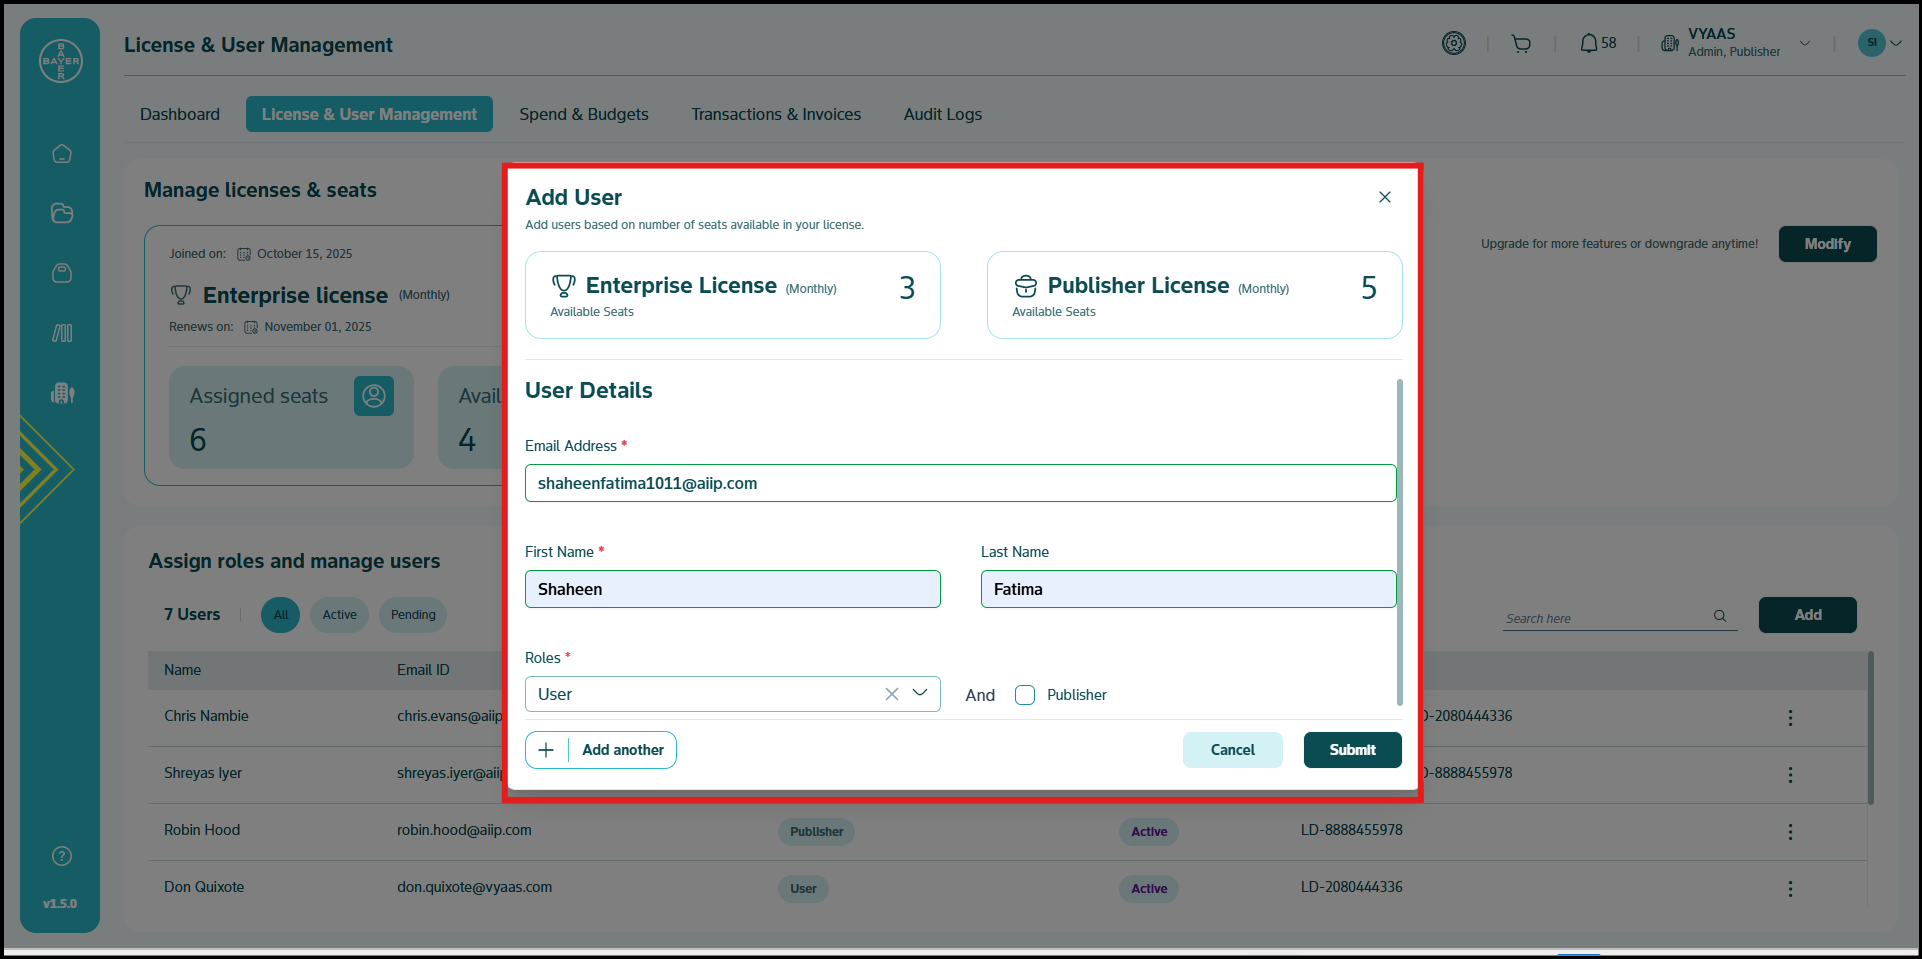
Expanding Your Team/Adding Users
Add new users with a streamlined process:
-
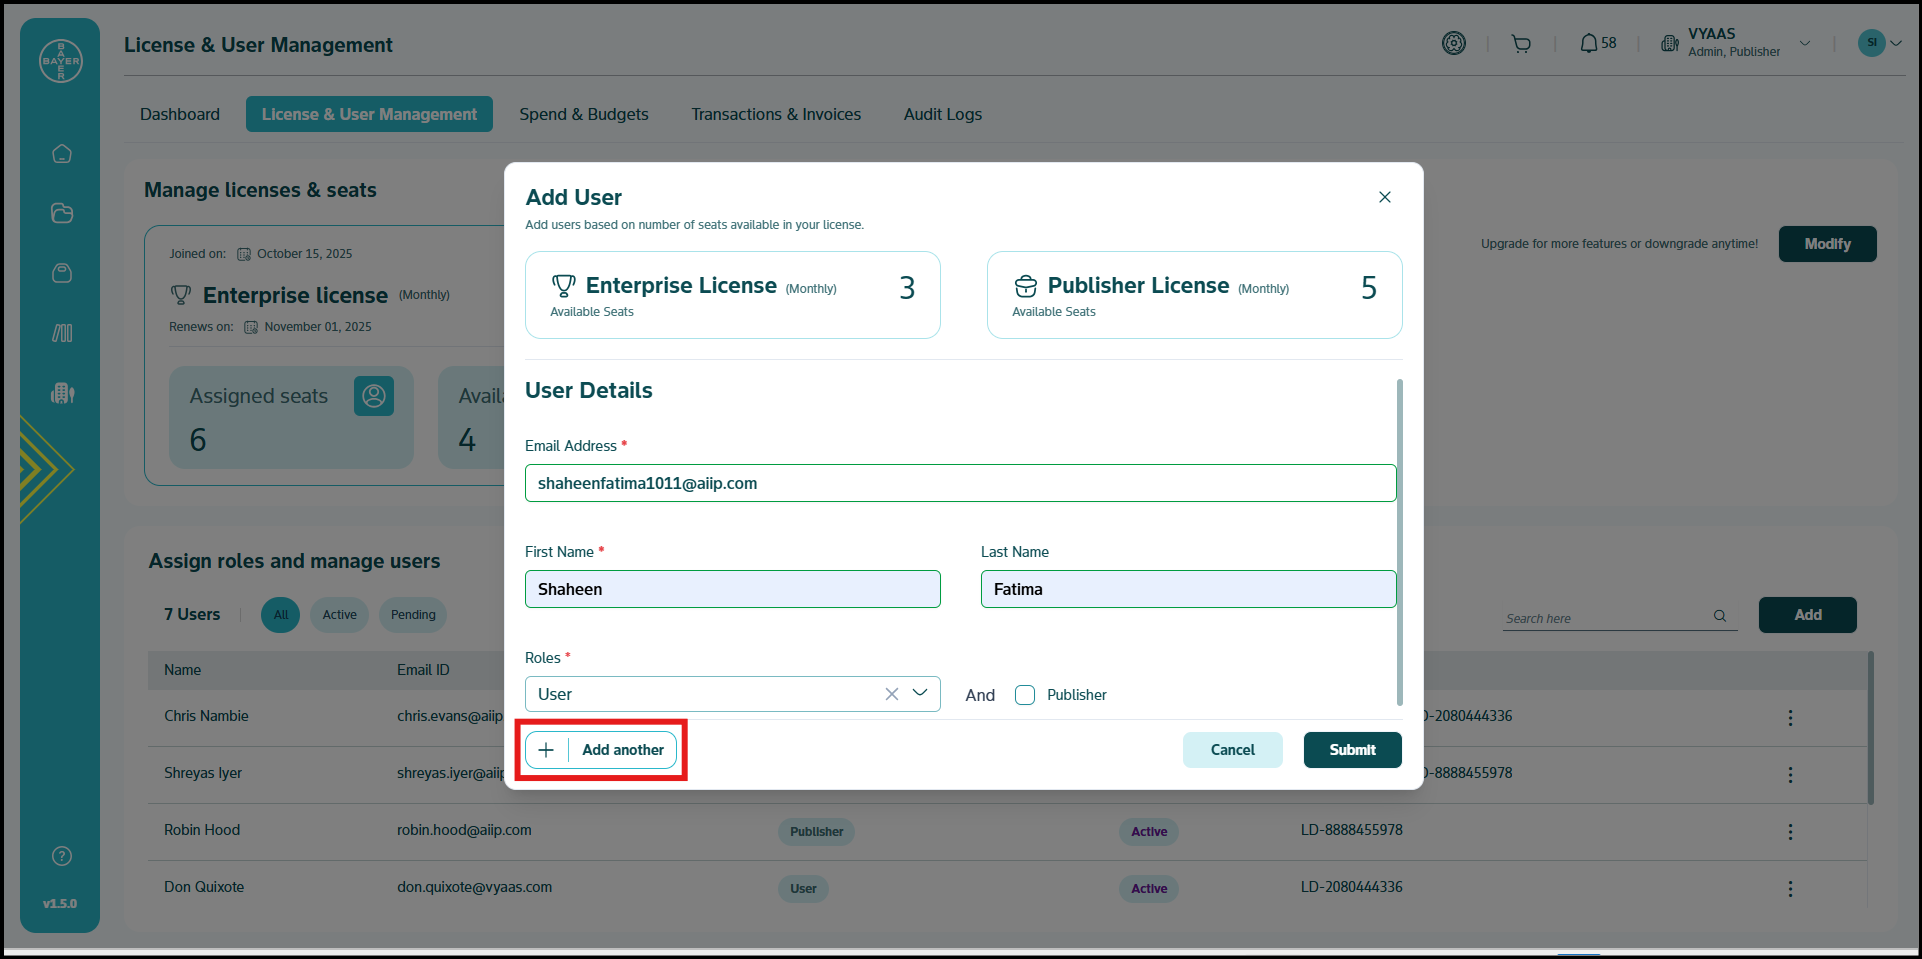
Click the "Add" button to launch the registration form
-
Check the available seats for your licenses and accordingly enter user details:
- Email address
- First and last name
- Appropriate role assignment
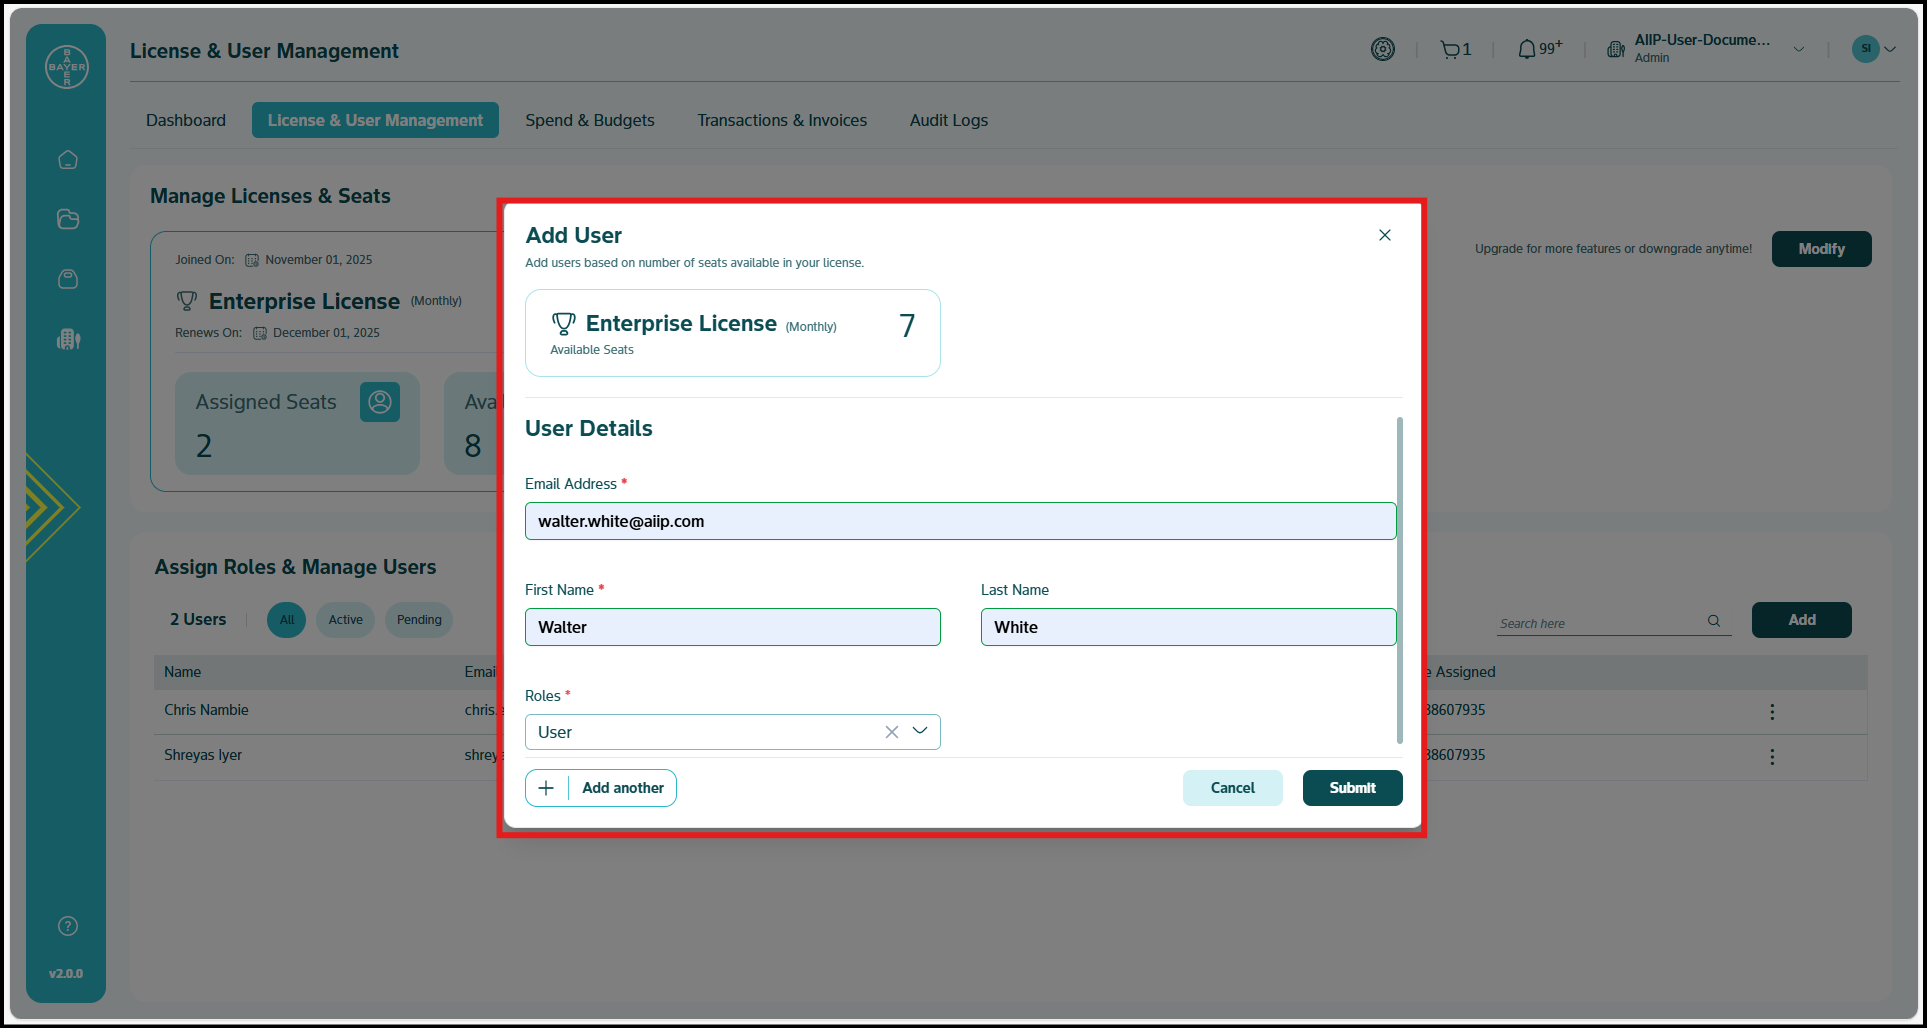
-
Use the "Add Another" button to include multiple users in a single session
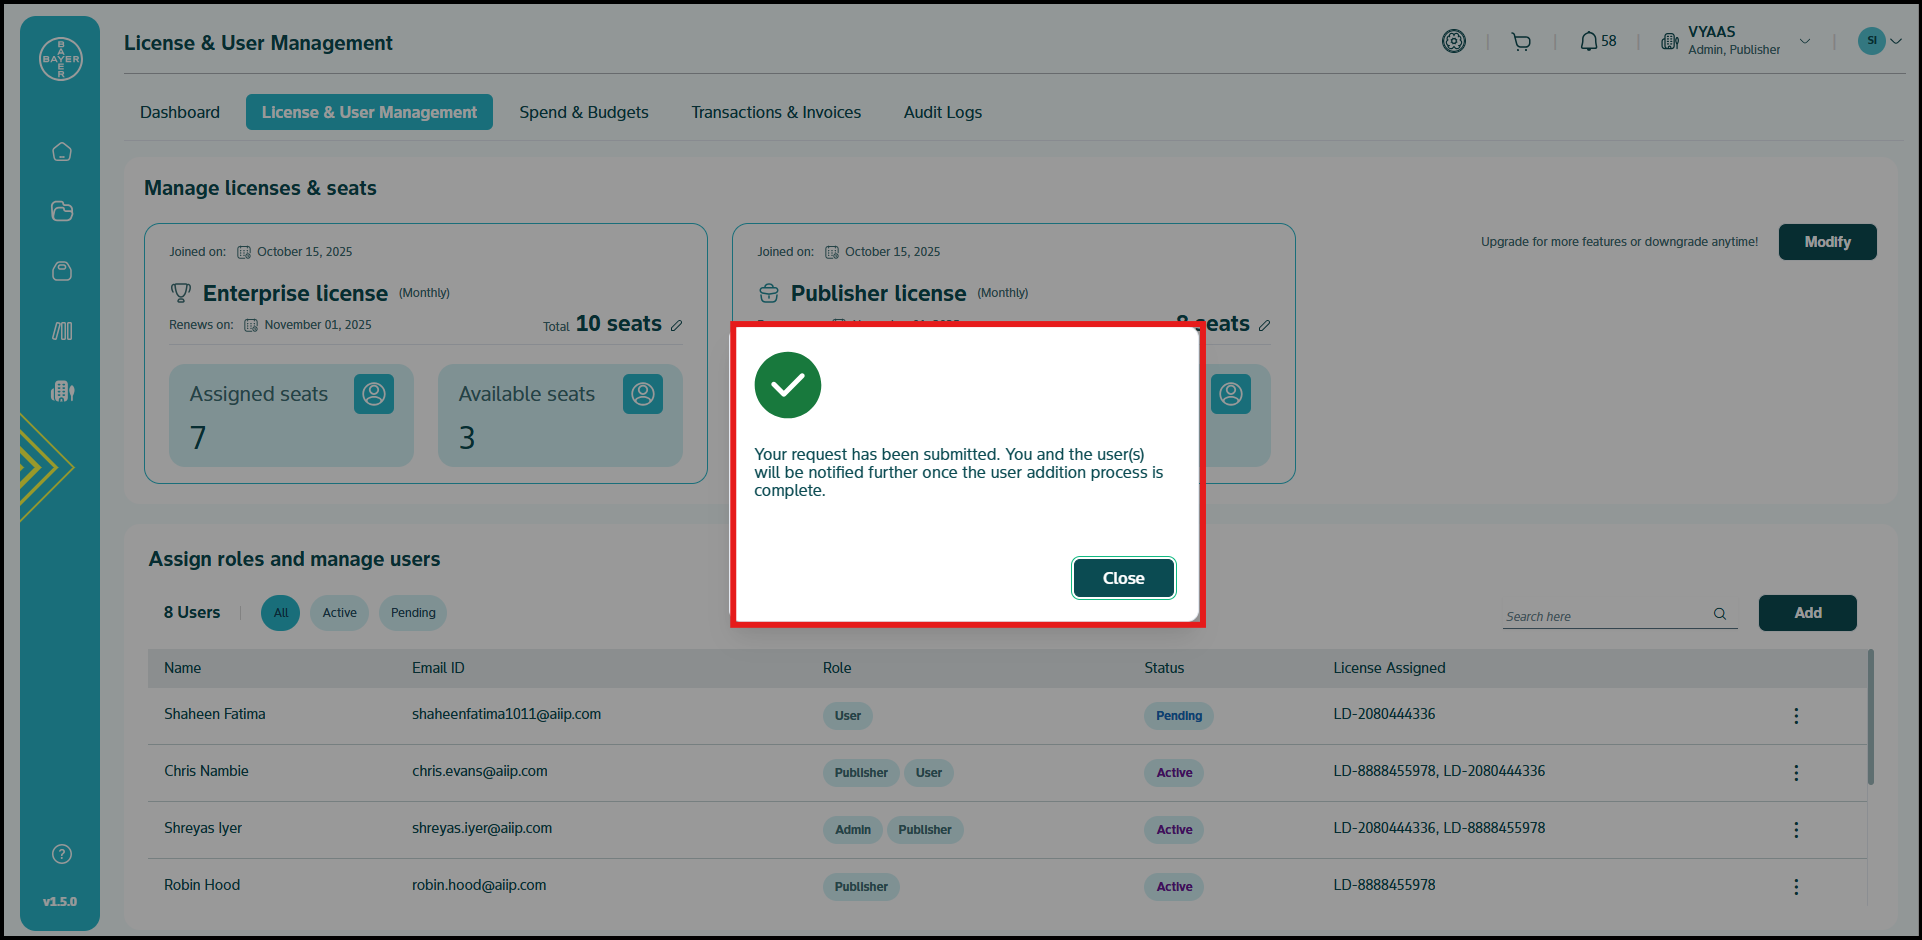
-
Click "Submit" when all user details are complete
Editing and Removing Users
Modify or remove users through these simple actions:
-
Locate the user in your management table
-
Click the three-dot menu icon in the status column
-
Select from available options:
- Edit: Update the user's name or role assignment and click "Submit" to save changes
- Remove: Revoke the user's access to your tenant
-
Changes will take effect immediately across your tenant environment
Understanding User Roles
Assign the appropriate access level to each team member:
- Admin: Full management capabilities for tenant settings and user control
- User: Standard platform access for everyday work and project participation
- Publisher: Special capabilities for creating and publishing content on the Marketplace
Note
Each tenant must maintain at least one tenant admin at all times. If your tenant has only one user, that user must be assigned the admin role.
Each role is designed to provide precisely the right permissions needed for different responsibilities, balancing security with productivity.
Best Practices
- Regularly review your license utilization to ensure your team is on the most appropriate plan
- Assign roles based on actual user responsibilities rather than organizational titles
- Maintain a current list of admins to ensure continuity of tenant management
- Consider starting new users with basic access, upgrading as their needs evolve
With these powerful license and user management tools, you can maintain complete control over your tenant while ensuring everyone has exactly the resources they need to succeed.