Detailed Guide
Tenant Administration
Tenant Management
Your tenant configuration affects all users and their platform experience within the tenant.
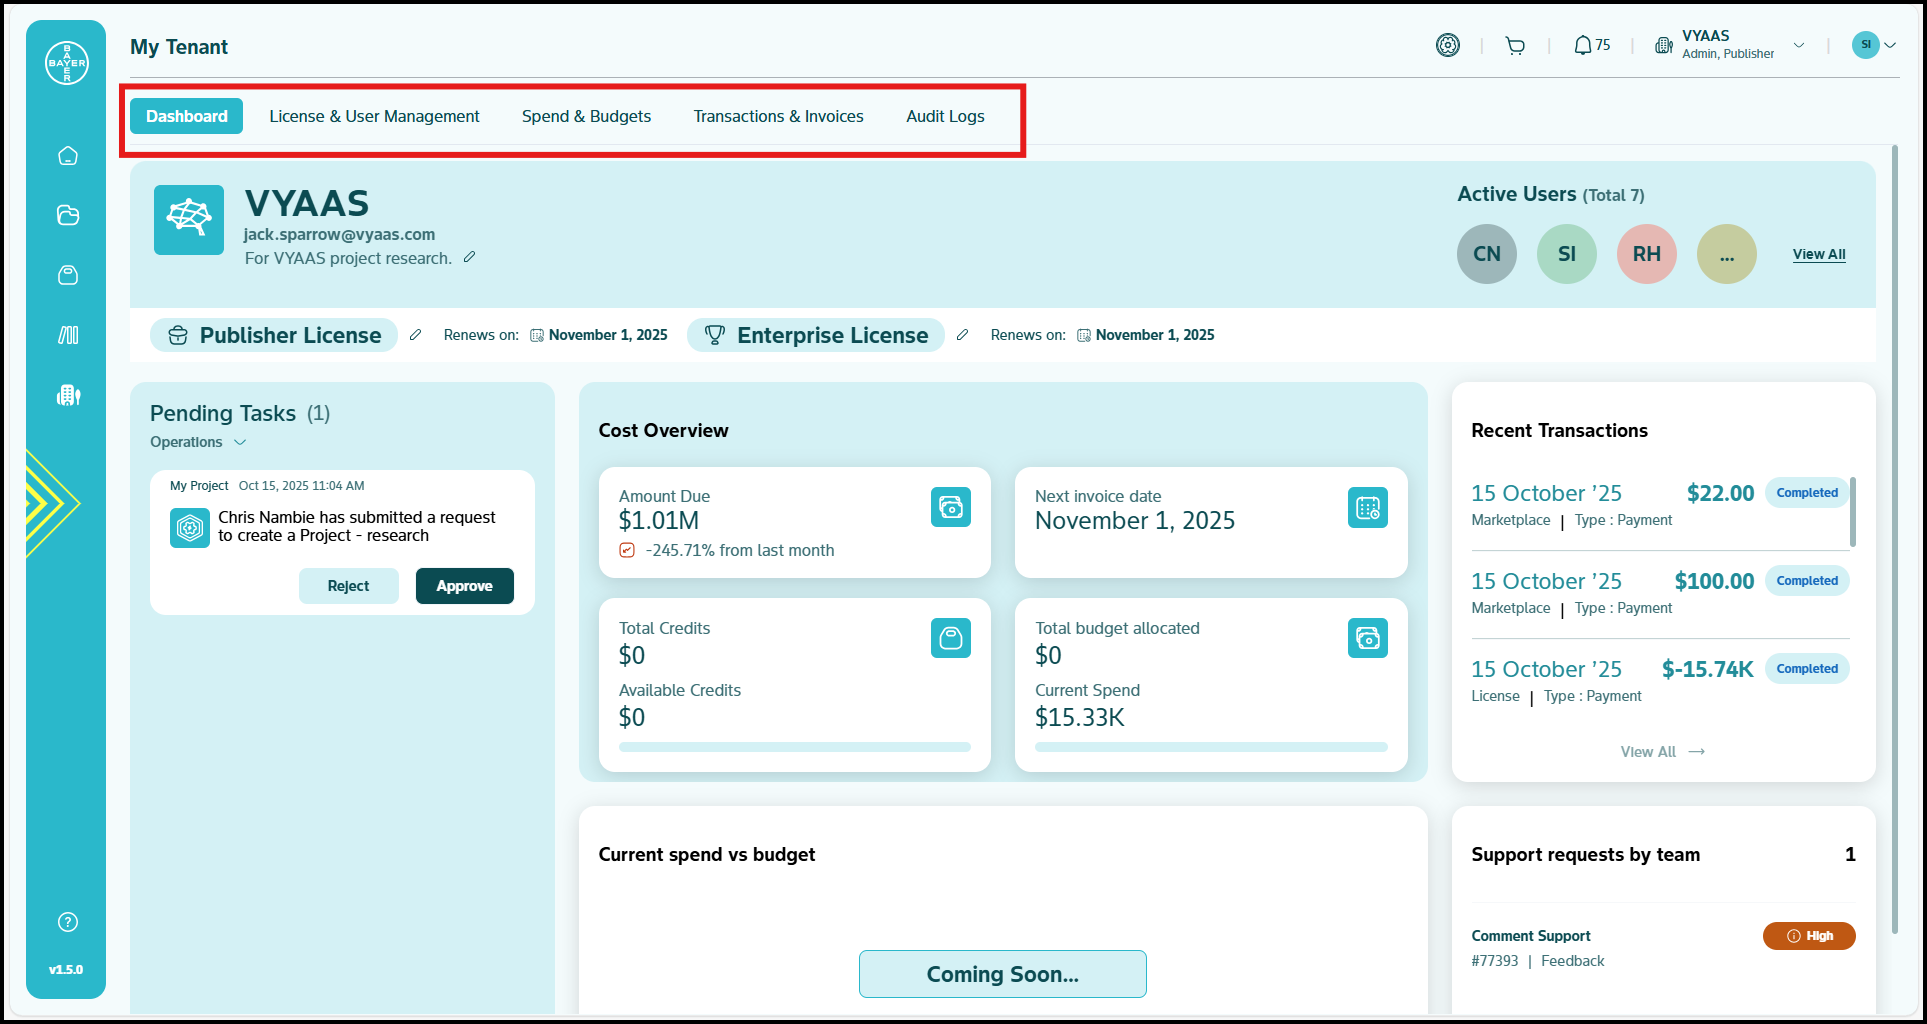
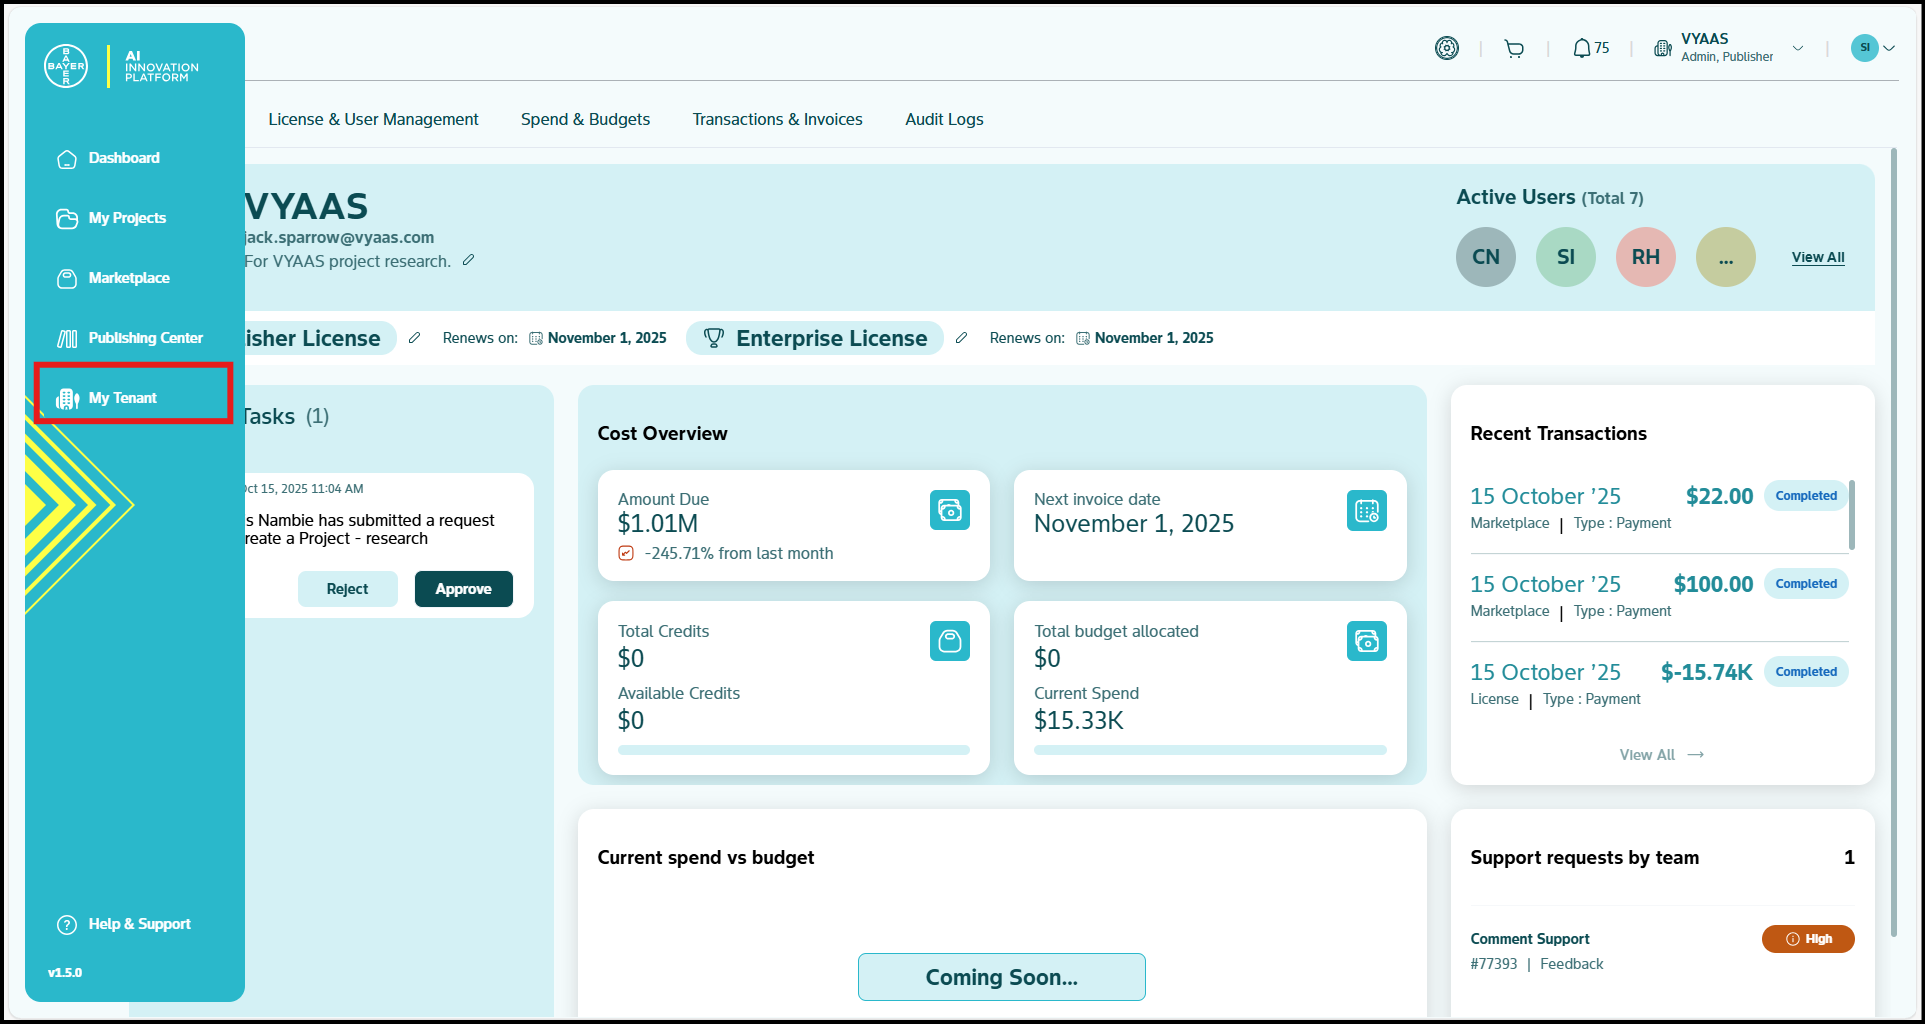
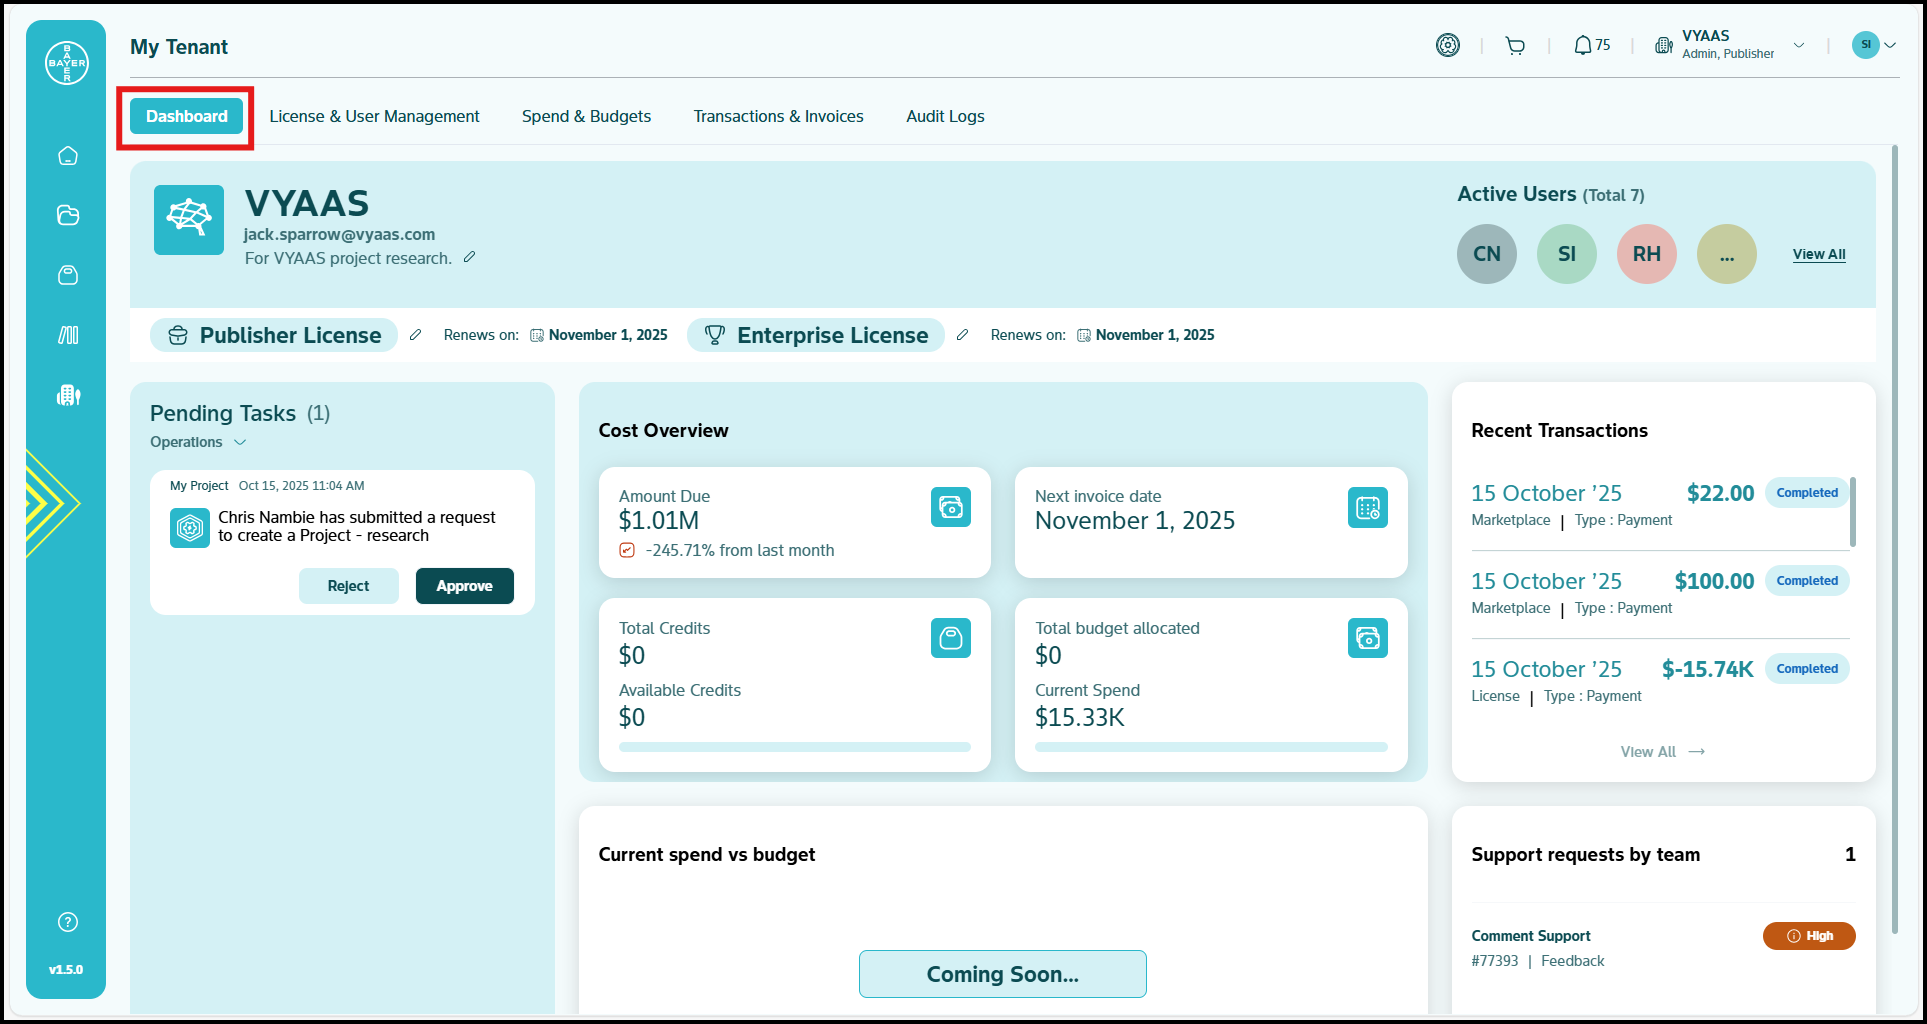
Accessing Tenant Settings
- Navigate to "My Tenant" from your Dashboard.

-
Review the main sections:
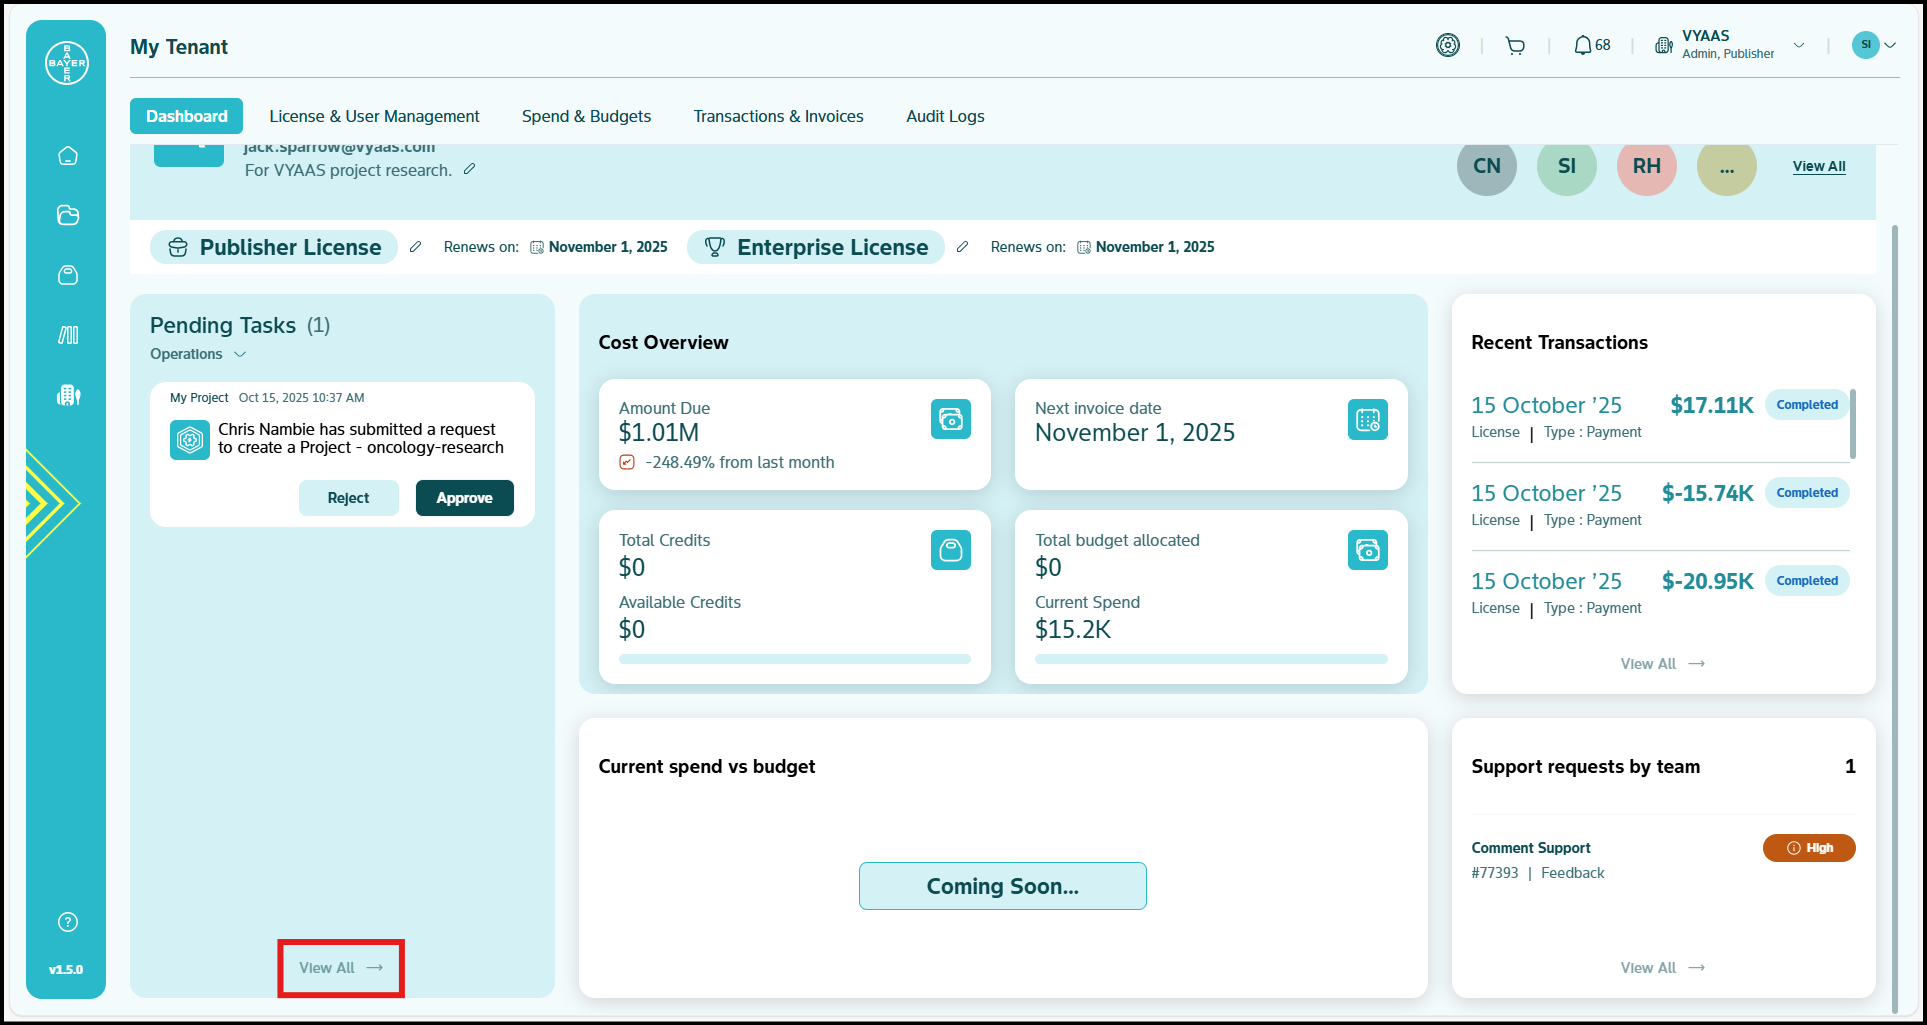
- Dashboard: Overview of tenant status and key metrics.
- User Management: User management across tenant.
- Spend and Budgets: Financial oversight and budget management.
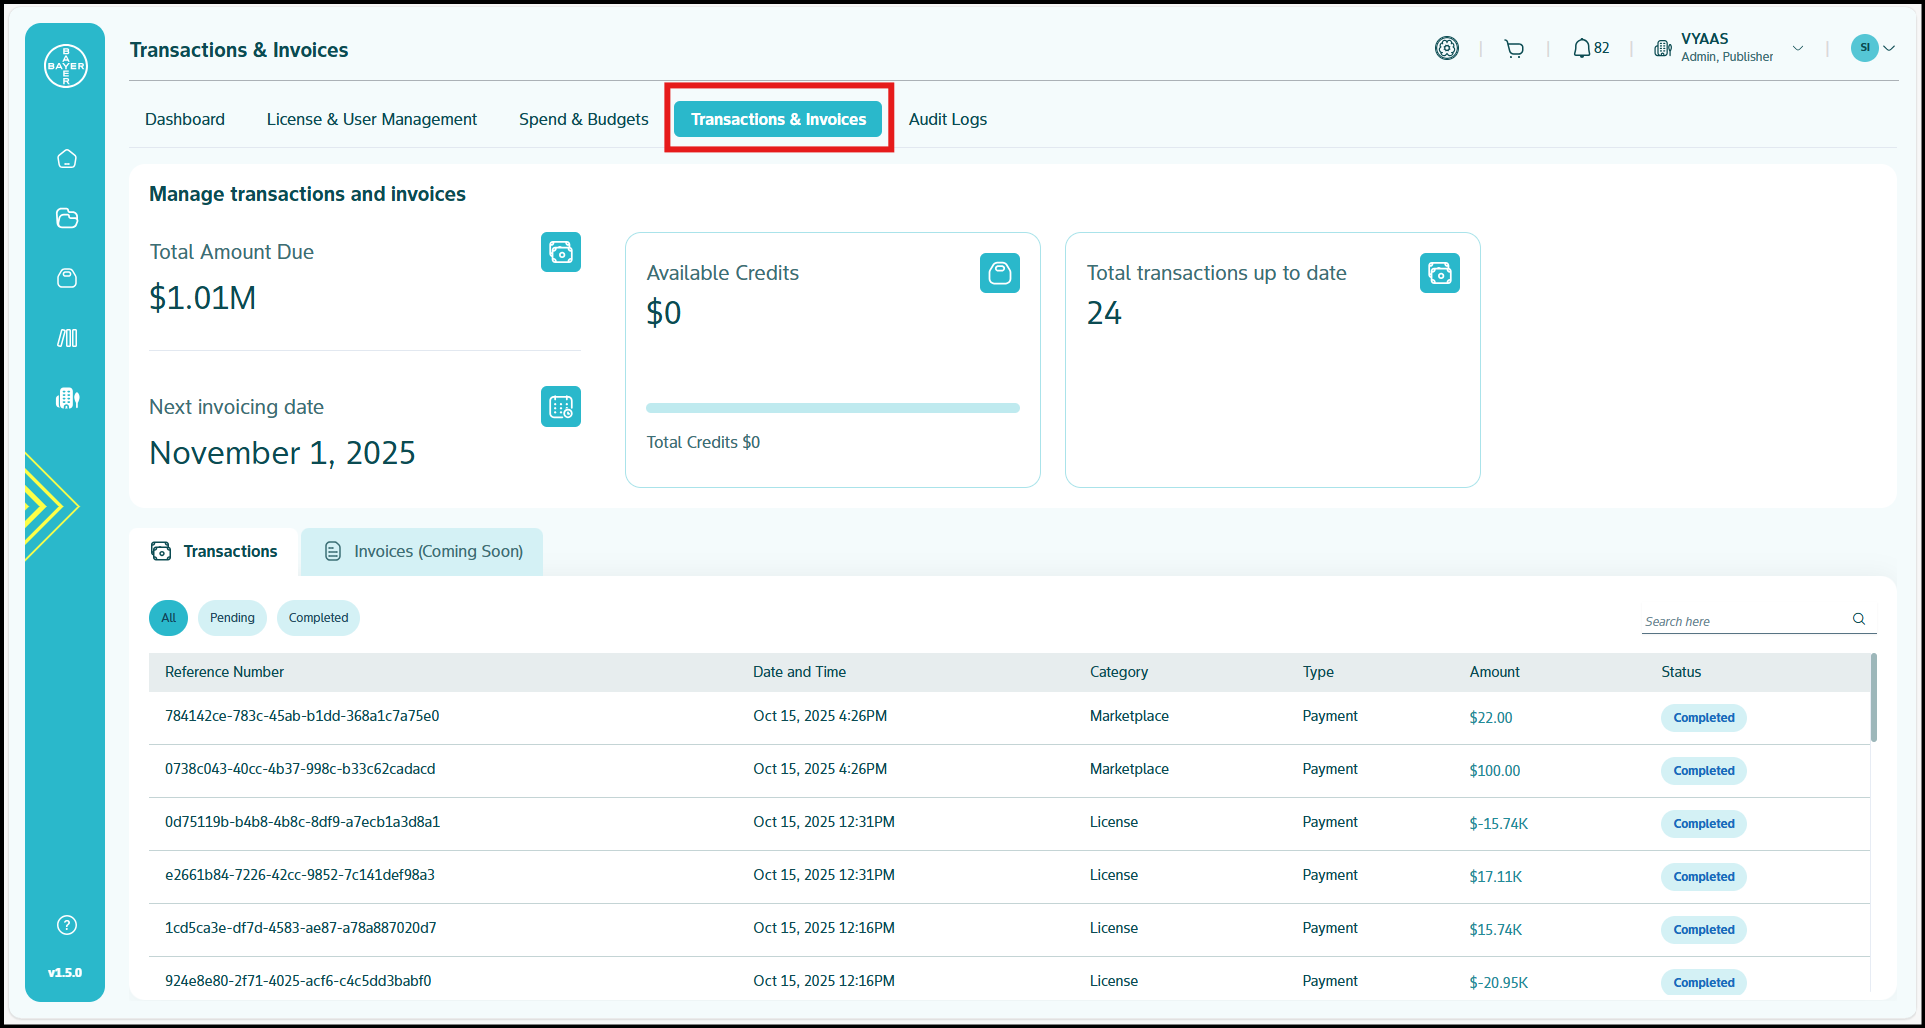
- Transactions and Invoices: Billing and payment history along with invoice details.
- Audit Logs: Keep track of all the user activities.
Key Tenant Administrative Tasks
- Monitor tenant spends through real-time dashboards.
- Respond to pending admins requests.
- Track financial obligations and spending patterns.
- Manage tenant hierarchy and structure.
Click here for more comprehensive tenant management details.
User Management
Managing your team members and their access levels is fundamental to platform admins.
Adding New Users
-
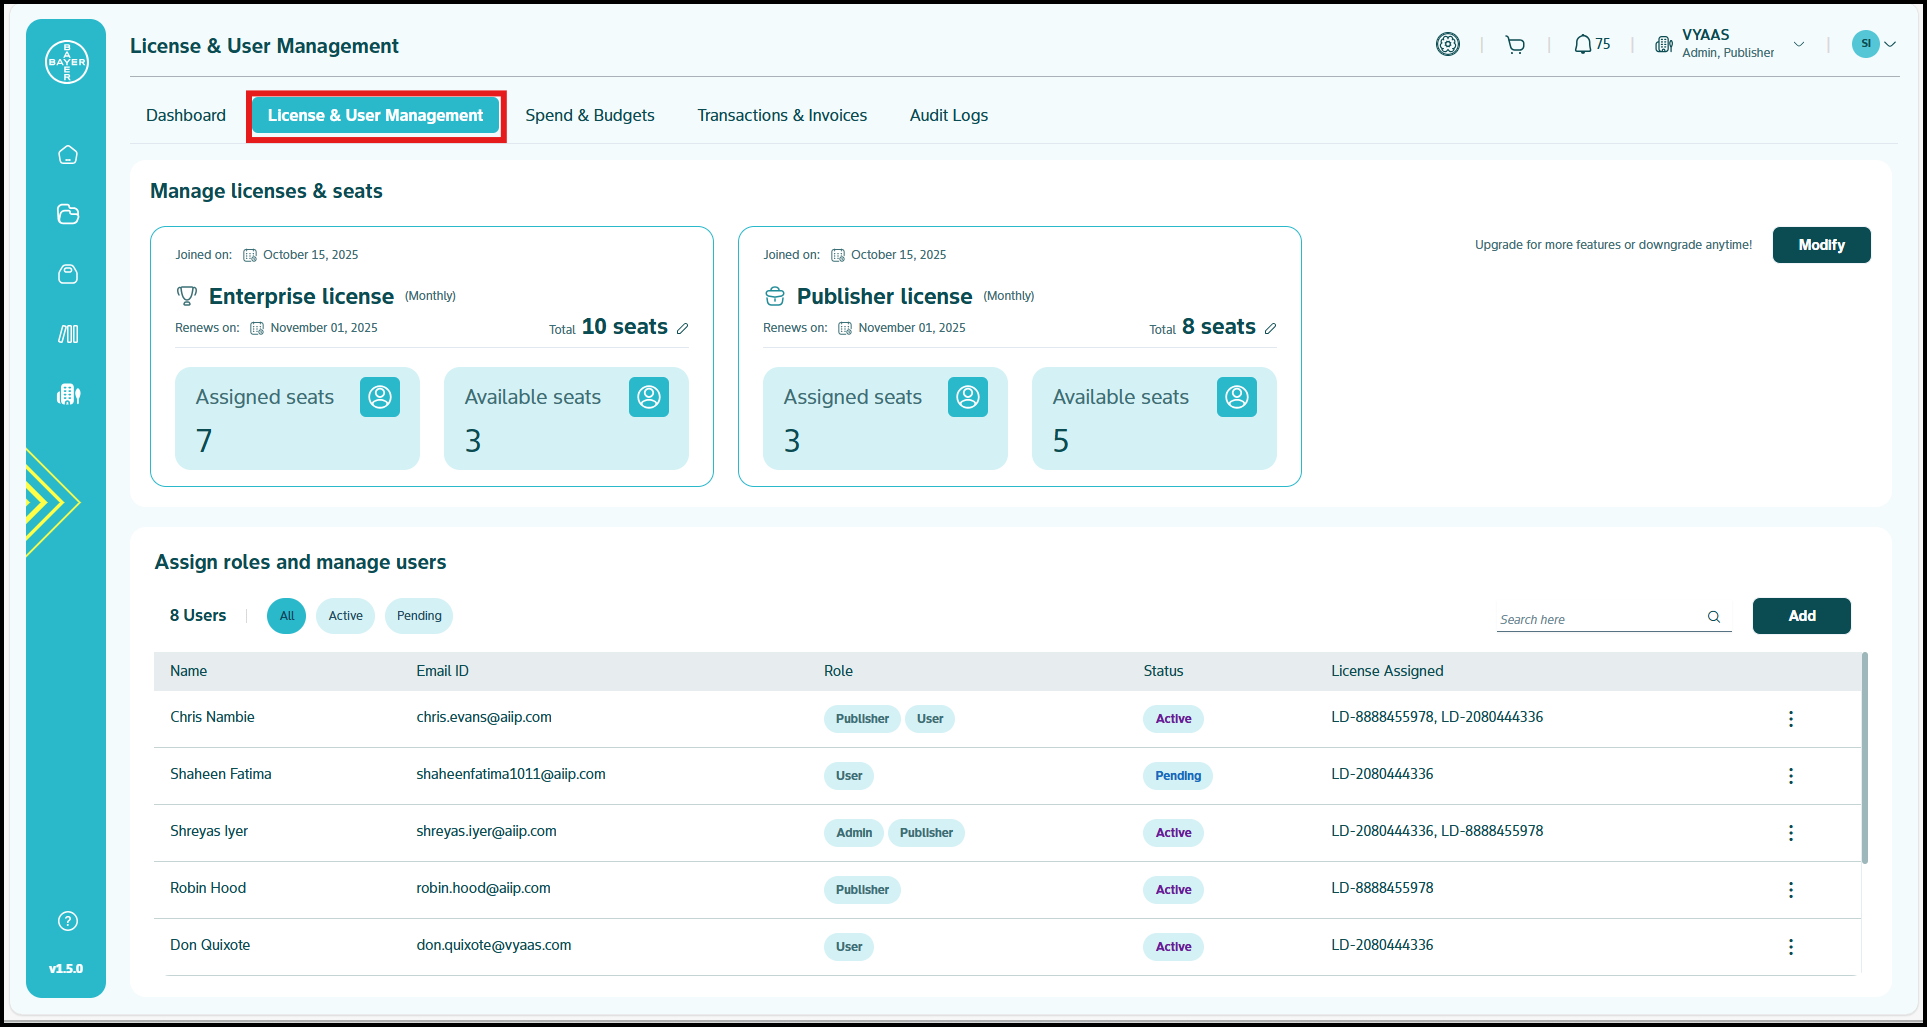
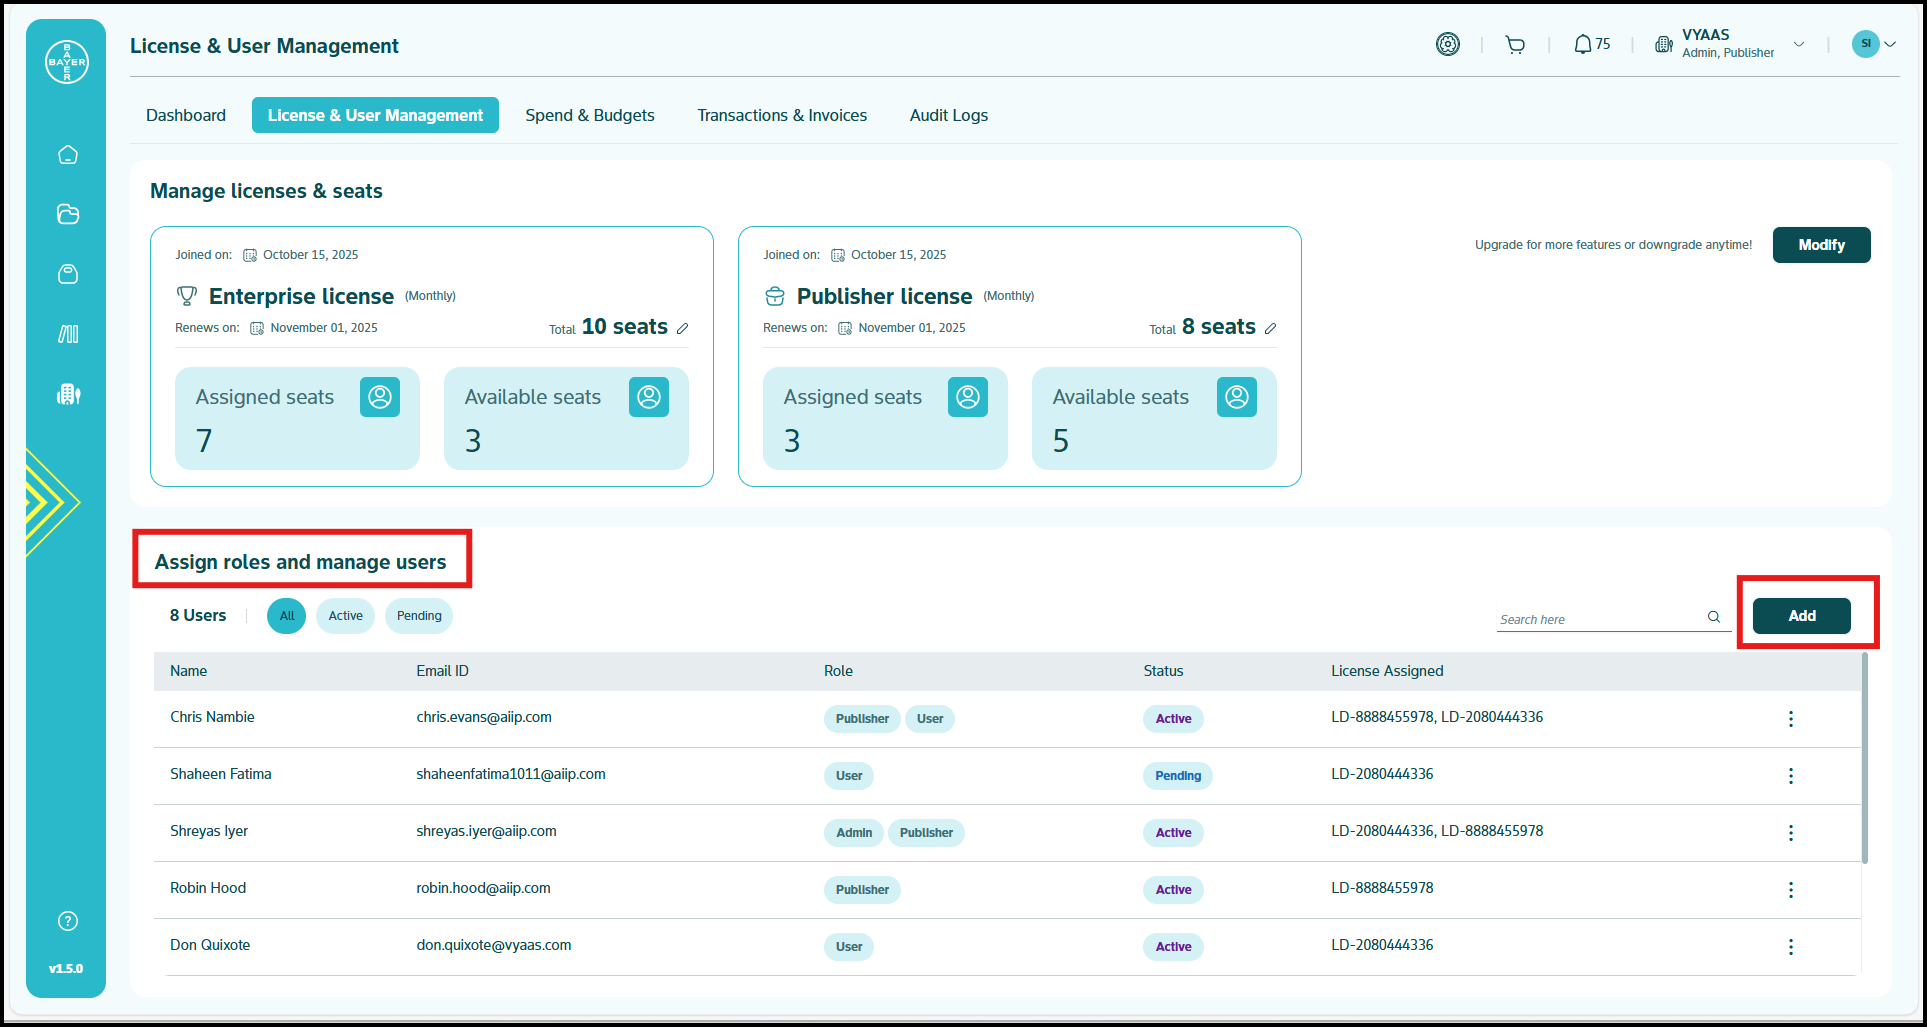
Access User Management
- Navigate to "My Tenant"
- Select the "Licensing and User Management" tab.
- Click "Add" under the “Assign roles and manage users” to open the registration form.
- Navigate to "My Tenant"
-
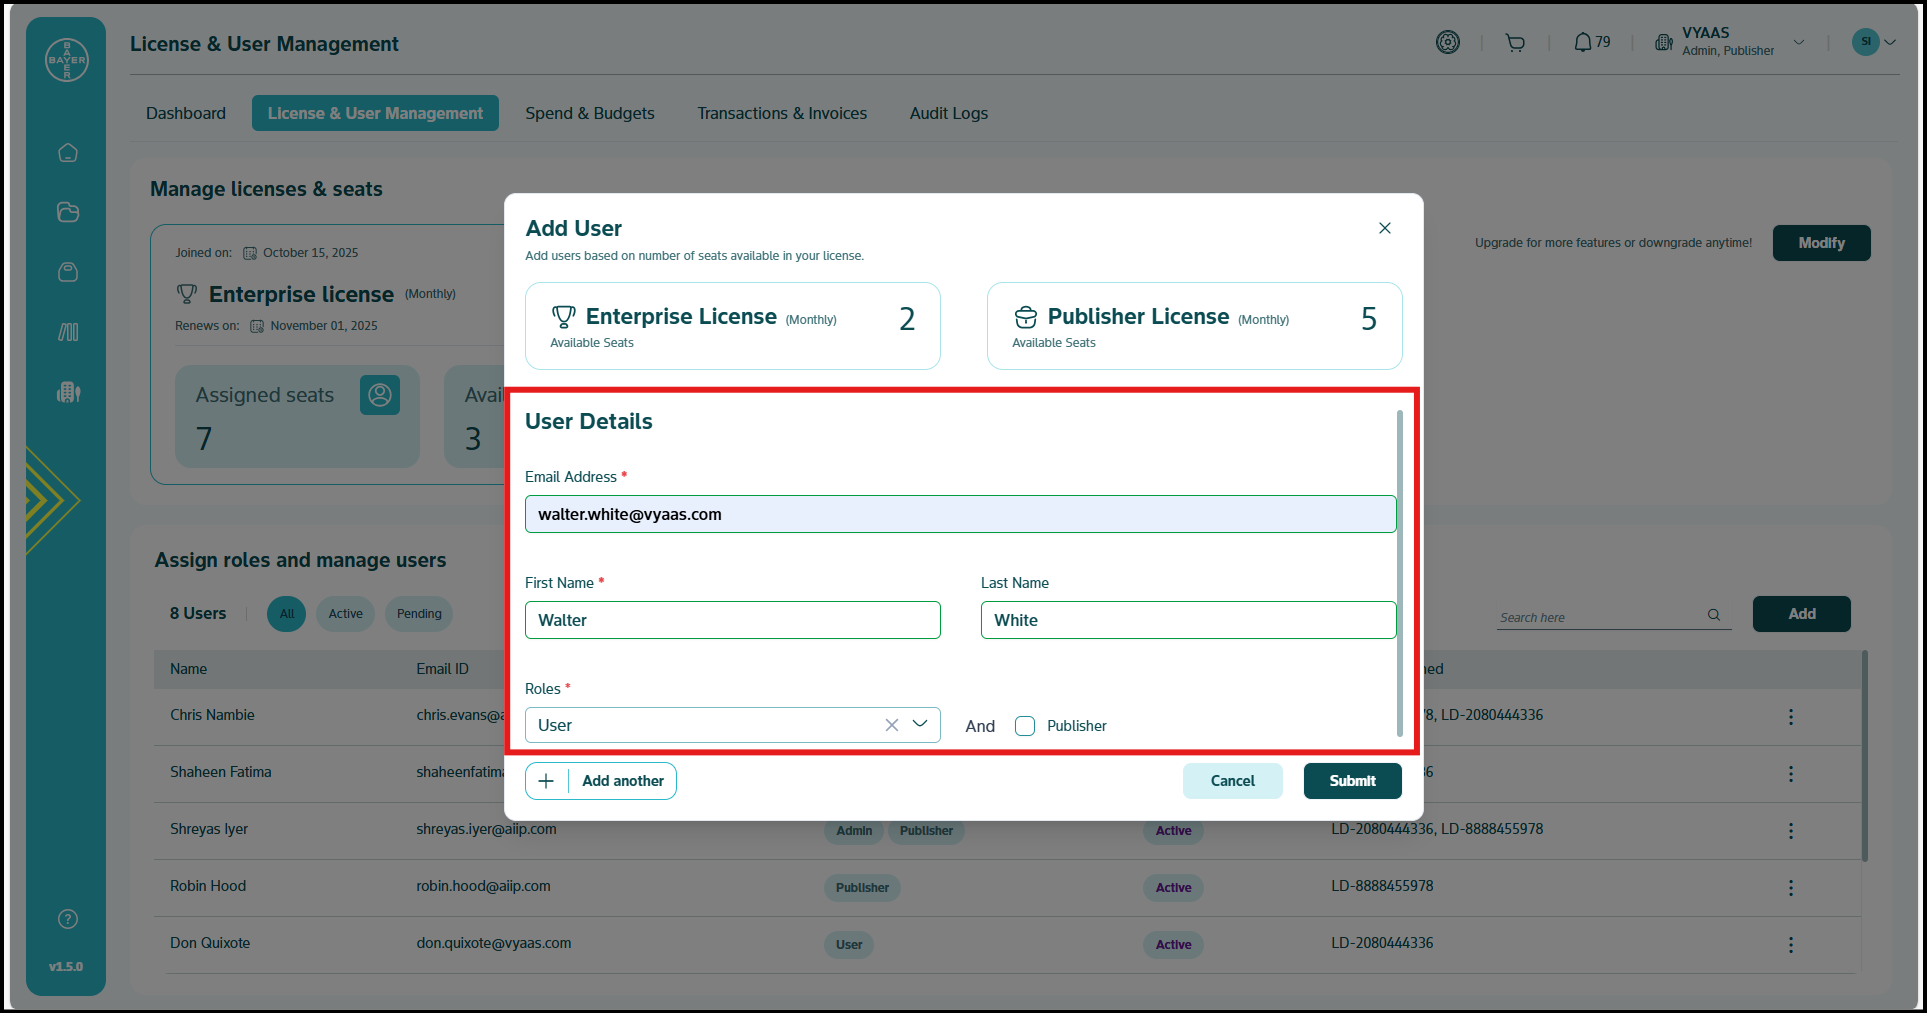
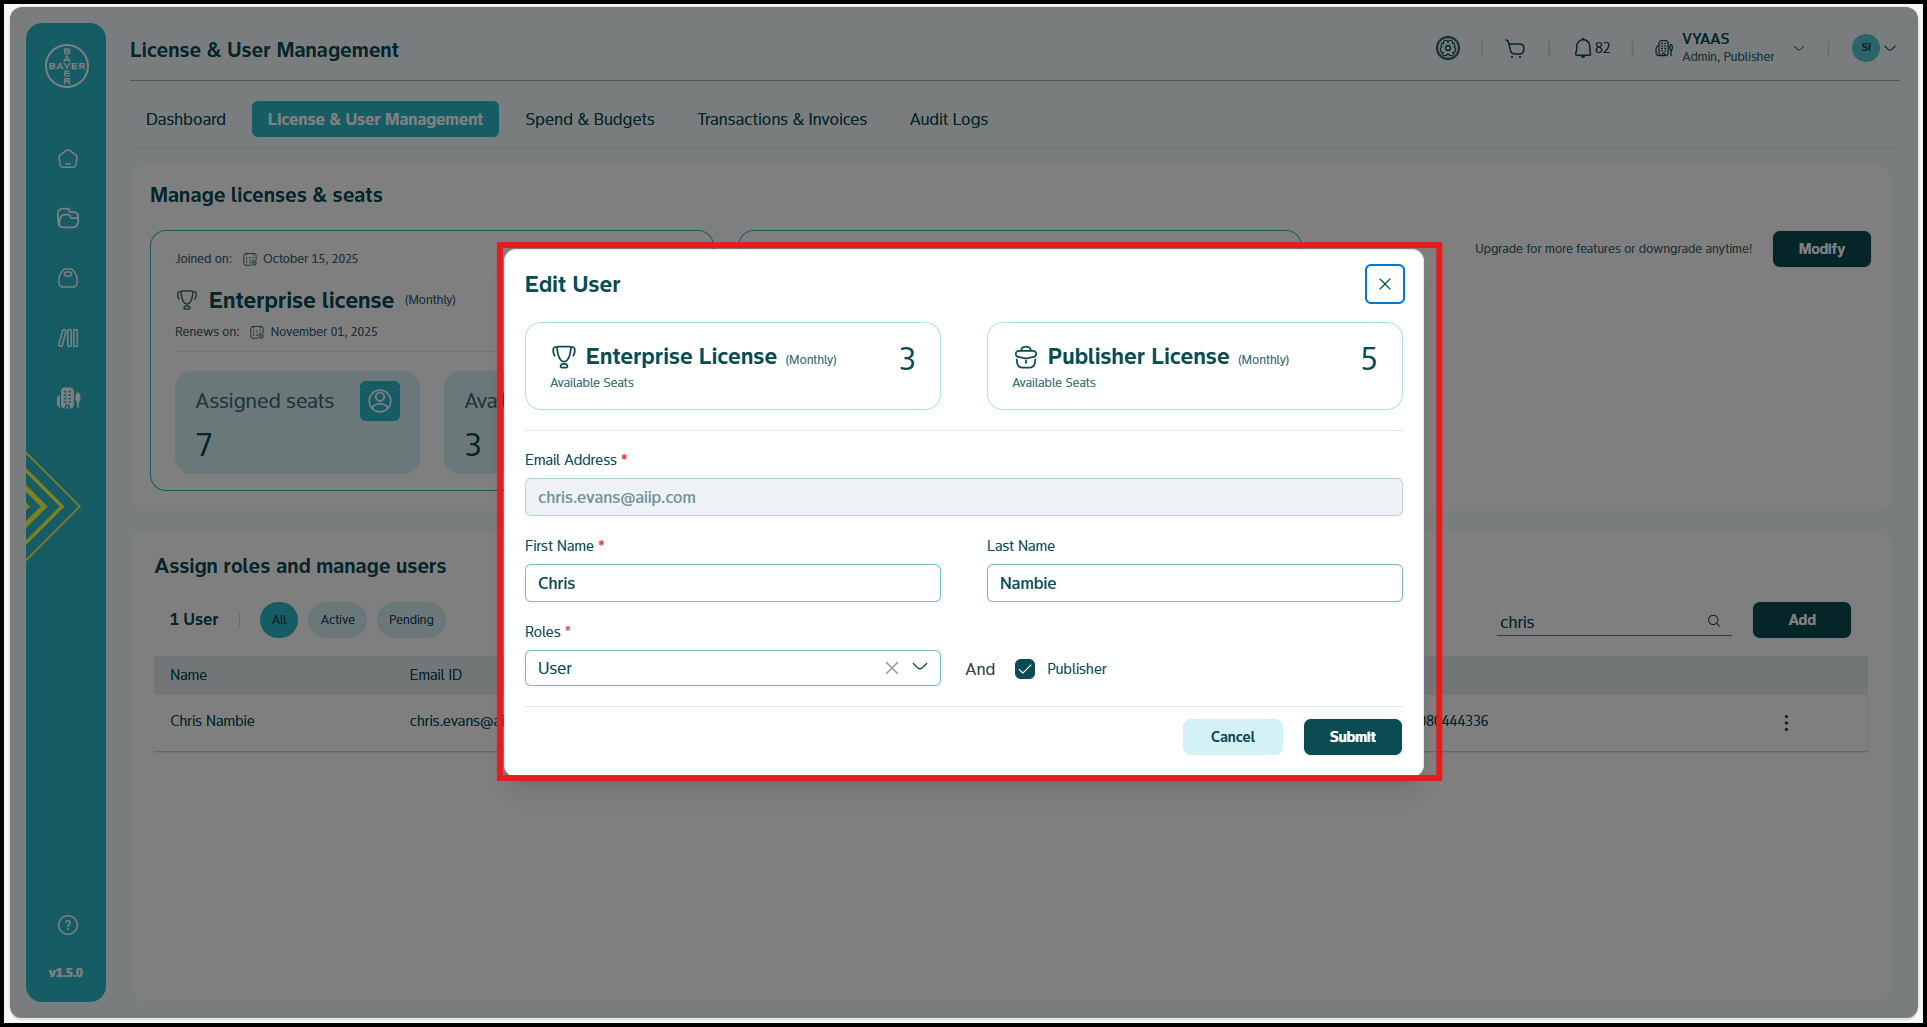
Configure User Details
- Email Address: Enter the user's business email.
- Name: Provide first and last name for identification.
- Role Assignment: Choose from Admin or User roles.
-
Bulk User Addition
- Use the "Add Another" button to include multiple users in a single session.
- This streamlines onboarding for larger teams.
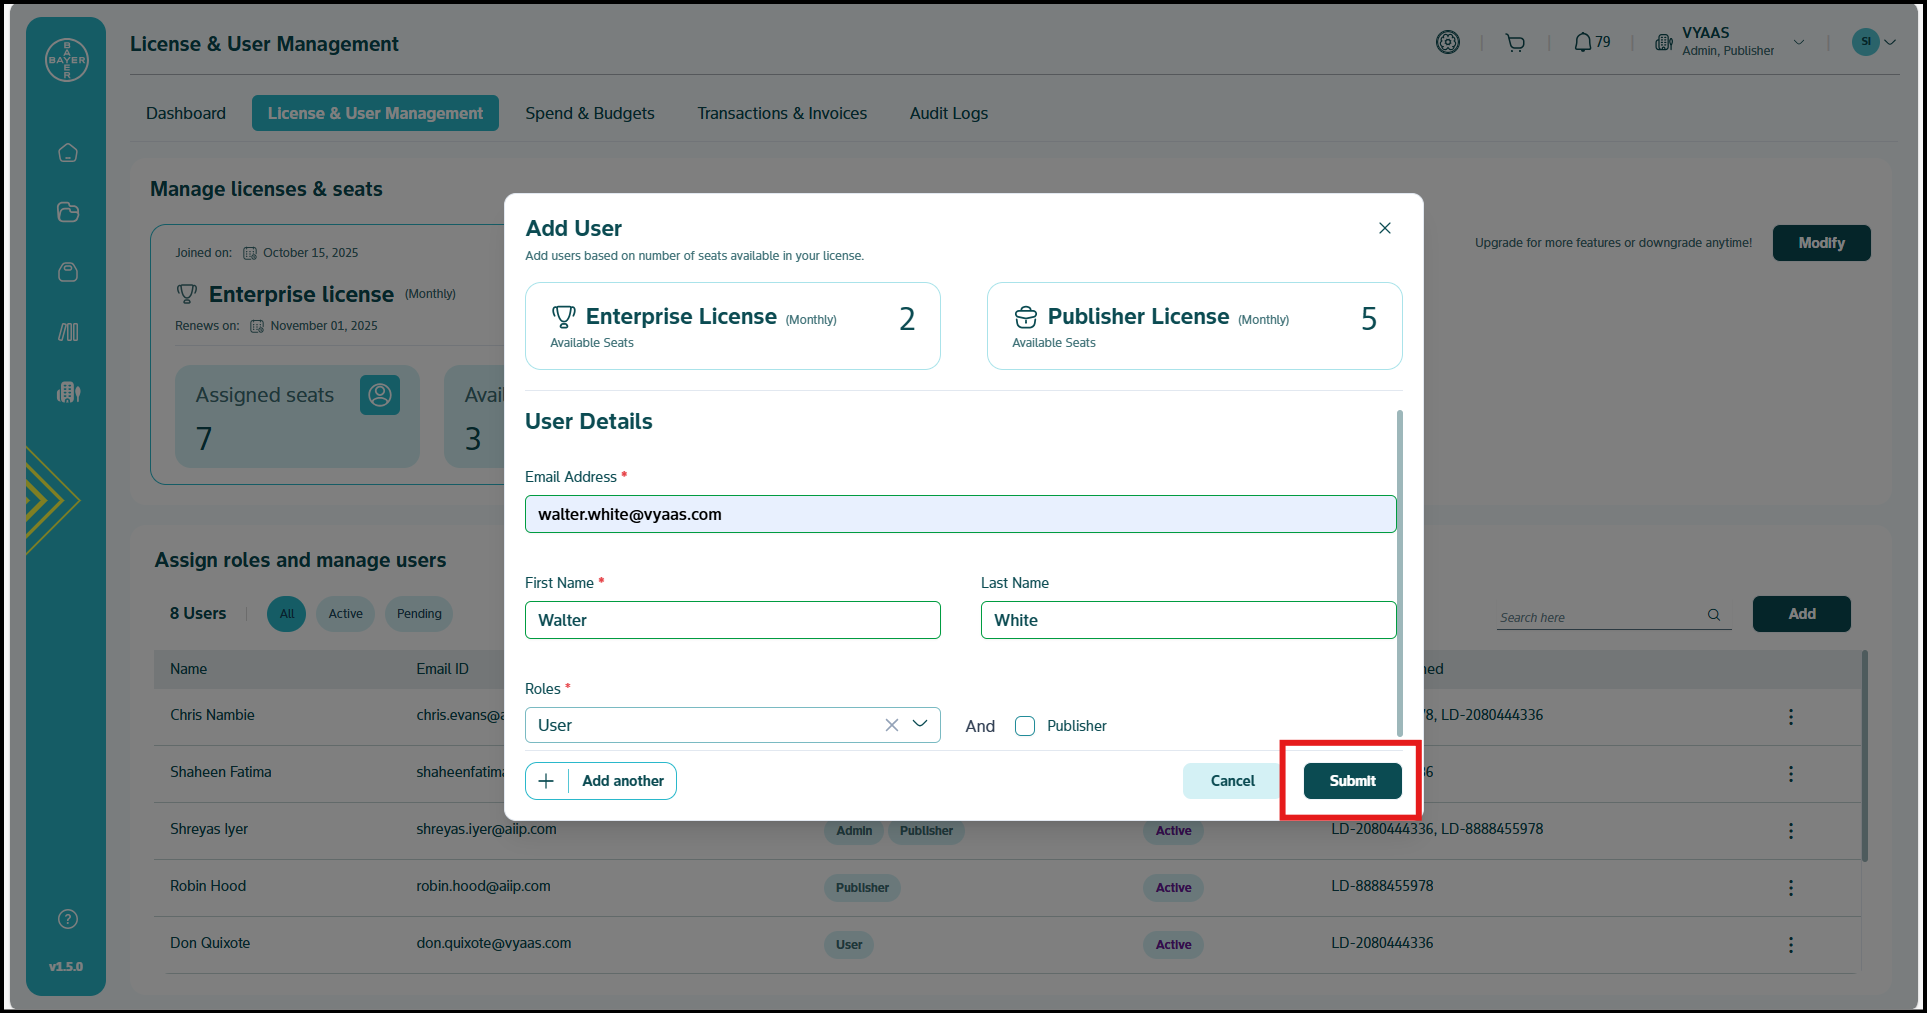
- Click "Submit" when all user details are complete.
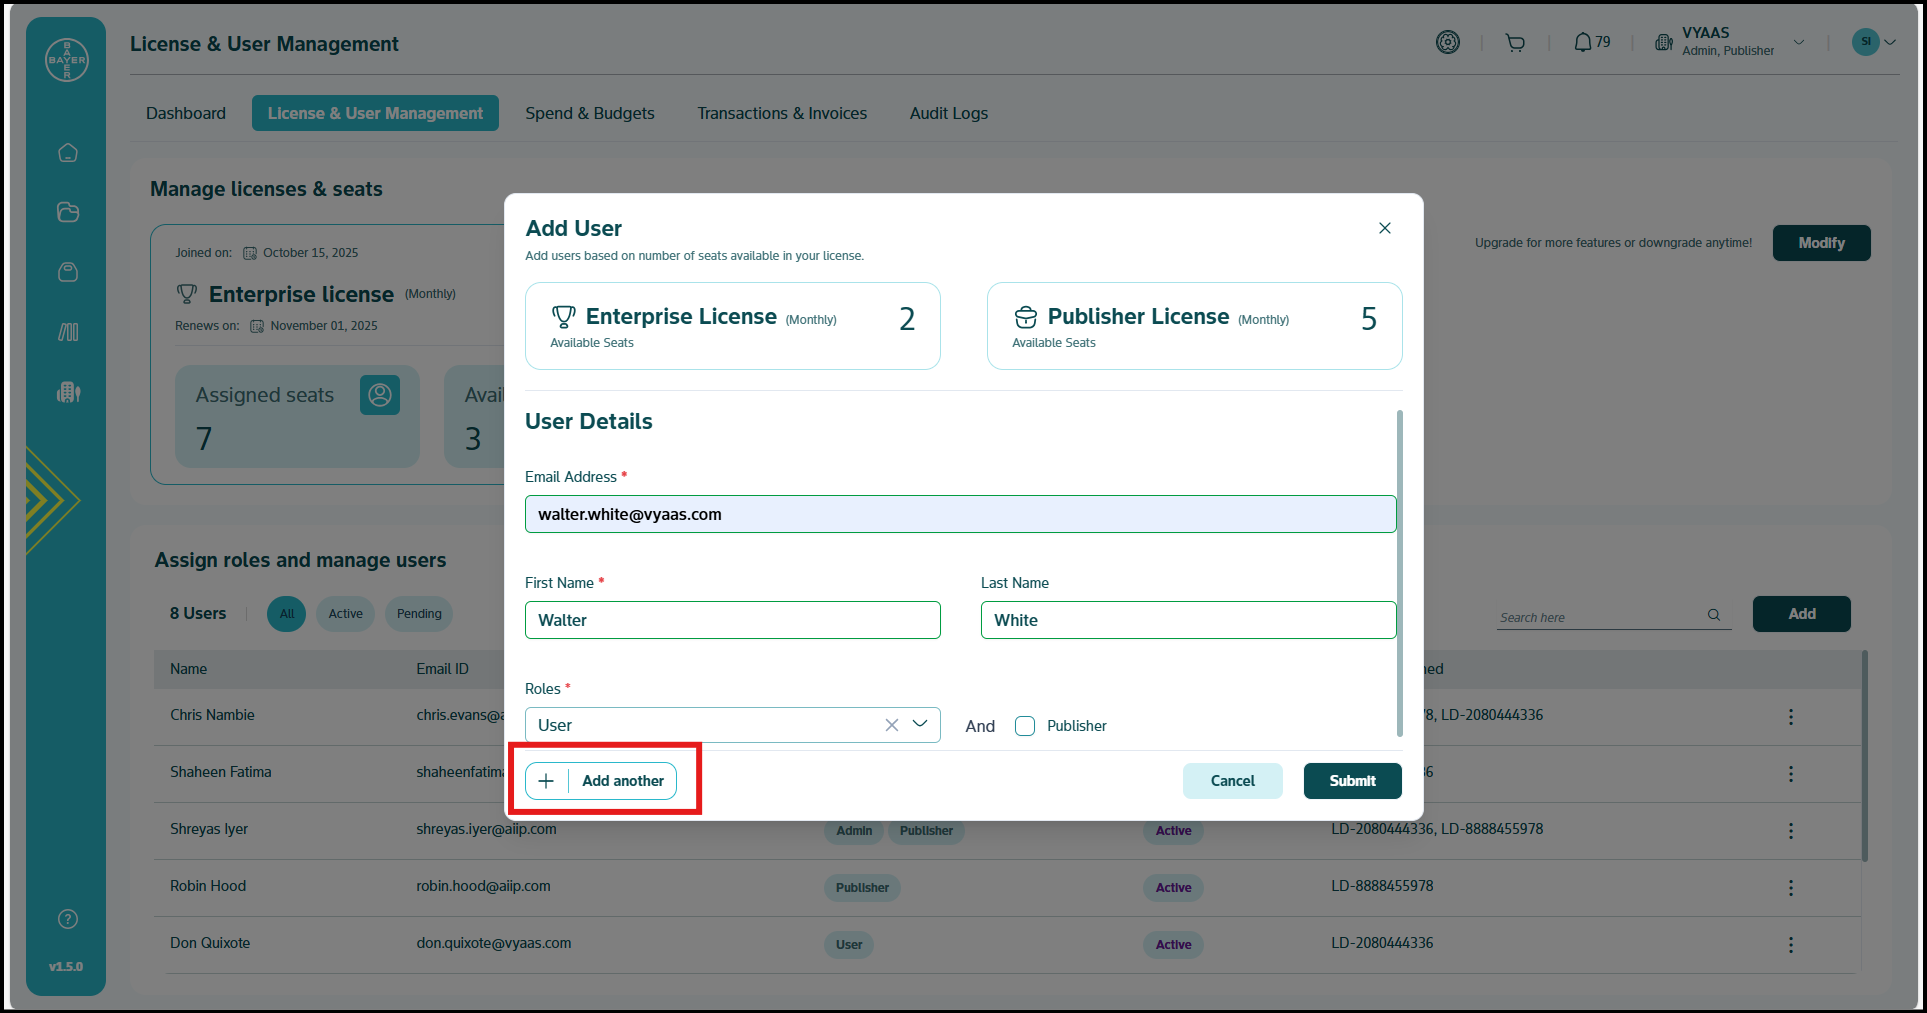
- Use the "Add Another" button to include multiple users in a single session.
Managing User Roles and Permissions
The roles in the AI Innovation Platform are:
- Admin: Full management capabilities for tenant settings and user control.
- User: Standard platform access for everyday work and project participation.
To Modify User Roles:
- Access the "Assign roles and manage users" section from the User Management tab.
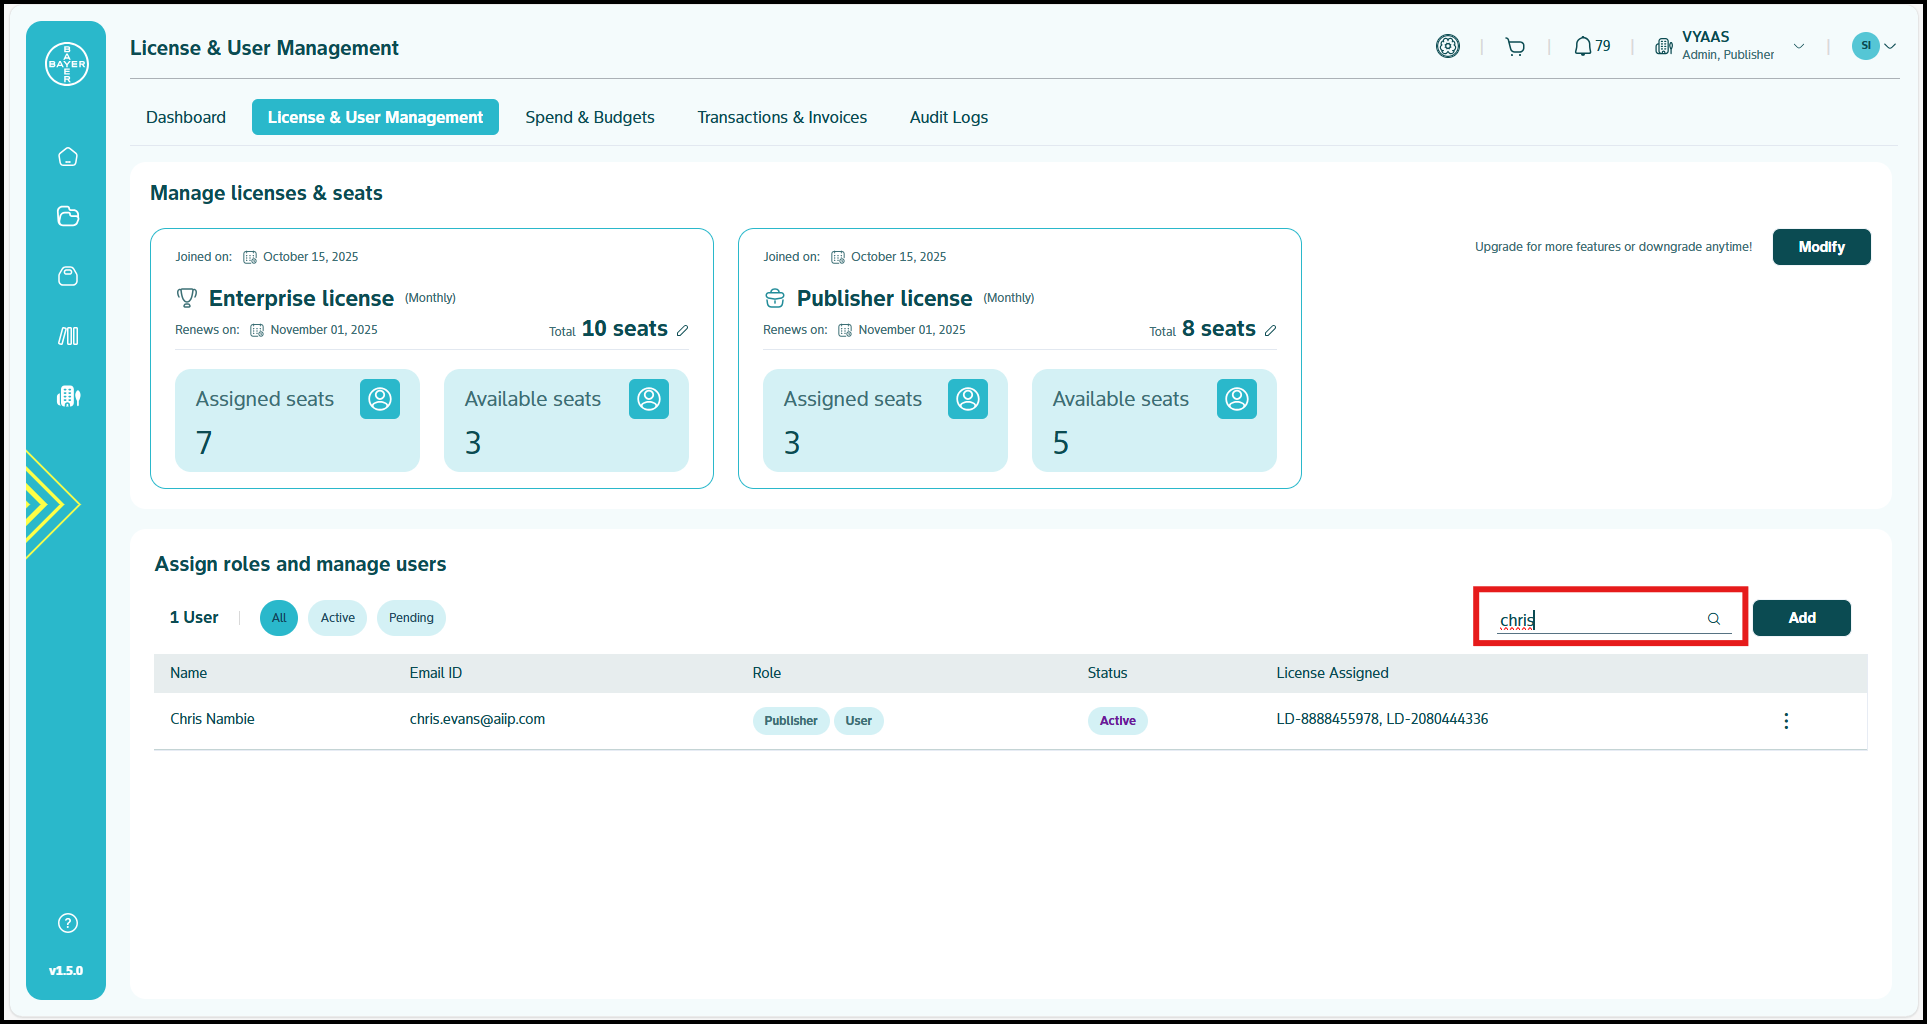
- Locate the specific user using the search option.
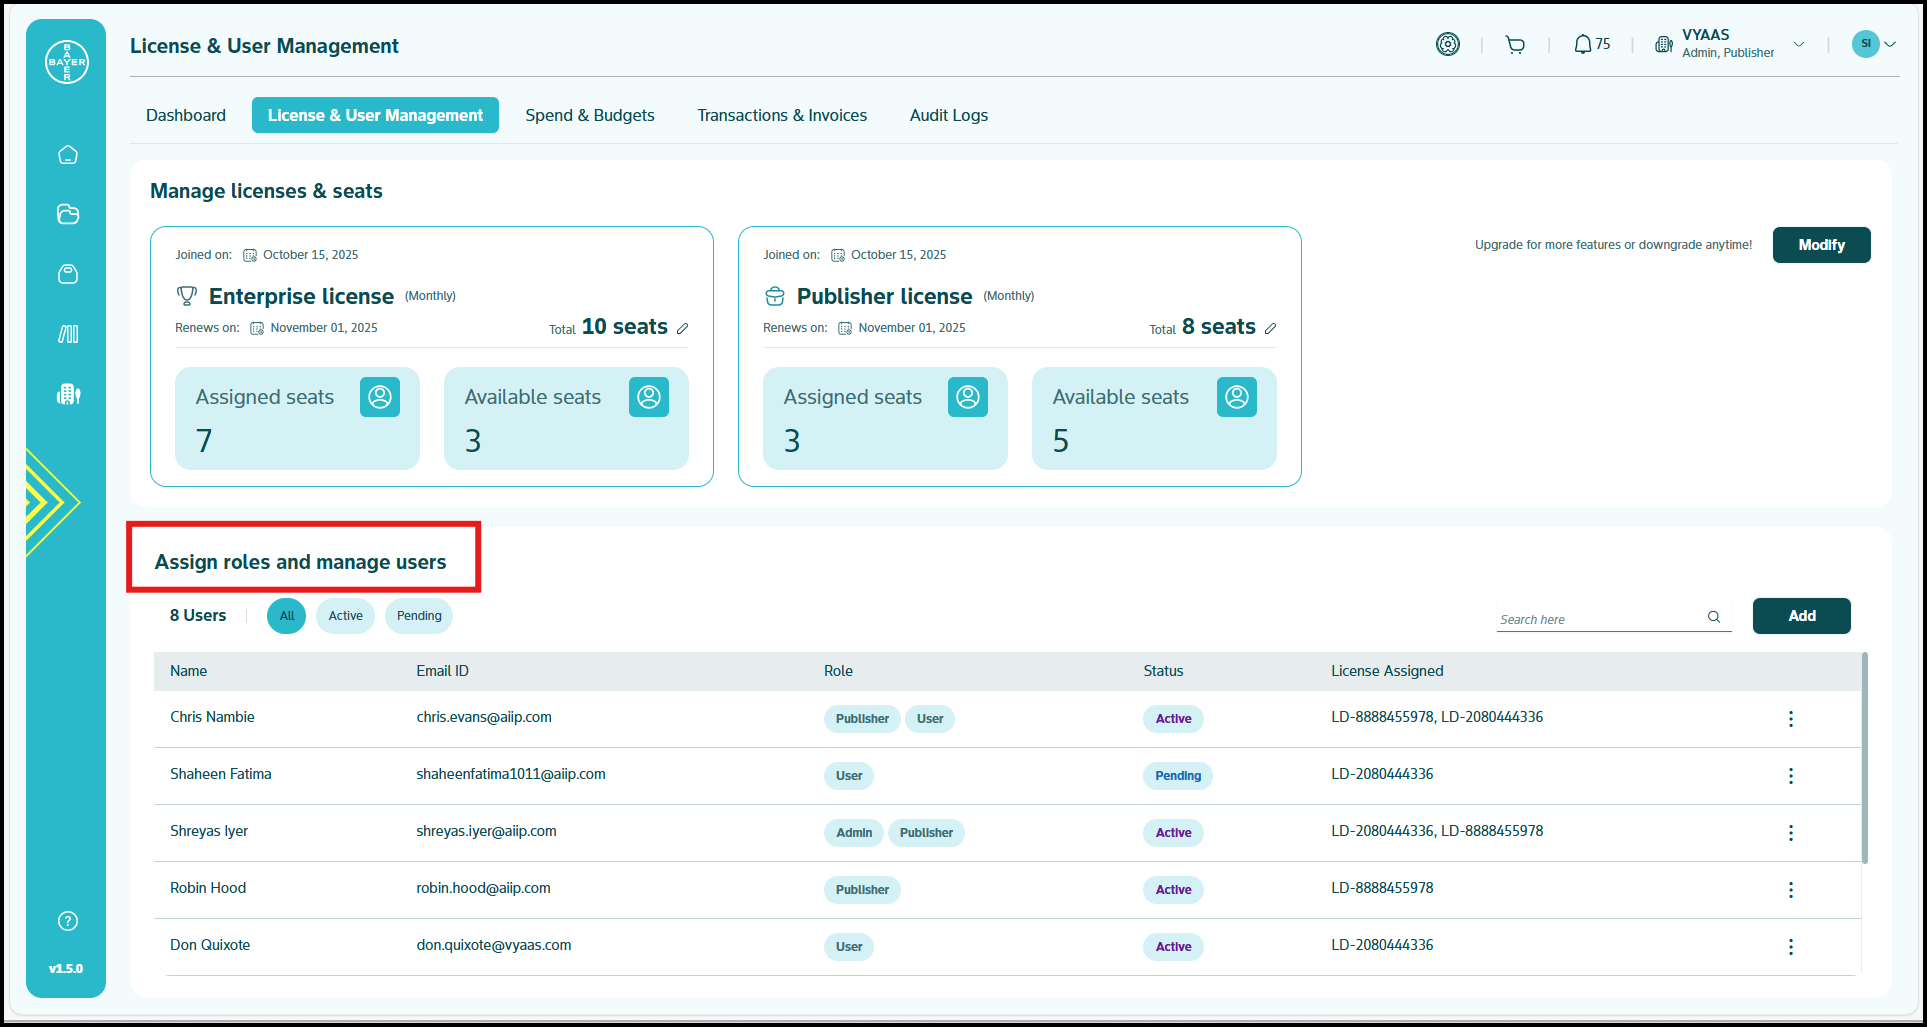
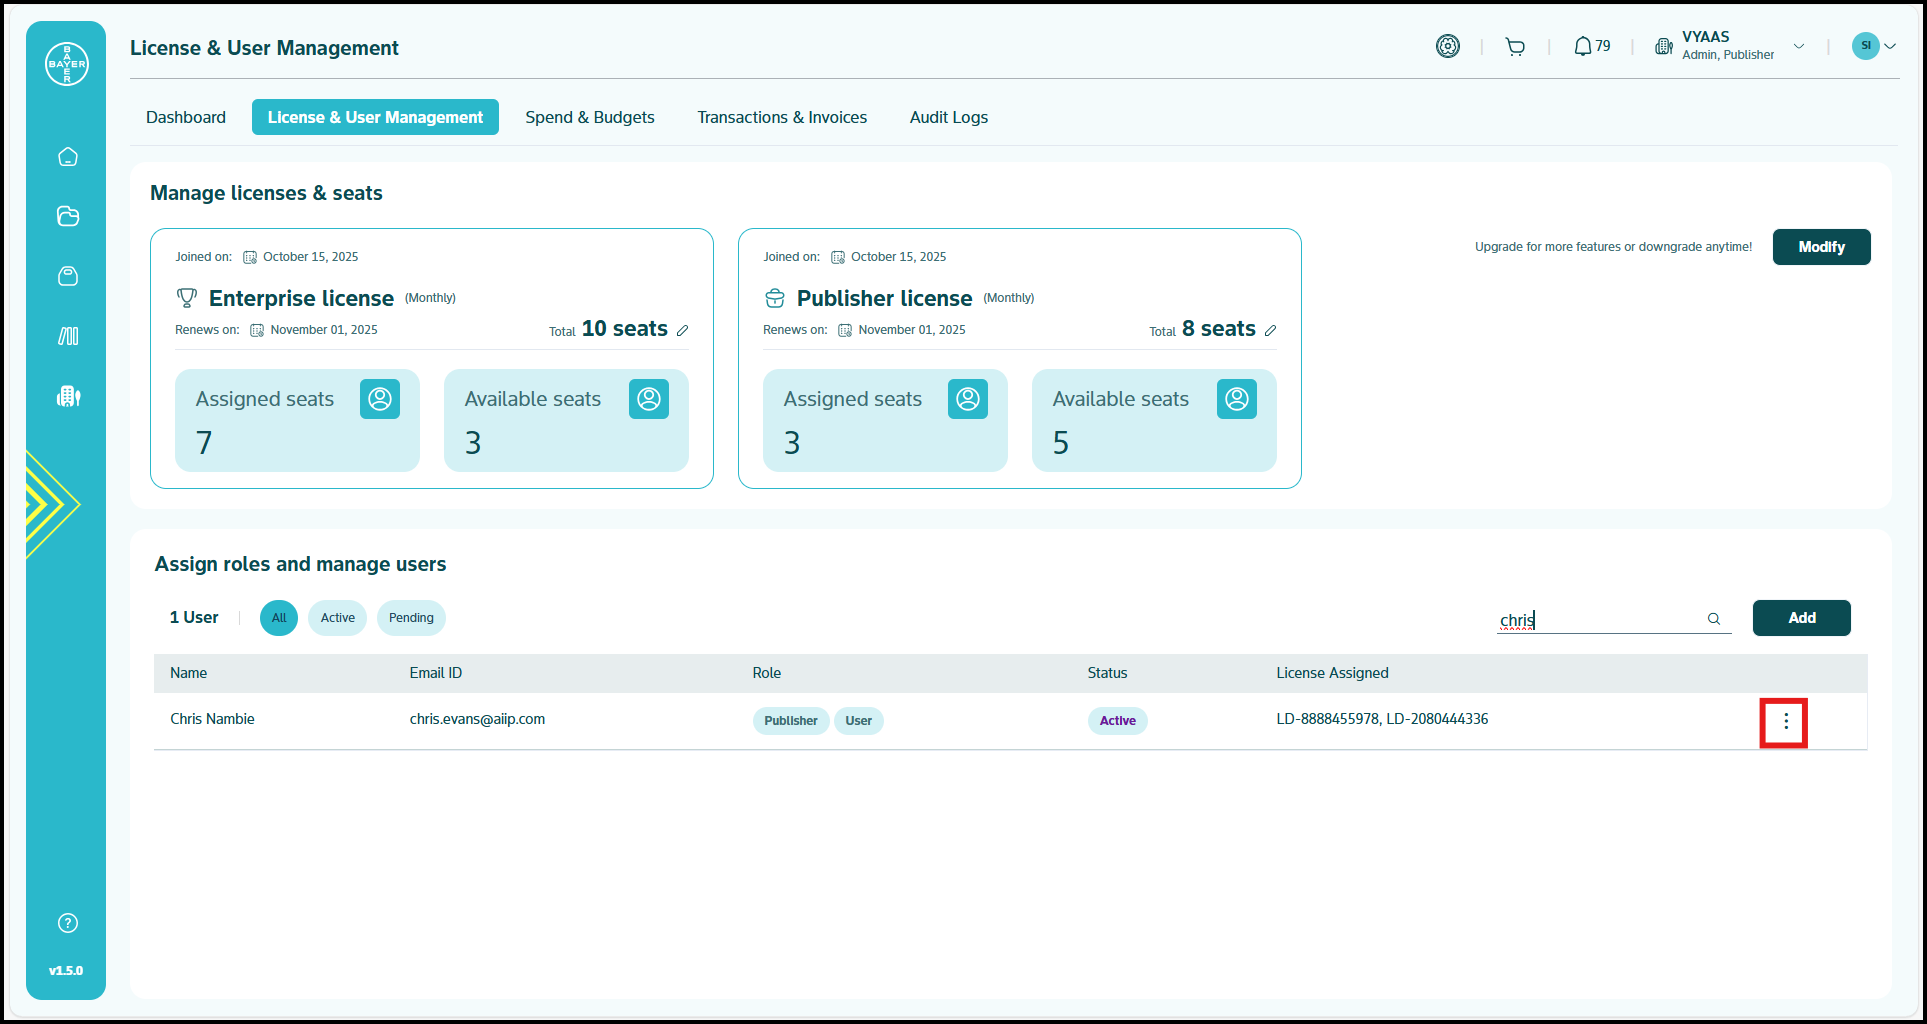
- Click the 3 dots icon on the user’s row and click "Edit".
- Update roles and click "Submit"
Note
Each tenant must maintain at least one tenant admin at all times for security and continuity.
Click here for a more detailed guide on licensing and user management.
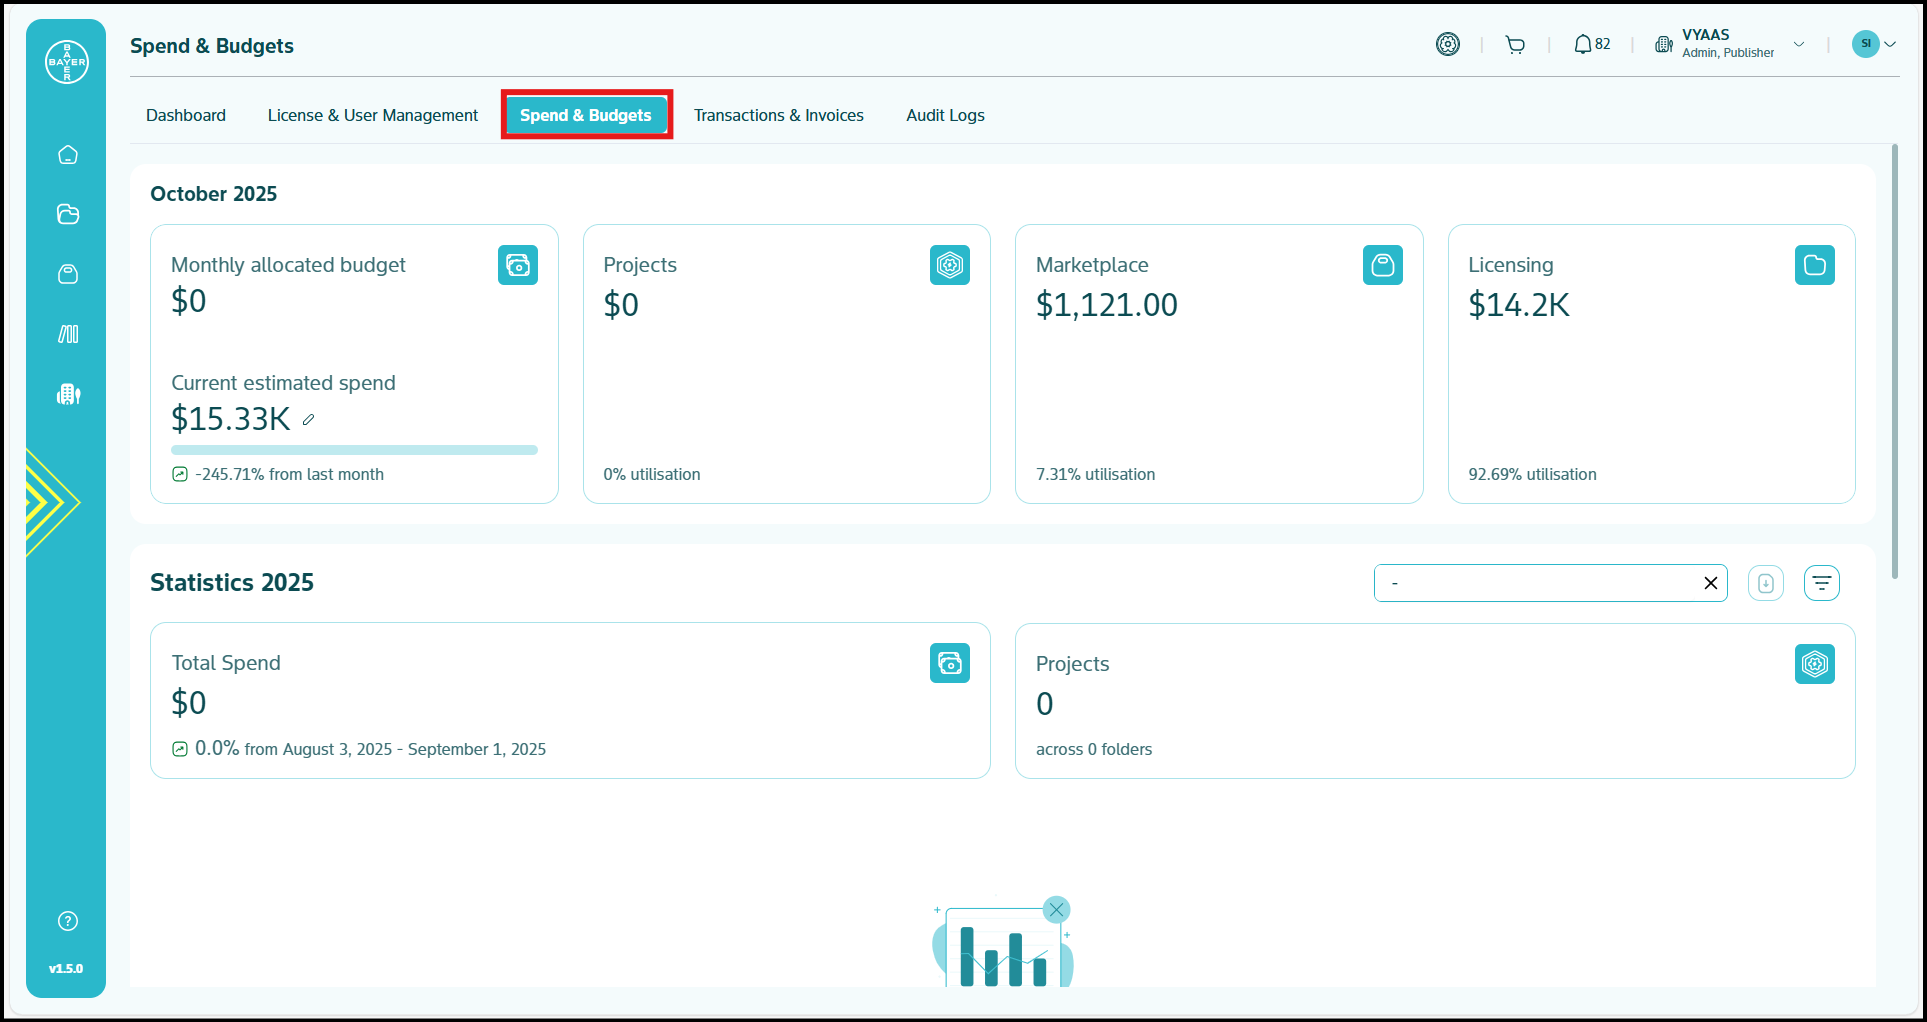
Financial Management
Spend and Budget Overview
- Monitor tenant wide spending patterns.
- Set global budget policies and controls.
- Track financial commitments and obligations.
- Configure billing preferences and payment methods.
Note
Some exciting features are coming soon!
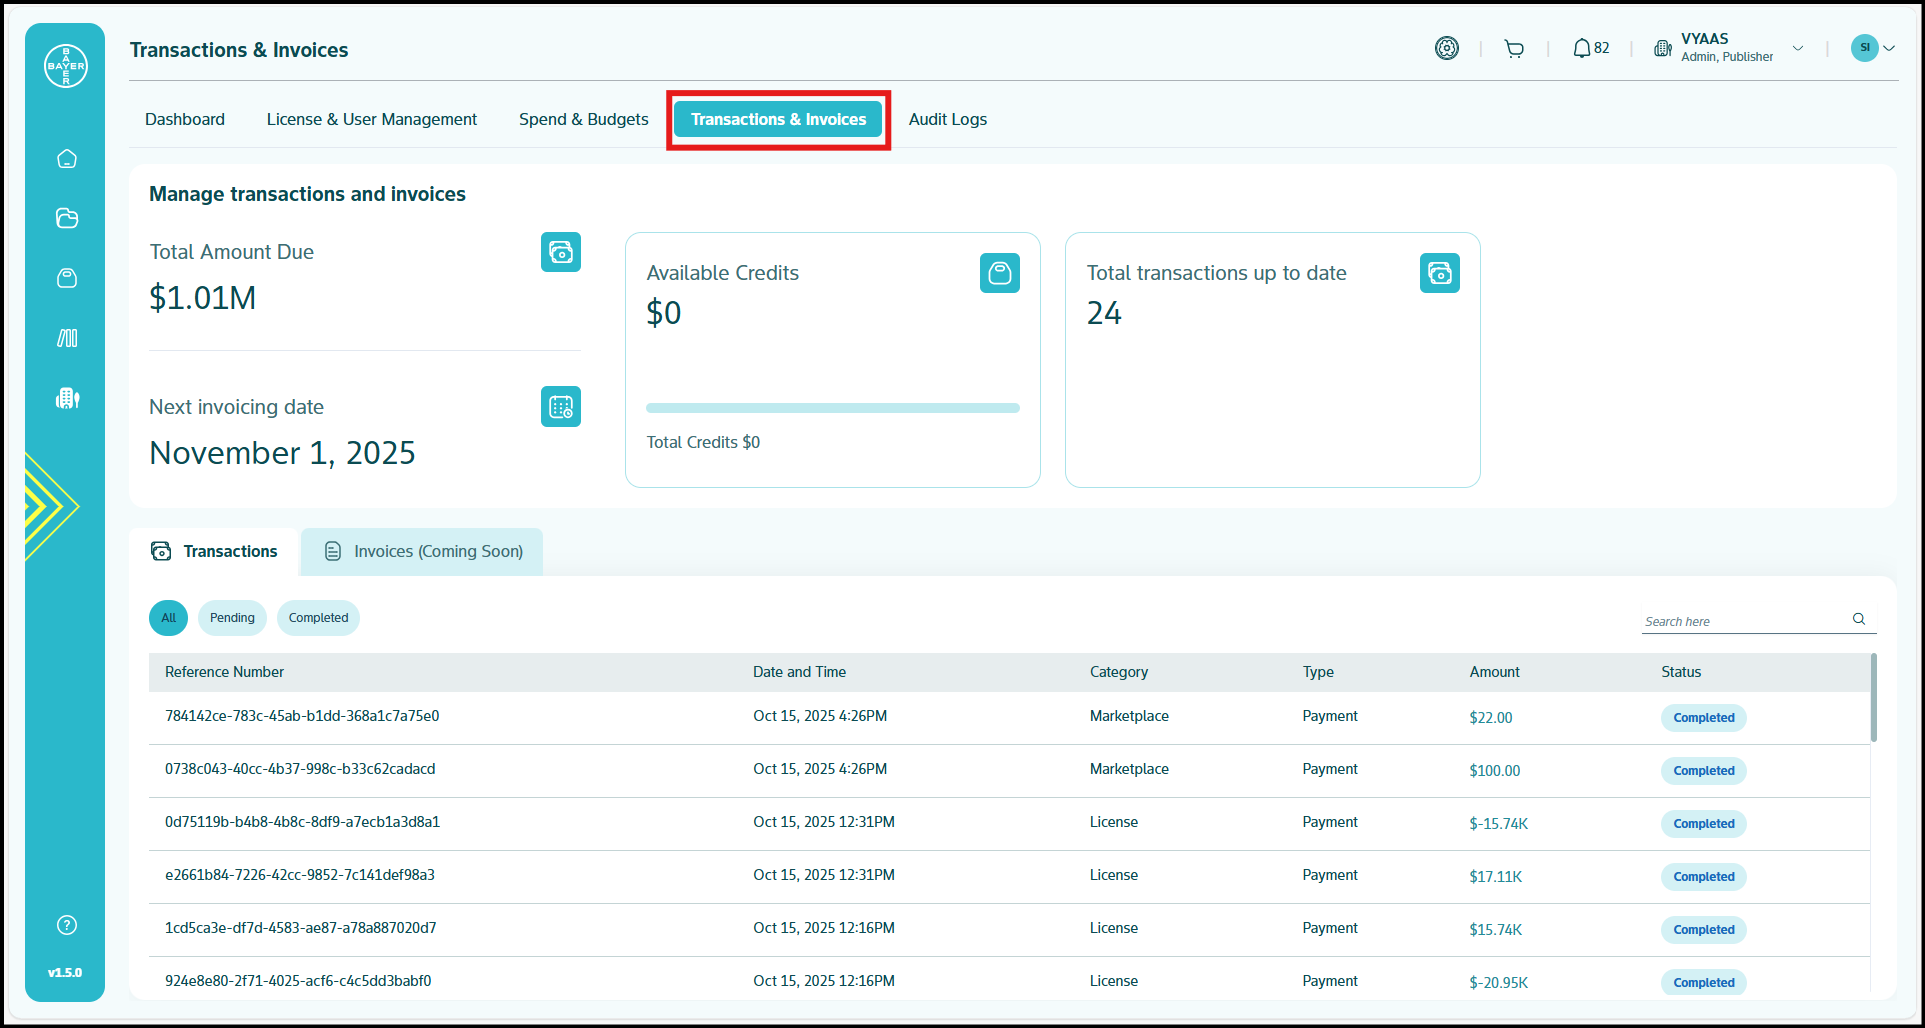
Transaction Management (Coming Soon)
- Review billing history and payment records.
- Monitor subscription costs and usage charges.
- Download invoices and financial documents.
- Manage payment methods and billing contacts.
Click here for a more detailed guide on transactions and invoicing.
Project Management
Effective project organization is crucial for team productivity and resource control.
Creating and Managing Projects
Direct Project Creation
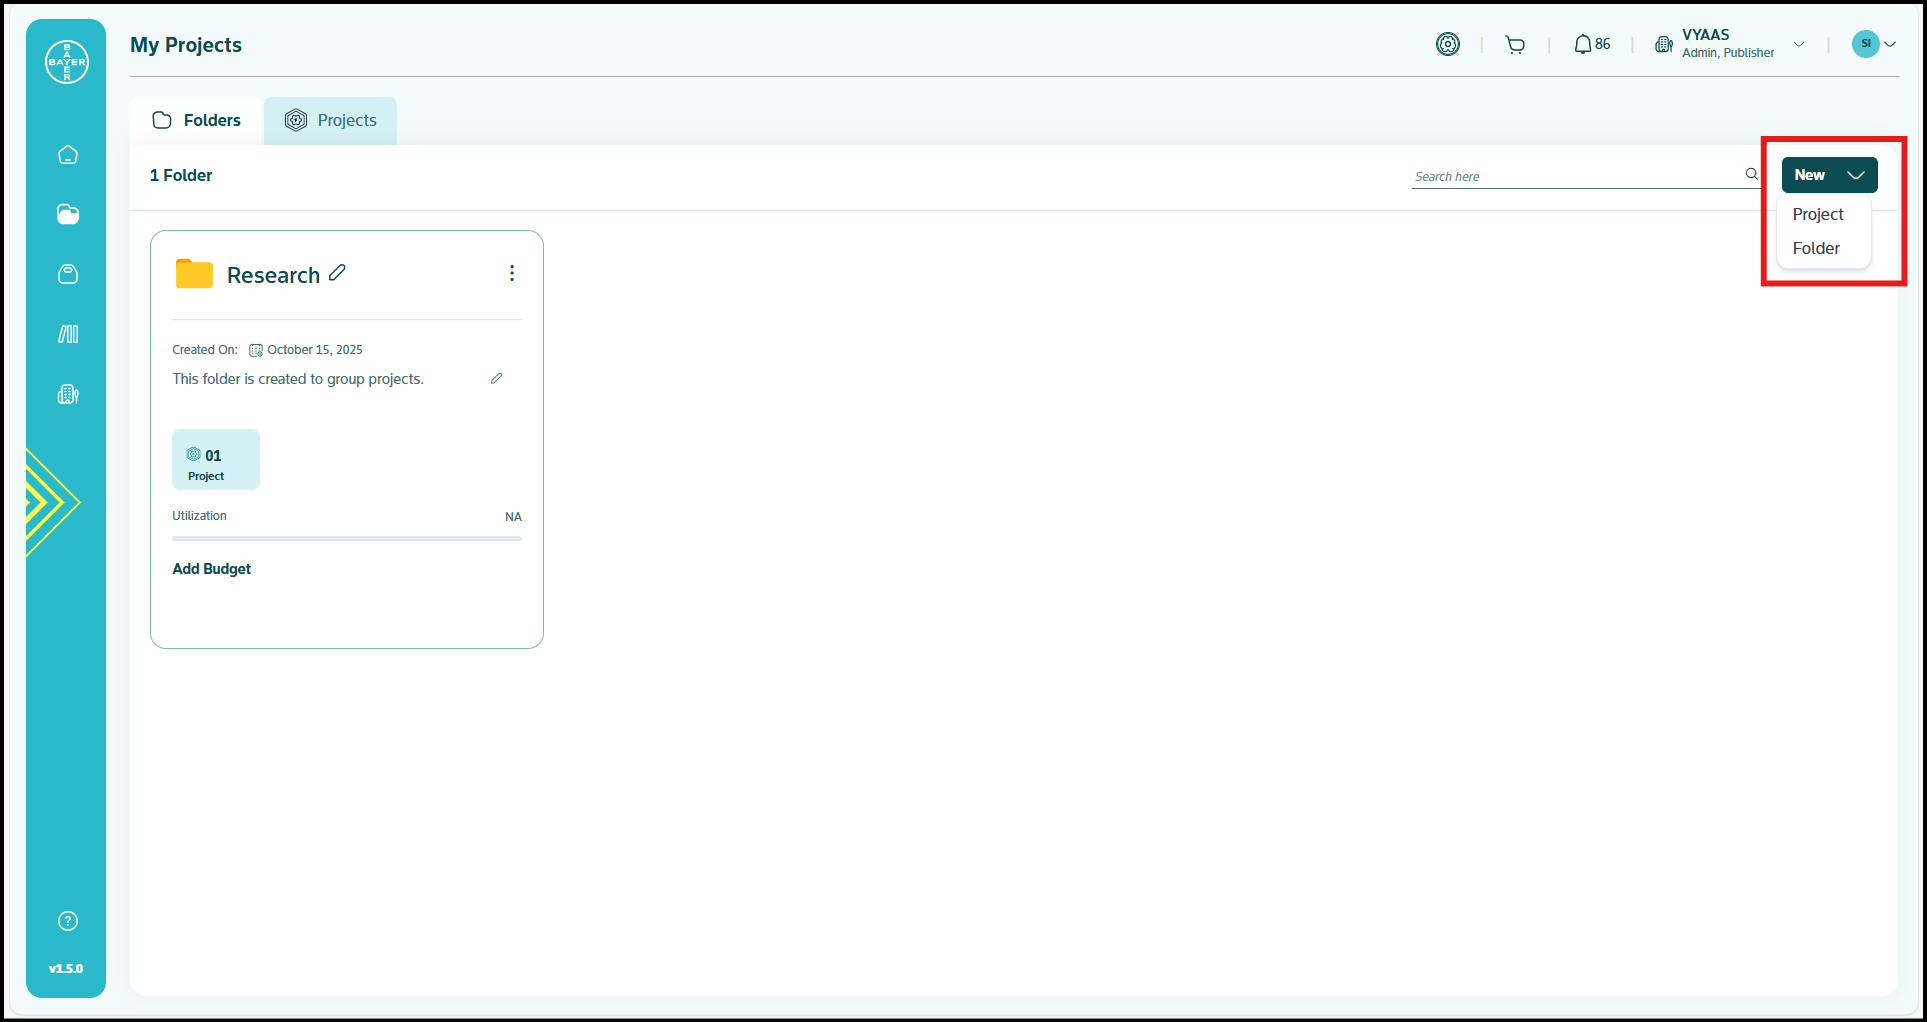
- Navigate to "My Projects" from your Dashboard.
- Click "New" button to bypass the approval workflow, tenant admins can directly create projects.

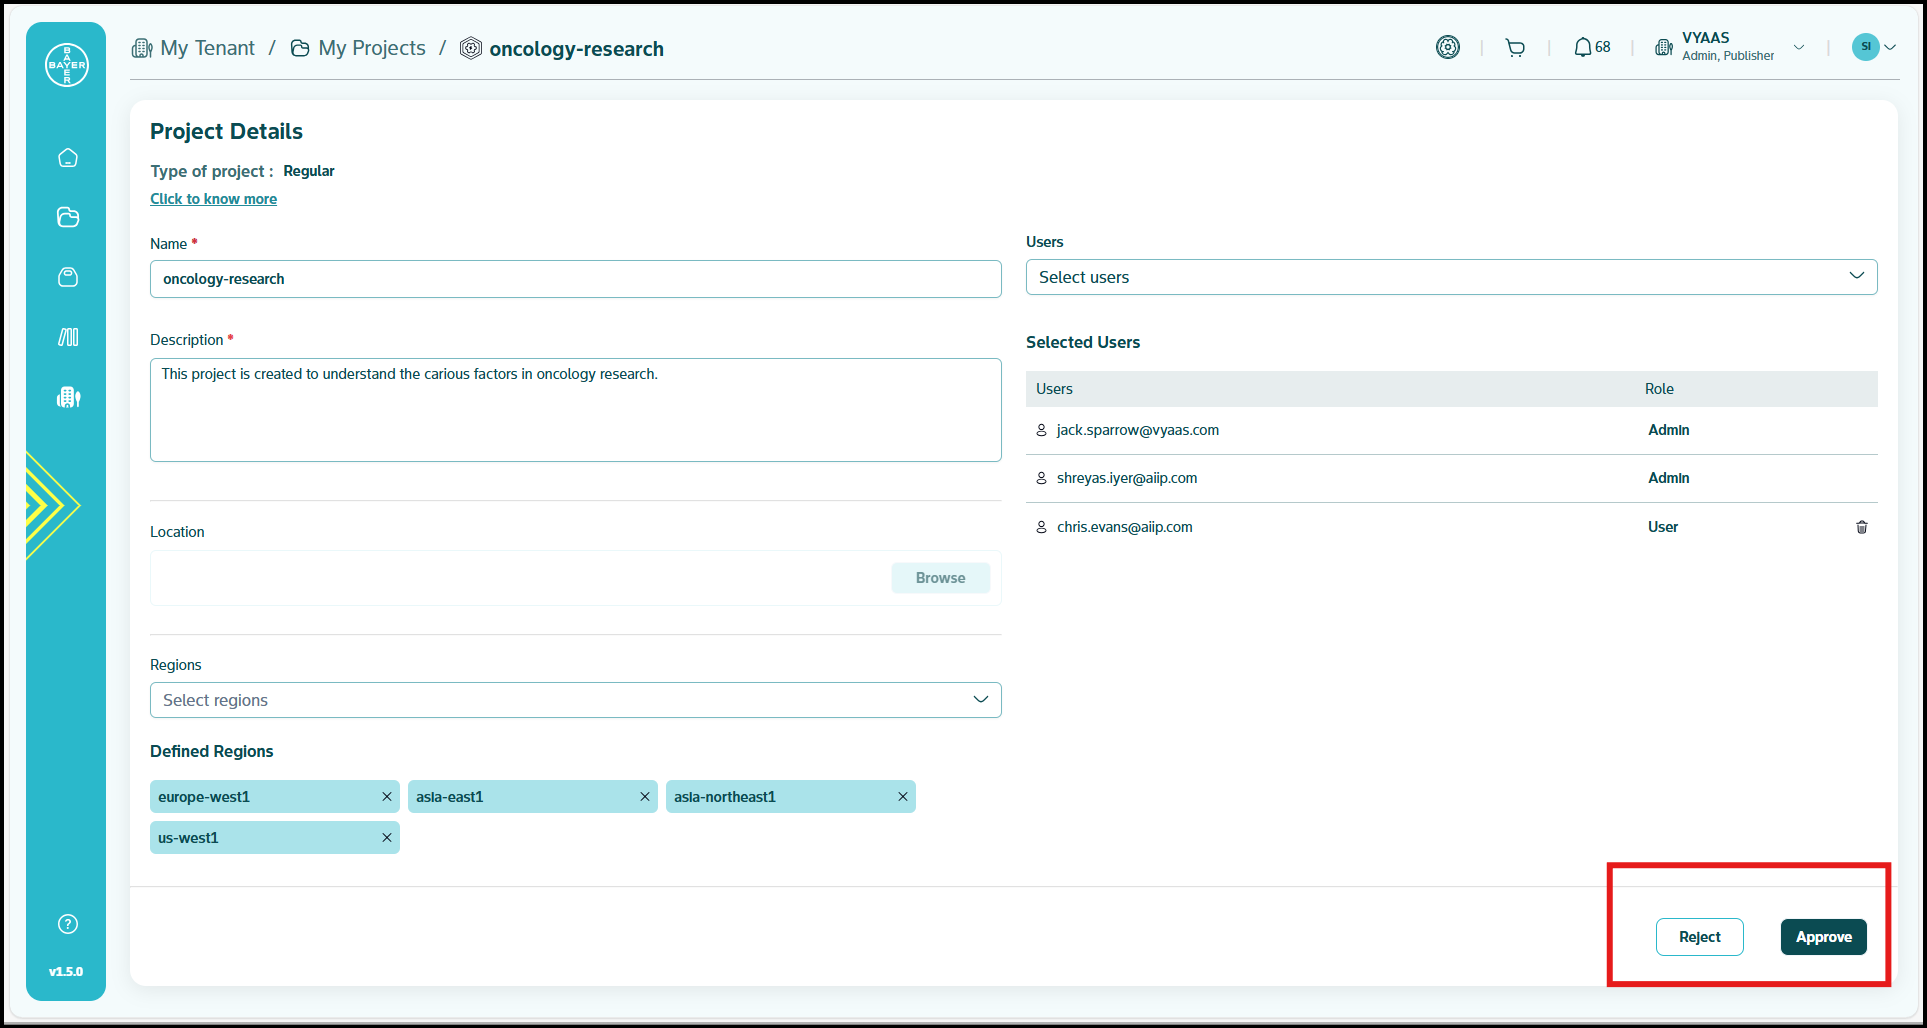
- Configure project details including:
- Project Name: Clear, descriptive identifier.
- Description: Purpose and scope of the project.
- Budget Allocation: Set spending limits and controls.
- Access Permissions: Define who can access the project.
Click here for a more detailed explanation on creating a project.
Approving Project Requests
- Monitor the "Requests" section on your Dashboard.
- Review project details and requester information.
- Use "Approve" or "Reject" buttons for quick decisions.
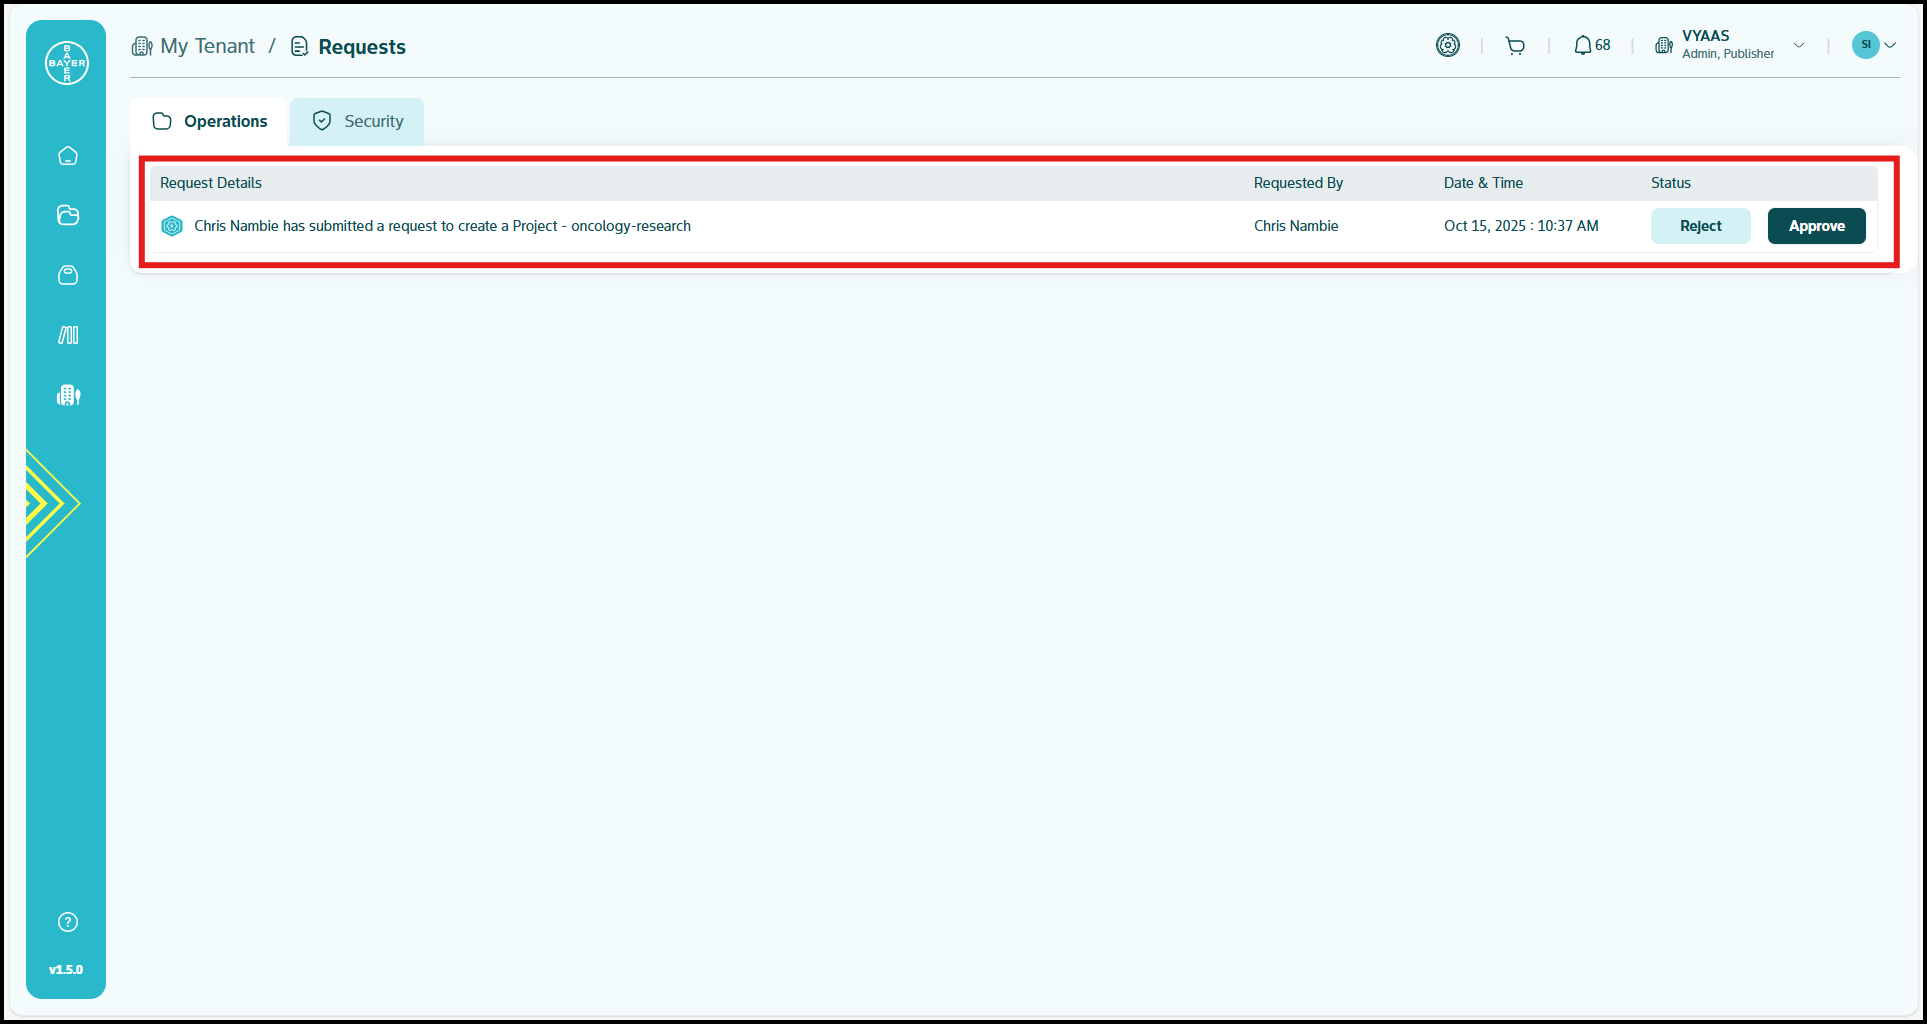
- Select "View all" to access complete request history.
Click here for a more detailed guide on project management.
Project Viewing and Monitoring
- Monitor project status and health across your organization.
- Track project resource utilization and performance.
- Review project access permissions and user activity.
- Filter and search projects based on various criteria.
Click here for a more detailed guide on viewing and monitoring projects.
Editing Project Details
Admins can modify project configurations, update descriptions and change titles as needed. Click here for a more detailed explanation on how to edit project details.
Understanding Project Access
Manage and understand how users access projects, including permission structures and access control mechanisms. Click here for a more detailed guide to understand project access management.
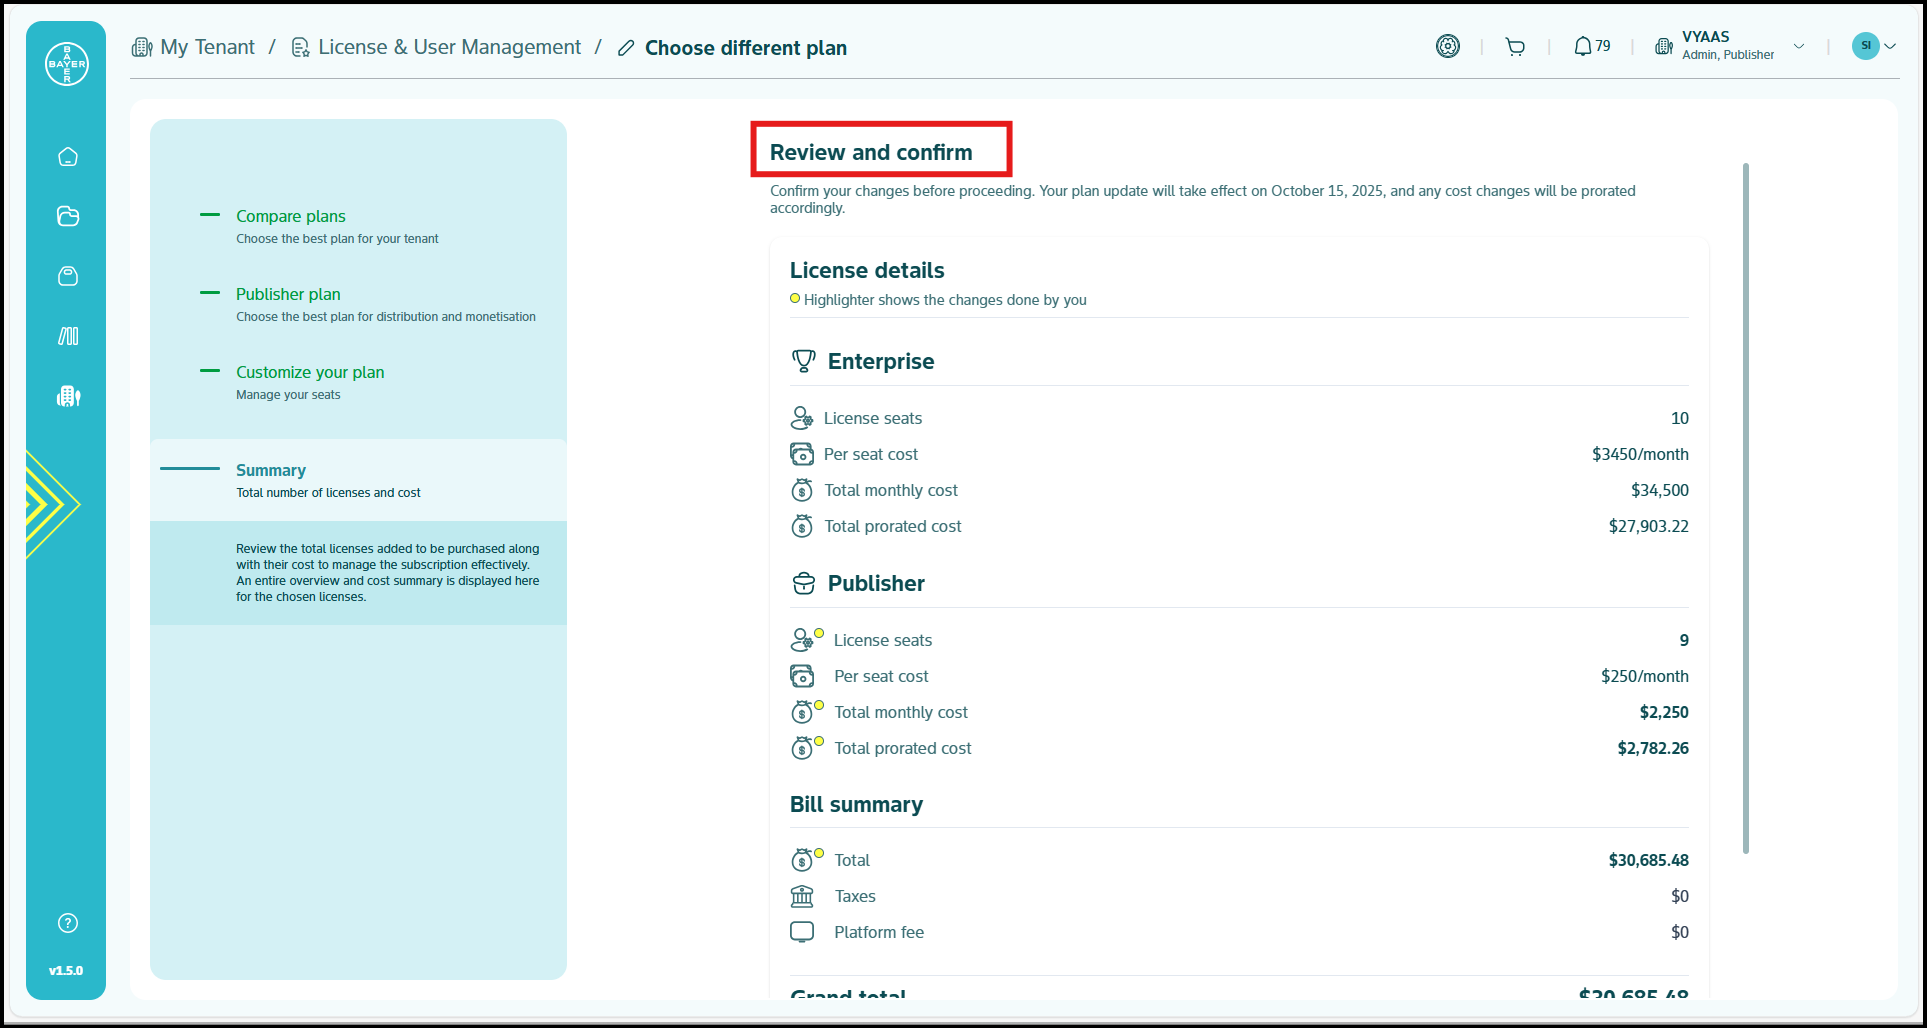
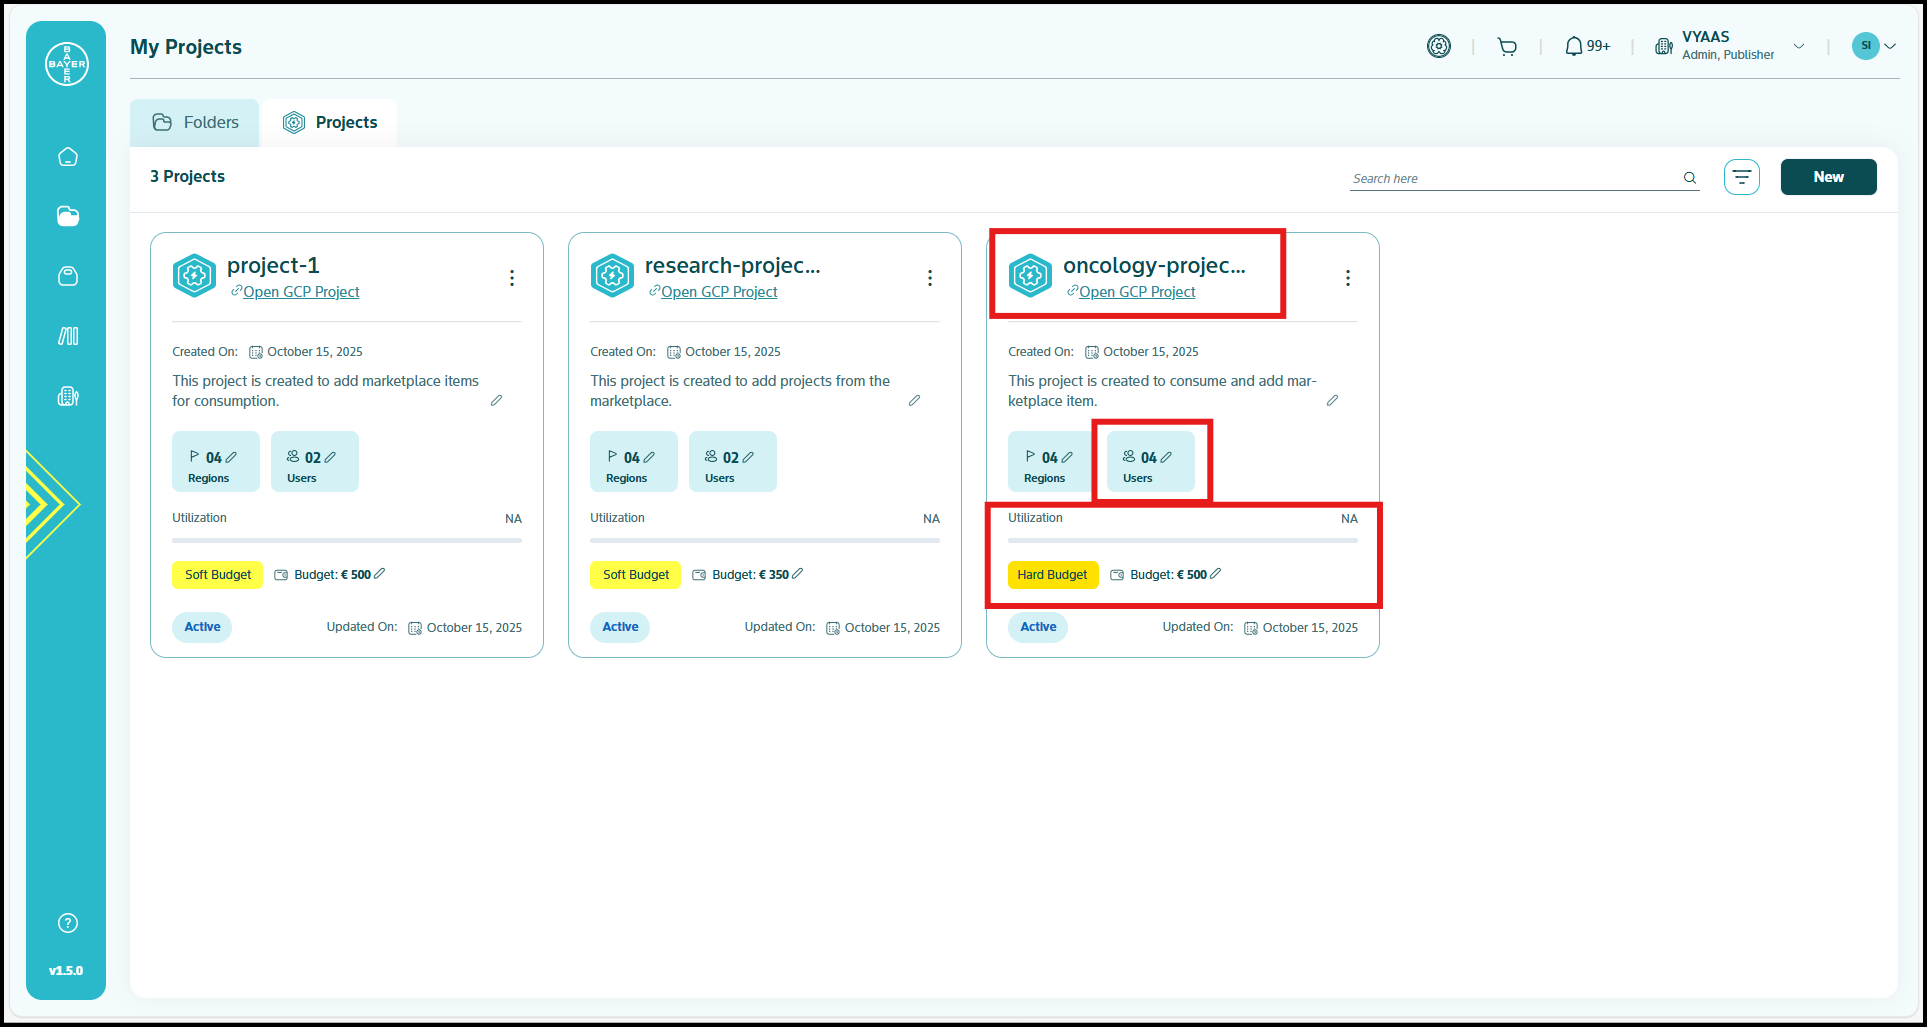
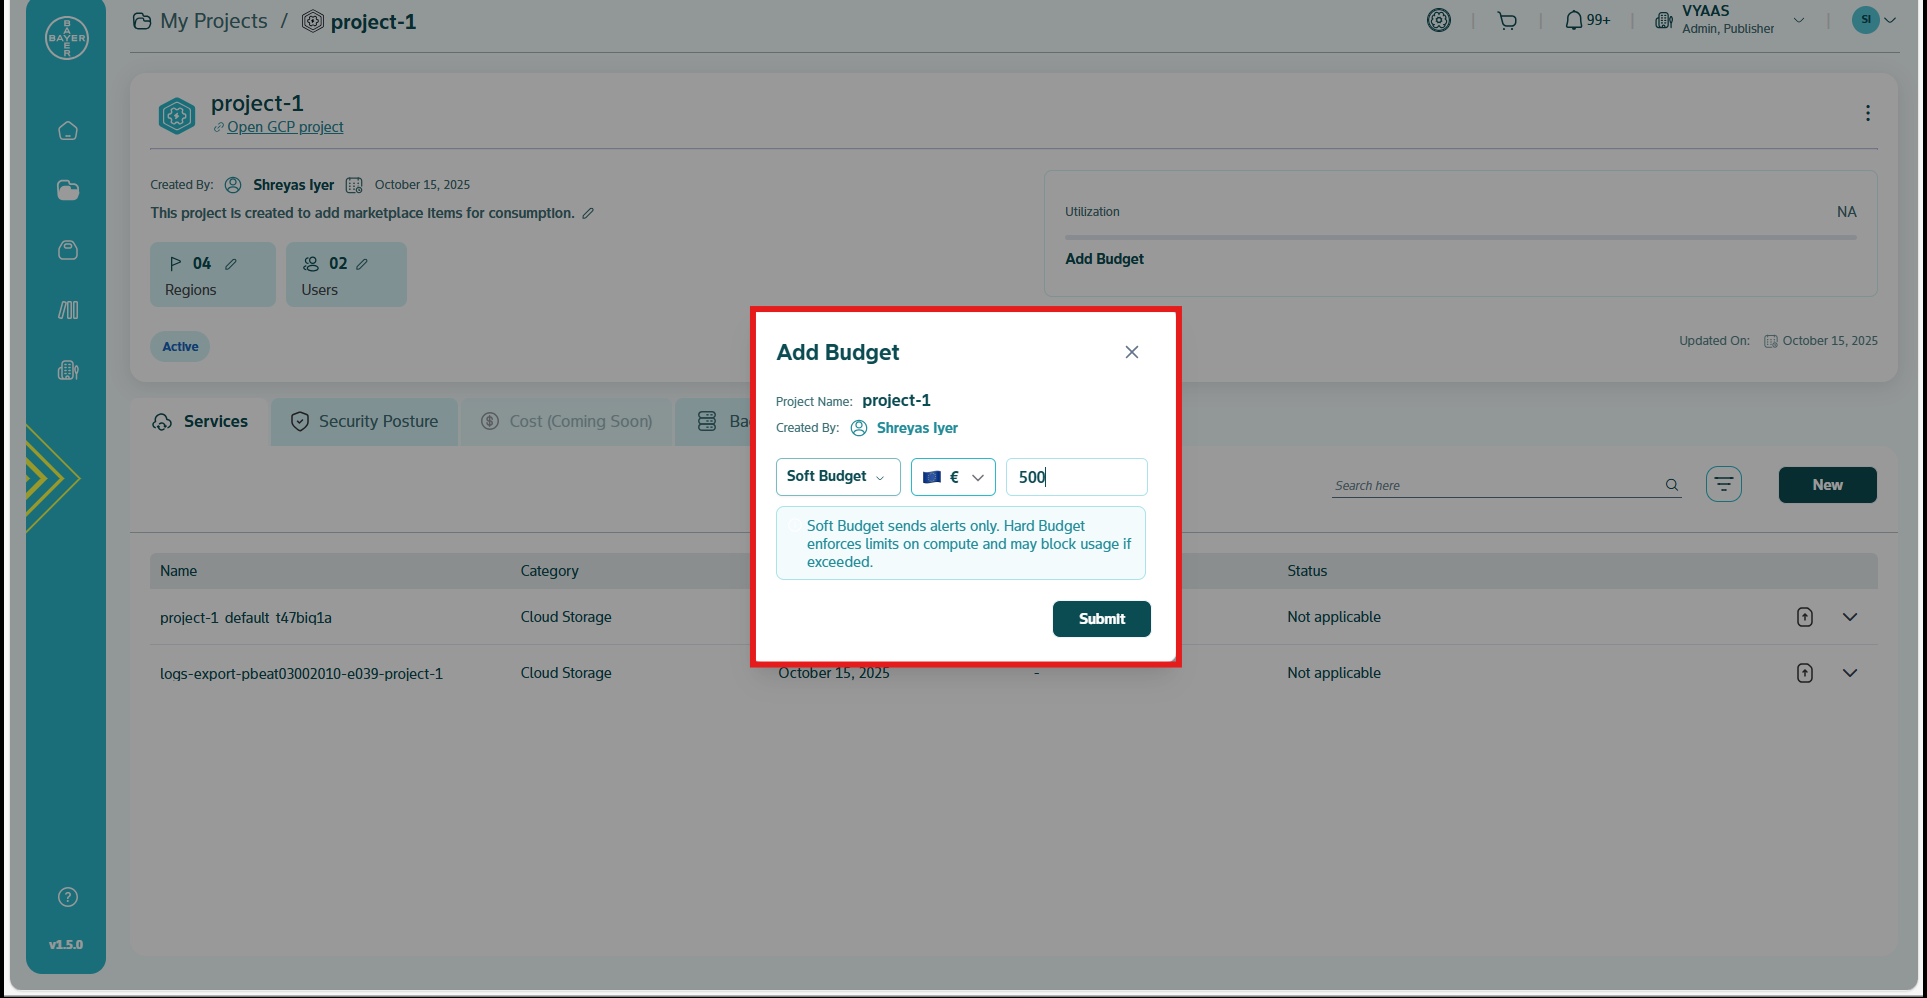
Project Budget Controls
Budget Types:
- Soft Budgets: Provide notifications without service disruption
- Hard Budgets: Enforce strict spending limits with automatic service stops (Upcoming)
Configuring Budget Controls:
- Navigate to the project you want to configure.
- Access "Budget" from the project menu under utilization or from the detailed view page.
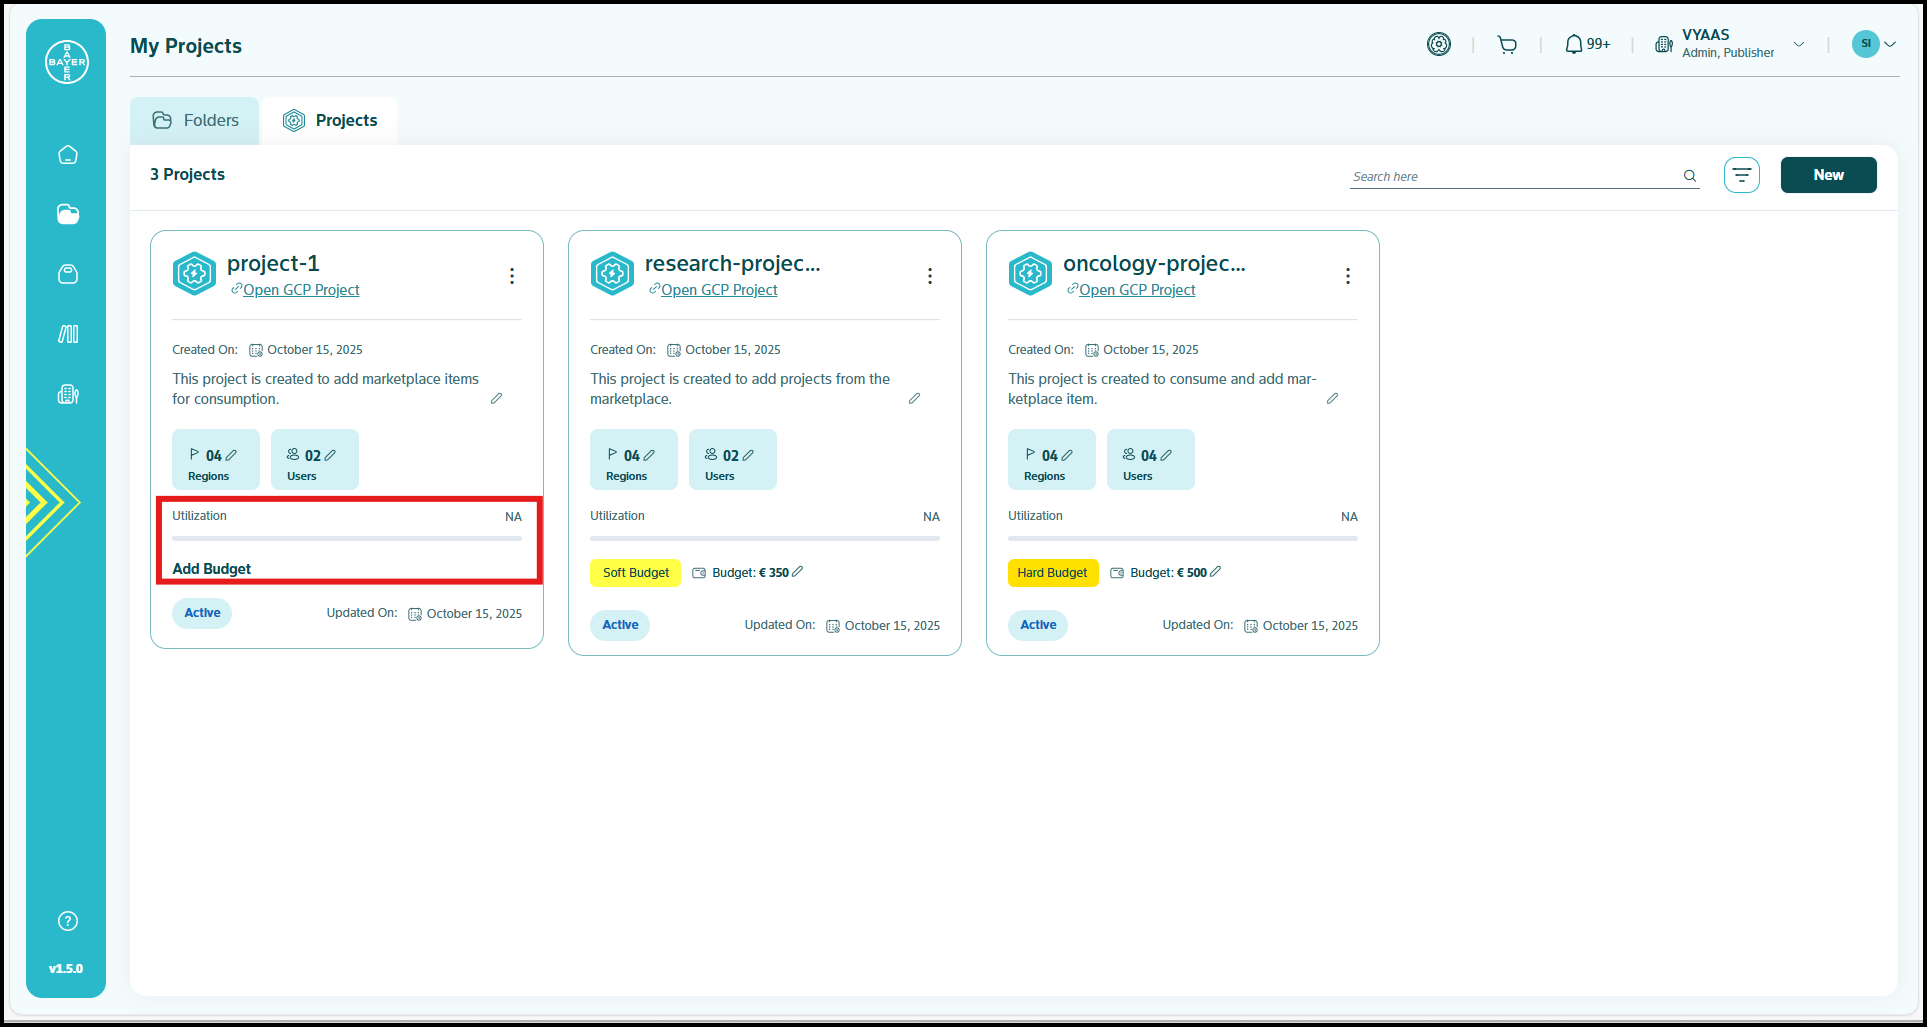
- Set budget amount and select budget type.
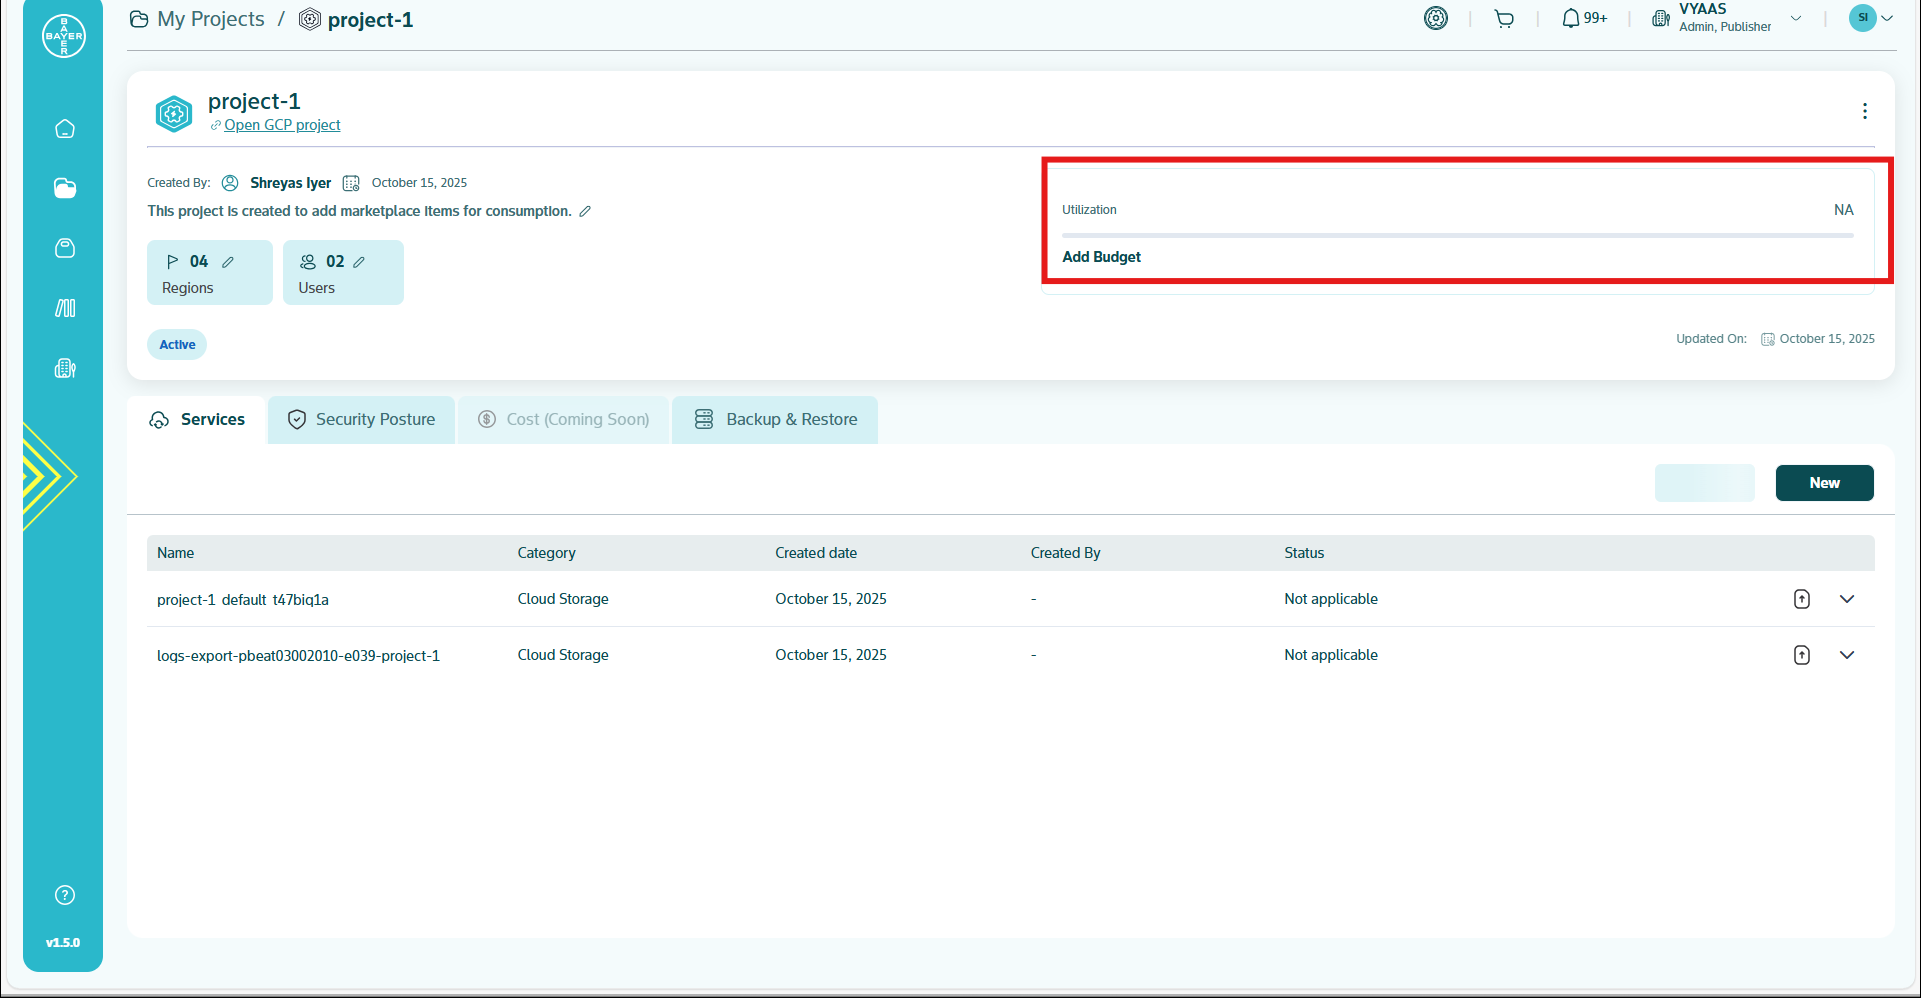
- Configure alert thresholds:
- 80% consumption: Early warning notification
- 95% consumption: Escalation alert
- 100% consumption: Action required notification
Budget Monitoring:
- Monitor spending patterns through real-time dashboards
- Receive automatic notifications at key thresholds
- Take proactive action before reaching budget limits
Click here for a more detailed guide on project budget settings.
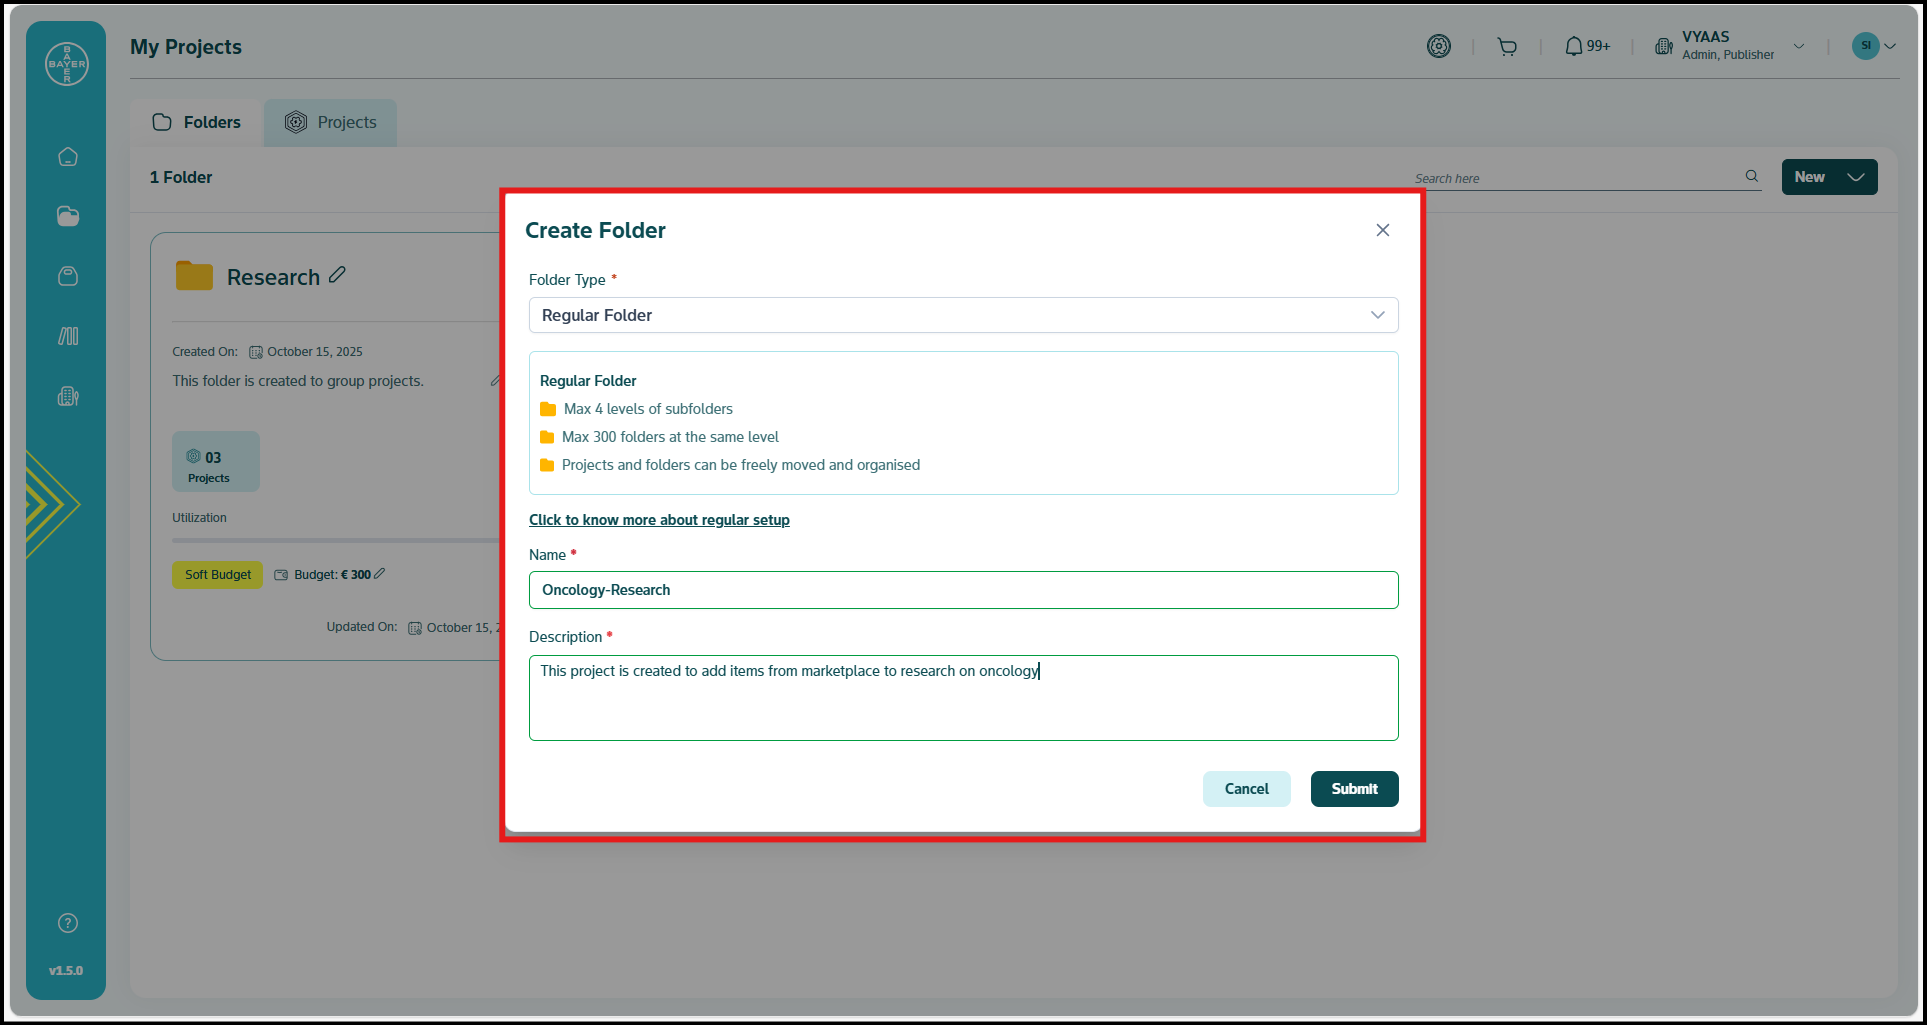
Folder Management
Folder Organization and Control
Creating Folders
- Regular Folders: Standard folders that can be renamed and moved
- Regulated Folders: Specialized folders for compliance with strict naming and structure requirements

Folder Management Actions
- Create: Establish new folder structures for project organization
- Rename: Update folder names (Regular folders only)
- Move: Relocate folders within the hierarchy (Regular folders only)
- Set Permissions: Control access levels for different user groups
Folder Types and Compliance
Understanding the differences between Regular and Regulated folders is crucial for maintaining compliance and proper organization structure.
Click here for a more detailed guide on folder organization controls and management.
Access Control and Security (PAM)
Privileged Access Management
Privileged Access Management (PAM) ensures secure, time-limited access to sensitive resources.
Click here for a more detailed overview of PAM.
Understanding PAM Components:
- Entitlements: Packages of temporary, elevated access permissions (configured by AIIP)
- Grants: Specific instances of access requests and approvals
- Eligible Requesters: Users authorized to request specific entitlements
Note
There are two distinct user types in the PAM system:
1. Tenant Admins: Can request entitlements that are automatically approved
2. Standard Users: Must have their requests reviewed and approved by tenant admins
Request Access Grants with PAM
- Go to the Google Cloud Platform console.
- Navigate to your desired project for requesting elevated access.
- Go to IAM & Admin > PAM in the navigation menu.
- Go to the "MY ENTITLEMENTS" tab.
- Locate the entitlement for which you want to request a grant.
- Request grant by providing all details related to duration, justification and notifications.Define entitlement parameters:
- Access Level: Specify roles and permissions included
- Duration Limits: Set maximum grant periods
- Approval Requirements: Configure automatic vs. manual approval
- Eligible Requesters: List authorized users
Managing Grant Approvals
As a tenant admin, you'll need to review and process access requests:
Approving or Denying Grant Requests:
- Navigate to the Privileged Access Manager page in Google Cloud Platform console
- Click the "Approve grants" tab, then select "Pending approval"
- Review the request details including:
- Requestor identity
- Requested permissions
- Duration of access
- Provided justification
- For each request, click "Approve/deny"
- If required, enter your justification in the Comment field
- Click either "Approve" or "Deny" to complete the action
Important Approval Considerations:
- Requests from you as a tenant admin are automatically approved.
- End Users cannot approve your own access requests and require approval from tenant admins.
- Requests not processed within 24 hours expire automatically
- Approval history is available for 30 days after action is taken
- View your approval history in the "My approval history" tab
Programmatic Approval Management
For bulk or automated processing, you can use the following google cloud commands:
- gcloud pam entitlements search: Find entitlements for which you are an approver
- gcloud pam grants search: Find grant requests pending your approval
- gcloud pam grants approve: Approve a specific grant request
- gcloud pam grants deny: Deny a specific grant request
References
Understand Access To Your Projects
Reports and Analytics
Spend & Budgets Essentials
Monitor and manage your spending efficiently:
- Check your monthly finances - View your budget, current spend, and spending across Projects
- Stay informed - Receive automatic notifications at 80%, 90%, 95%, and 100% of your budget
- Analyze your spending - Access Total Spend Analytics, Project Distribution, and Visual Cost Reports
- Customize your view - Adjust date ranges and apply category, project, and resource-type filters
Coming Soon: Export capabilities for downloading reports in CSV, PDF, and Excel formats.
Statistics & Financial Metrics
Review key financial information at a glance:
- Total Spend Analytics - Track expenditure figures with percentage changes between periods
- Project Distribution - See active project counts and resource allocation patterns
- Visual Reports - View automatically generated charts once sufficient cost data is available
Quick Actions to Try
- Review your current month's spending compared to budget
- Filter transactions by status to check pending items
- Use date selectors to compare spending across different periods
- Monitor category-specific spending to identify cost patterns
References
Best Practices and Quick Links
Security and Compliance
Access Control Best Practices:
- Regularly review user access and permissions
- Monitor and audit administrative actions
- Maintain proper separation of duties
- Use PAM (Privileged Access Management) for temporary elevated access
- Review PAM entitlements periodically to ensure appropriate configuration
Budget Management:
- Set appropriate budget limits based on business requirements
- Monitor spending patterns regularly through real-time dashboards
- Implement cost optimization strategies
- Plan for seasonal or project-based variations
- Configure both soft and hard (upcoming) budget limits where appropriate
User Management
Onboarding New Users:
- Assign correct roles and permissions from the start
- Monitor initial usage patterns for optimization
- Gather feedback for continuous improvement
- Consider bulk user addition for team onboarding
Ongoing User Support:
- Address issues promptly and effectively
- Maintain at least one admin user at all times
Operational Excellence
Strategic Planning:
- Plan for growth and scaling requirements
- Evaluate new features and capabilities
- Organize projects and folders for optimal management
Project Governance:
- Establish clear project creation guidelines
- Review project requests thoroughly
- Implement consistent naming conventions
-
Monitor project health and resource utilization
-
Periodically review service catalog for alignment with requirements
Regular review of platform updates and new features will help you maintain optimal administrative effectiveness. The platform is continuously evolving, so stay connected with the latest developments and best practices.
Quick Reference
- User Management: Dashboard → My Tenant → User Management
- Project Management: Dashboard → My Projects → [Select Project]
- Budget Controls: Dashboard → My Tenant → Spend and Budgets
- PAM Configuration: Dashboard → Google Cloud Platform Console → IAM and Admin → PAM
- Service Catalog: Dashboard → My Projects → Services
Platform Tour
This Quick Start Guide provides comprehensive coverage of Tenant Admin capabilities within the AI Innovation Platform, organized by logical modules for easy navigation and reference. For detailed information on specific features and procedures, use the linked documentation throughout this guide.
Questions or need additional support? Click here or contact the support team through the established channels for immediate assistance.